


How to Successfully Plan an RV Roof Replacement
An rv roof replacement involves stripping away damaged exterior materials down to the structural decking and installing a durable, watertight membrane. Just like residential roofing systems protecting single-family homes, recreational vehicles face harsh Midwest weather cycles, from heavy snowfall to intense summer heat. When an existing roof suffers from widespread cracking, seam failure, or soft sub-decking, a complete teardown is the only permanent fix against severe water intrusion.
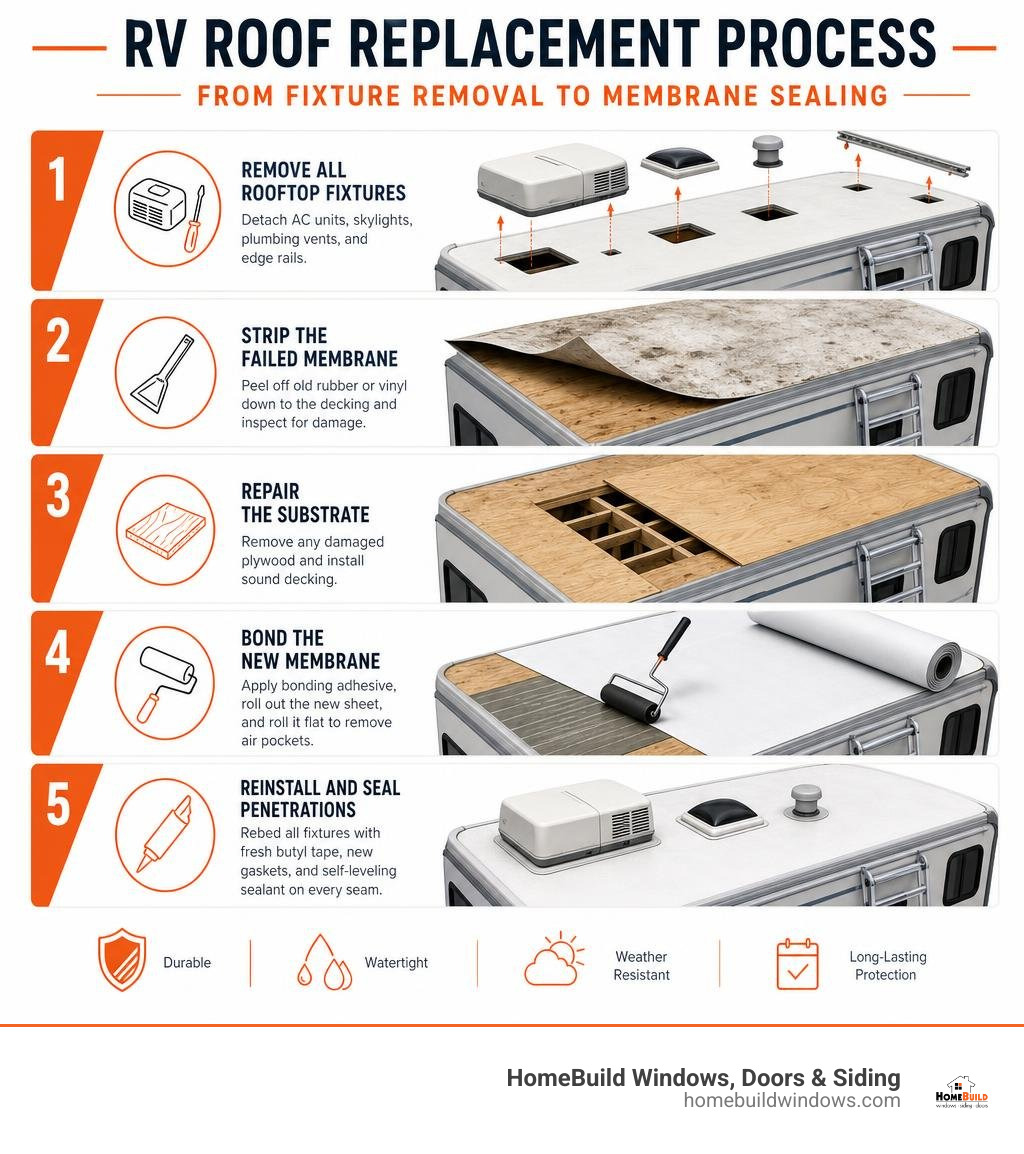
To complete a full membrane replacement properly, follow these core steps:
- Remove all rooftop fixtures: Detach air conditioning units, skylights, plumbing vents, and perimeter edge termination rails.
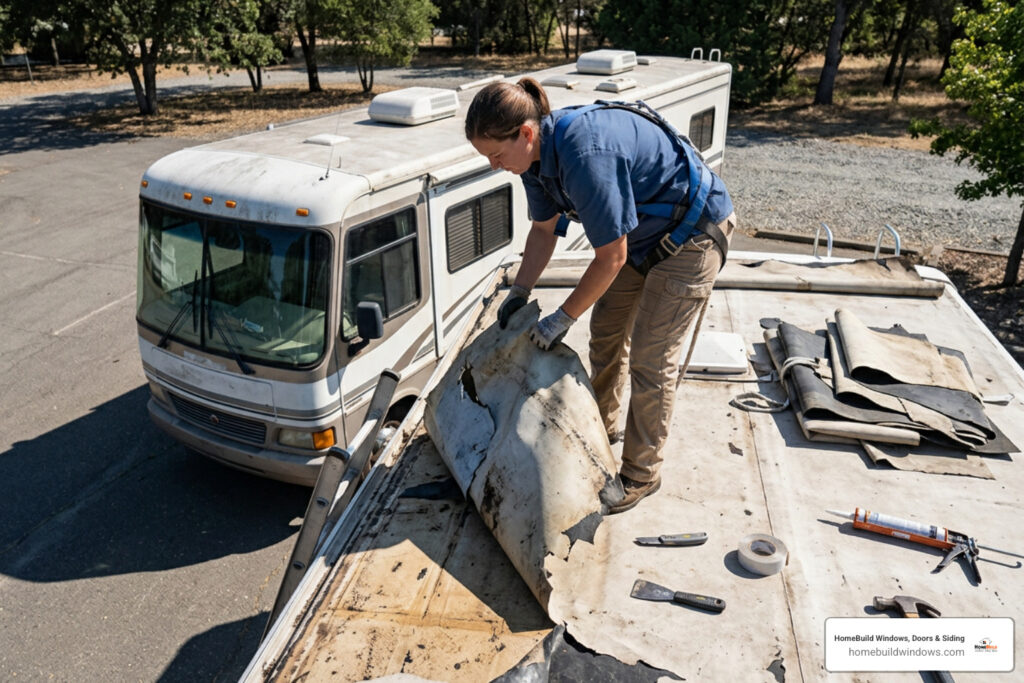
- Strip the failed membrane: Peel off the old rubber or vinyl material down to the decking and inspect the wood for moisture or rot.
- Repair the substrate: Cut out any compromised plywood and install sound decking panels across the roof trusses.
- Bond the new membrane: Roll out the replacement sheet (such as TPO, PVC, or EPDM), apply bonding adhesive systematically, and roll the sheet flat to eliminate air pockets.
- Reinstall and seal penetrations: Rebed all appliances using fresh butyl tape, new appliance gaskets, and compatible self-leveling lap sealant along every flat seam.
I’m Steve Mlynek, founder of HomeBuild Windows, Doors & Siding. For over 20 years, our team has delivered dependable home exterior improvement services, including residential roofing, window installation, exterior door replacement, and siding upgrades for homeowners throughout Chicago and surrounding northwest suburbs like Arlington Heights, Schaumburg, and Glenview. Whether weatherproofing a home or planning an rv roof replacement, understanding exterior building envelopes ensures lasting protection against the elements.
Rv roof replacement definitions:
RV Roofing Materials Compared: EPDM, TPO, PVC, and Fiberglass
Choosing the right membrane material determines how your roof handles extreme temperature swings, driving rain, and continuous sun exposure. Similar to single-ply flat residential roofing materials used on modern homes, RV membranes require high puncture resistance, UV stability, and thermal efficiency to withstand seasonal Midwest weather changes.
| Material Type | Typical Lifespan | UV Resistance | Maintenance Needs | Key Strengths |
|---|---|---|---|---|
| EPDM Rubber | 12–15 Years | Moderate | High (semi-annual cleaning & resealing) | Flexible, forgiving to install, handles freezing cycles |
| TPO Single-Ply | 15–20 Years | High | Moderate (annual seam inspections) | Reflective, resists punctures, no chalking |
| PVC Membrane | 20–30 Years | Exceptional | Low (occasional cleaning) | Chemical resistant, weldable seams, prevents black streaks |
| Fiberglass | 25+ Years | High | Low to Moderate (annual oxidation checks) | Rigid, puncture-proof, excellent structural barrier |
| Aluminum | 25+ Years | High | Moderate (seam resealing required) | Lightweight, rustproof metal protection |
Rubber Membranes (EPDM and TPO)
Ethylene Propylene Diene Monomer (EPDM) is an established synthetic rubber membrane known for its flexibility during freeze-thaw cycles. However, as it ages under sun exposure, it oxidizes, producing chalky residue that runs down vehicle sidewalls.
Thermoplastic Polyolefin (TPO) provides an upgraded alternative commonly utilized in both mobile applications and residential flat roofing. TPO reflects heat effectively to improve energy efficiency and resists tear damage from low-hanging branches. When selecting high-performance options like SuperFlex specifications, you gain up to 220% higher tear resistance and 500% greater elongation compared to standard PVC films, allowing the membrane to flex across complex contours without splitting.
Rigid Options: Fiberglass and Aluminum
Rigid roofing options offer solid impact resistance against severe storms. Fiberglass provides a hard, seamless shell that holds up against falling hail and tree debris. While fiberglass adds more weight compared to rubber membranes, it does not tear or puncture easily.
Aluminum remains a classic choice for lightweight travel trailers. It offers rustproof durability without excessive weight, though it requires meticulous attention along its structural seams and perimeter joints to ensure wind-driven rain cannot penetrate underneath.
Key Diagnostics: Repair, Restore, or Replace?
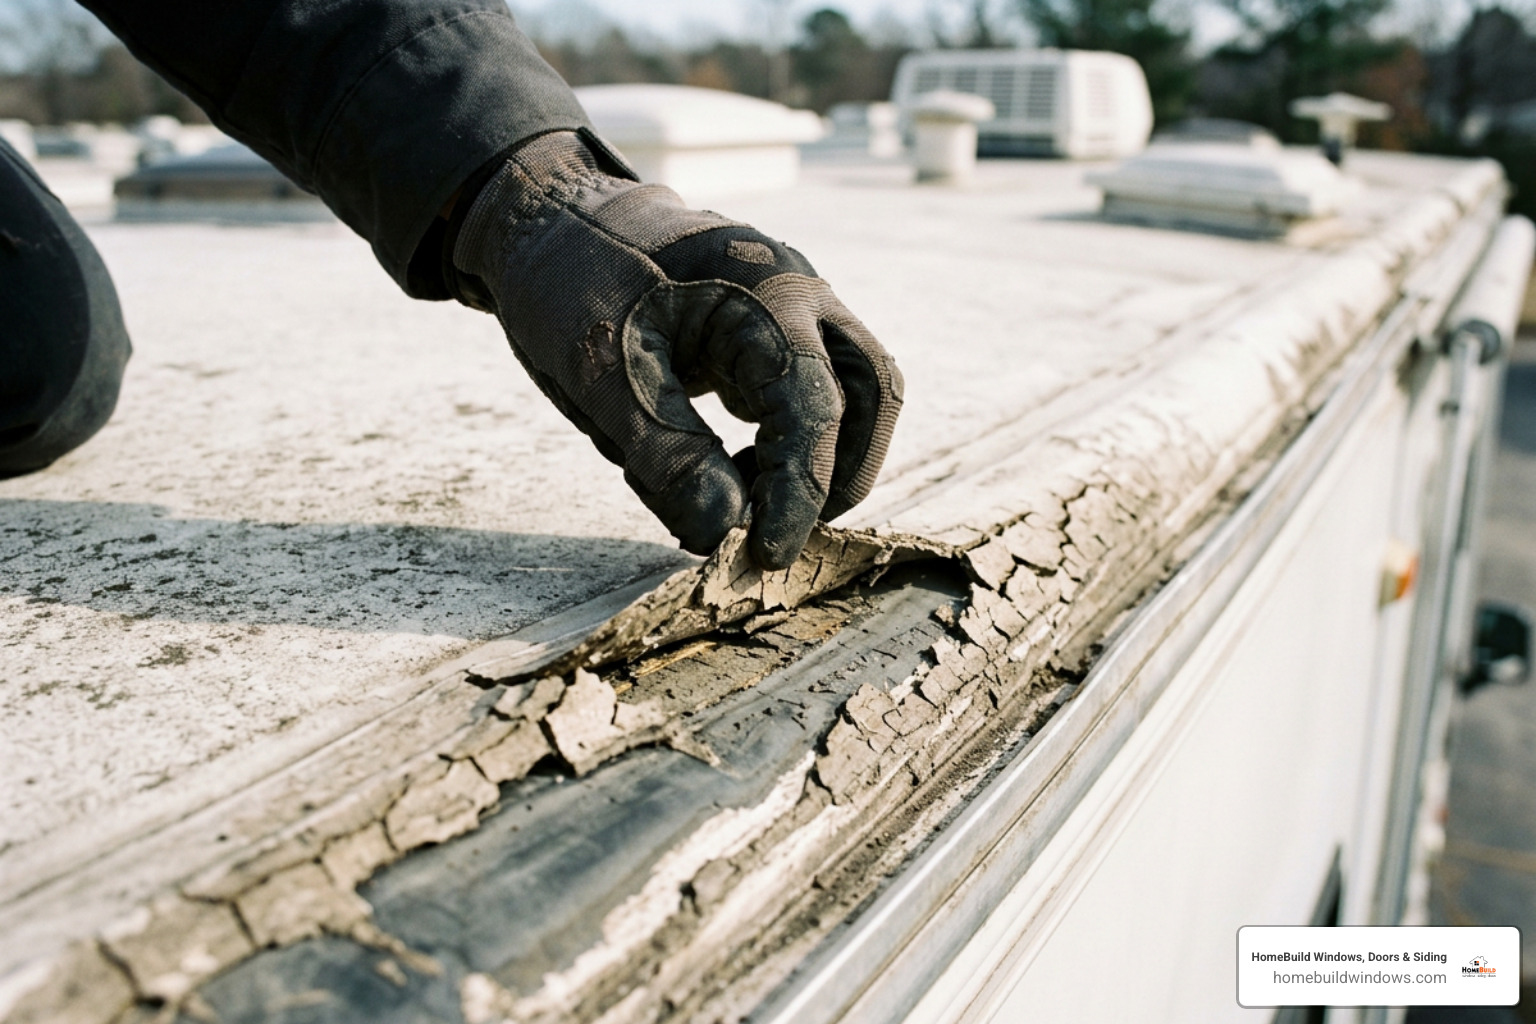
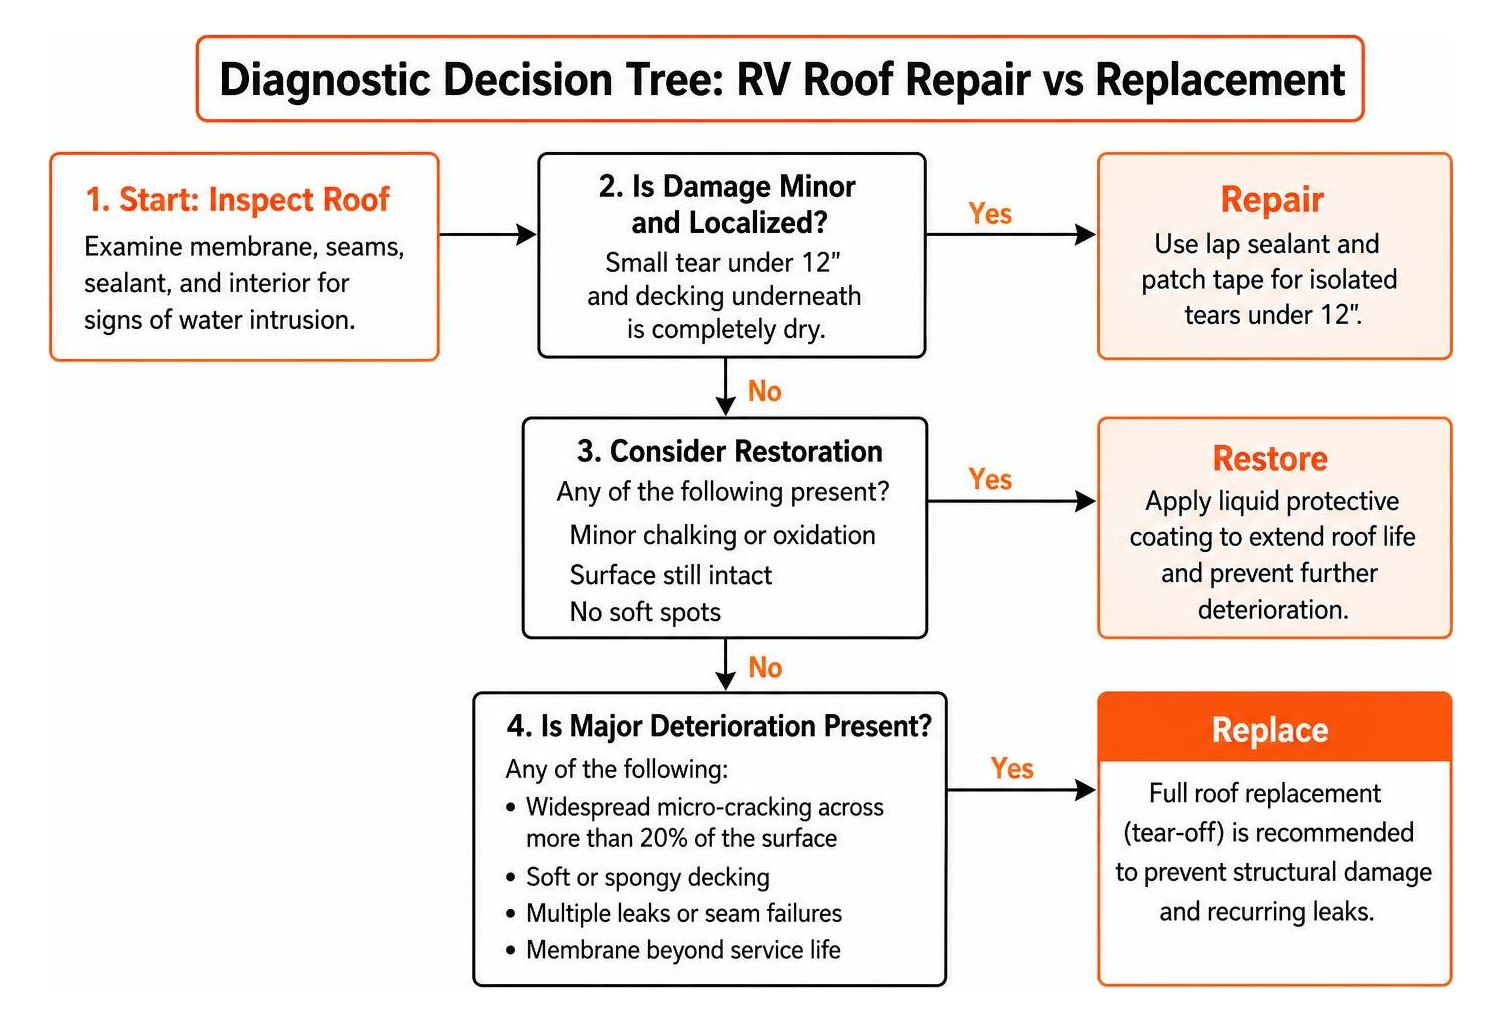
Before ordering a replacement kit or stripping fixtures, you must determine whether your roof requires spot repairs, a liquid protective coating, or a structural tear-off. Just as Chicago area homeowners inspect home exterior components like siding, windows, and residential roof flashing after harsh winters, catching RV seal failure early prevents severe structural damage.
When to Choose Full RV Roof Replacement Over Spot Repairs
Spot repairs using lap sealant and patch tape work well for isolated tears under 12 inches where the wood decking underneath remains completely dry. However, full replacement is required if you encounter:
- Widespread micro-cracking across more than 20% of the membrane surface.
- Extensive embrittlement where the membrane tears instead of stretching when probed.
- Multiple active leaks appearing simultaneously in different interior ceiling zones.
- Failed seam perimeters that allow water to bypass factory adhesive.
When dealing with severe moisture intrusion, applying reliable techniques for expert roof leak repair is essential. In cases where the entire substrate is compromised, learning about flat roof repair and replacement will help you evaluate structural roofing systems.
Assessing Substrate Rot and Structural Rafter Damage
A solid exterior skin cannot protect a structure if the structural wood decking beneath is failing. Roof assemblies typically use 1/8-inch to 3/8-inch lauan plywood or oriented strand board (OSB) laid over aluminum or wooden trusses spaced 16 to 24 inches on center.
Walk carefully along the roof line and press down with your hands and feet to locate soft, spongy areas. If rooftop components like TV antennas, AC shrouds, or plumbing vents feel loose or “float” when pressed, the underlying decking has likely rotted away. If more than 20% of the roof deck shows structural deterioration, the compromised wood sheets must be replaced down to the framing.
Comprehensive RV Roof Replacement vs. Liquid Membrane Overlays
Liquid Rubber and Seamless Coating Systems
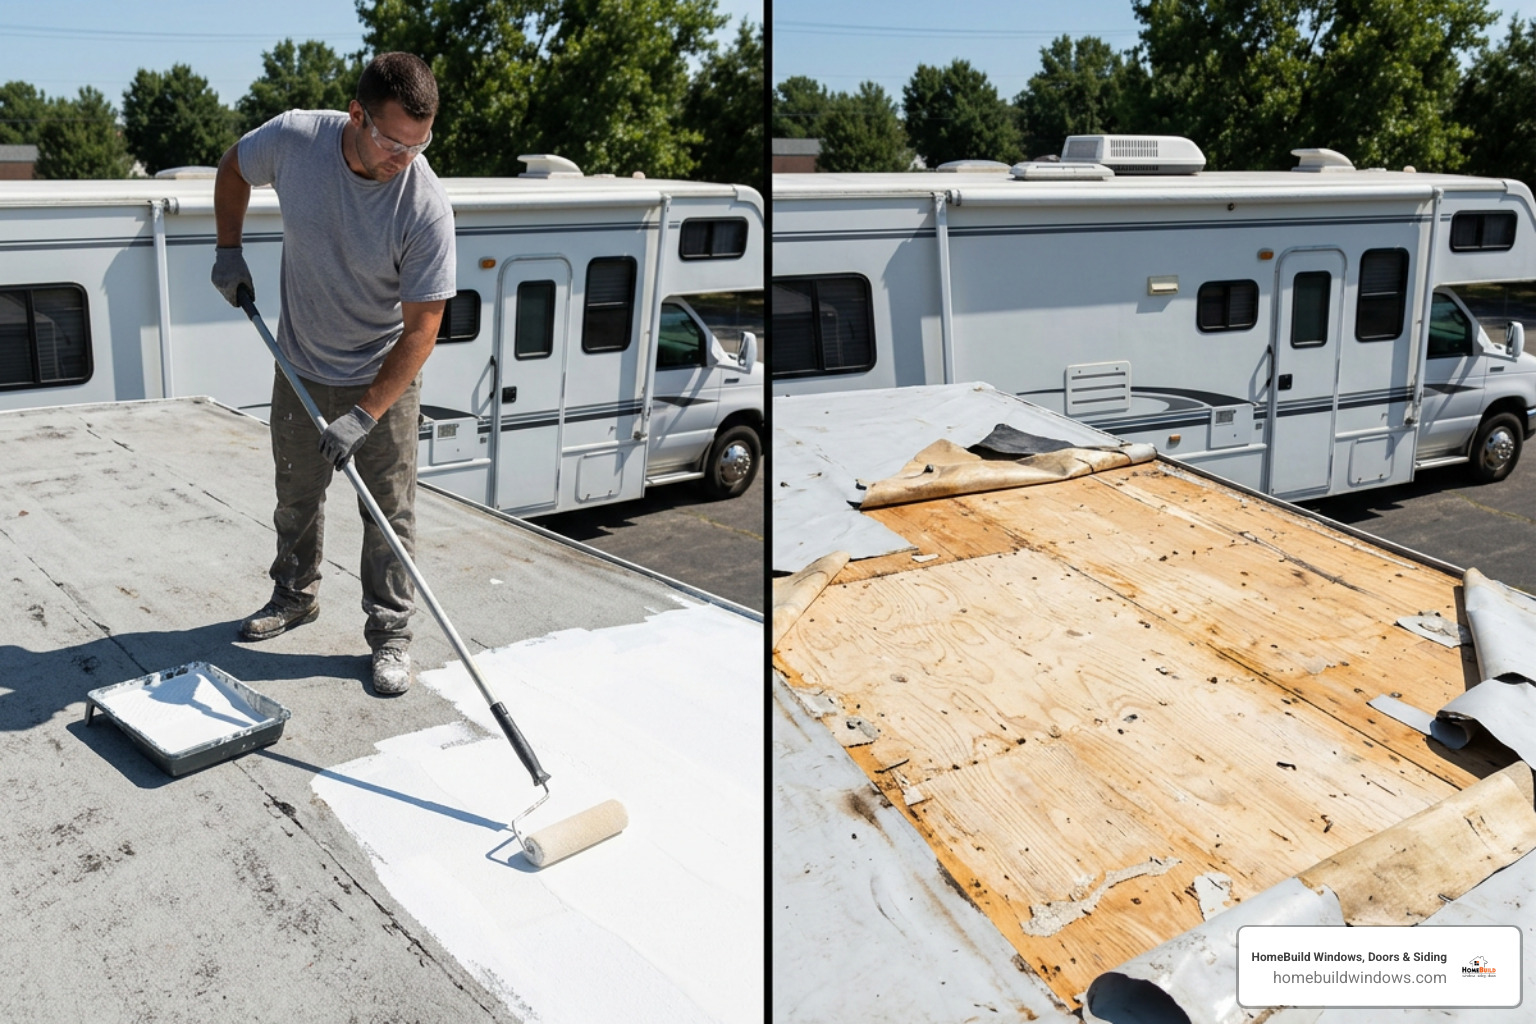
Liquid elastomeric coatings, acrylic formulations, and commercial-grade silicone systems provide a seamless protective barrier over an existing roof. When the underlying decking is solid and the factory membrane is intact but aged, applying a liquid coating seals minor hairline fissures, blocks UV degradation, and reflects thermal energy. Commercial silicone products can reflect substantial heat while providing lasting weatherproofing without a full structural tear-off.
However, a liquid coating is not a permanent structural fix if the membrane has lost adhesion to the wood or if moisture is trapped underneath. Applying a coating over wet or rotted wood seals in moisture, accelerating decay inside the roof cavity.
Complete Tear-Off and Deck Rebuilding
A complete tear-off involves stripping every component, scraping away residual adhesives, repairing damaged structural framing, and laying a continuous single-ply sheet. While it requires more labor and fixture removal, a complete replacement guarantees full visibility into your structural decking, lets you replace worn factory insulation for improved energy efficiency, and provides a fresh 15- to 30-year operational life.
Step-by-Step Execution and Best Practices
Completing a reliable installation requires proper preparation, the right tools, and adherence to adhesive flash times.
Essential Tools, Sealants, and Membrane Sizing
To execute a clean installation, gather the necessary supplies:
- Membrane Sizing: Measure the total length from the front cap to the rear bumper and add 2 feet to ensure adequate overhang for edge termination. Standard widths come in 8.5-foot and 9.5-foot rolls.
- Adhesives & Primers: Use water-based bonding adhesive designed specifically for your membrane chemistry.
- Sealing Supplies: 1/8″ x 1″ heavy-duty butyl tape, self-leveling lap sealant for horizontal penetration flanges, and non-sag lap sealant for vertical seams.
- Application Tools: Heavy-duty utility knife, paint roller with extension handle, weighted hand roller, plastic scrapers, and cordless drill.
Step-by-Step Process for a DIY RV Roof Replacement
Following established membrane replacement guidelines ensures your installation remains watertight:
- Disconnect Rooftop Utilities: Disconnect power and drain plumbing lines. Carefully remove AC units, vent covers, skylights, ladder mounts, and side termination rails.
- Strip the Failed Membrane: Slice the old membrane into manageable strips and peel it off the decking. Scrape away remaining adhesive down to clean wood.
- Inspect and Repair Substrate: Cut away rotted lauan or OSB sheets back to the centerline of structural rafters. Install new exterior-grade plywood panels flush with the existing deck.
- Clean and Tape Substrate Seams: Sweep and vacuum all debris. Apply fiberglass mesh tape over all decking joints to prevent rough plywood edges from rubbing against the new membrane.
- Dry-Fit the Sheet: Roll out the new membrane over the roof centerline, ensuring equal overhang on the front, rear, and sides. Let it rest for 30 minutes to eliminate shipping wrinkles.
- Apply Bonding Adhesive: Fold one half of the membrane back along the length of the vehicle. Roll water-based bonding adhesive evenly onto the decking, keeping the glue 3 inches away from outer perimeter edges.
- Smooth the First Half: Carefully unfold the membrane over the wet adhesive. Use a clean push broom or weighted roller, working from the center out to the edges to eliminate air pockets. Repeat the process on the second half.
- Secure Perimeter Rails: Apply butyl tape along the lower edge of the vehicle sidewall, press the membrane down into the tape, install the aluminum termination bar, and secure with screws every 6 to 8 inches. Trim excess material below the rail.
- Reinstall Roof Penetrations: Cut an “X” over vent and appliance openings. Apply fresh butyl tape to the mounting flange of each component, secure it into the framing, and install brand-new closed-cell gaskets beneath air conditioning units.
- Apply Lap Sealant: Cover all screw heads and flange borders on flat surfaces with self-leveling lap sealant. Use non-sag sealant along vertical wall transitions and end caps. Allow sealants to cure for 24 to 48 hours before exposing to rain.
Insurance Claims and Warranty Coverage
Navigating structural damage claims requires understanding how insurance adjusters distinguish between sudden external damage and deferred maintenance.
Navigating Storm, Hail, and Impact Damage Claims
Comprehensive policies generally cover sudden and accidental physical damage, such as hail fractures, falling tree limbs, and storm impacts. In contrast, progressive water damage resulting from aged, cracked lap sealant is typically excluded as routine maintenance.
When filing a claim after severe weather events, capture clear photographs of impact points, broken skylight domes, and structural framing damage before making temporary weather-tight repairs. Homeowners and property owners facing storm recovery in the Chicago area should review how to manage a storm damage roofing claim or navigate a broader roof insurance claim to streamline adjuster approvals and document required repairs accurately.
Material and Workmanship Warranties
Manufacturer warranties on raw membranes (such as EPDM, TPO, or PVC) generally span 10 to 30 years, covering material defects like premature cracking or delamination. However, these warranties require using compatible branded adhesives and following routine maintenance guidelines, such as inspecting and cleaning the surface two to four times per year. Professional exterior installations typically include separate workmanship warranties covering labor, seam bonding, and flashing seals against leaks.
Frequently Asked Questions about RV Roofing
How long does a newly installed RV roof membrane typically last?
A professionally installed TPO or PVC membrane lasts between 15 and 30 years, while traditional EPDM rubber roofs average 12 to 15 years. Routine inspections, seasonal cleaning, and prompt lap sealant touch-ups around penetrations maximize service life across cold winters and hot summers.
Can a liquid roof coating be applied directly over old rubber?
Yes, provided the existing rubber membrane is clean, fully adhered, and the underlying plywood decking is dry and structurally sound. If the rubber is peeling, torn, or spongy from rot, a complete tear-off and replacement is necessary.
Do rooftop air conditioners need to be removed during installation?
Yes. Removing rooftop air conditioners is necessary to inspect the structural framing around the opening, wrap the new membrane up and over the curb, and replace the compressed foam AC gasket with a fresh OEM seal to prevent leaks.
Conclusion
A well-maintained roof protects your vehicle from severe moisture damage, preserving structural integrity and interior comfort. Whether you are addressing storm damage or replacing an aging membrane, using quality materials and proper sealing techniques ensures long-lasting weather protection across diverse climates.
At HomeBuild Windows, Doors & Siding, we bring more than 20 years of dedicated exterior craftsmanship to homeowners across Chicago and surrounding northwest suburbs, including Des Plaines, Palatine, Arlington Heights, and Schaumburg. We work closely with homeowners to deliver reliable home exterior improvement services, partnering with trusted industry brands such as Pella, Marvin, Alside, Therma-Tru, Simpson, and James Hardie. Whether you are solving drafty windows, aging siding, outdated entry doors, or seeking comprehensive residential roofing services, our licensed and insured team focuses on durability, energy efficiency, and enhanced curb appeal. Contact us today to schedule your free consultation.