


Key Indicators to Replace Rubber Roof Systems vs. Surface Repairs
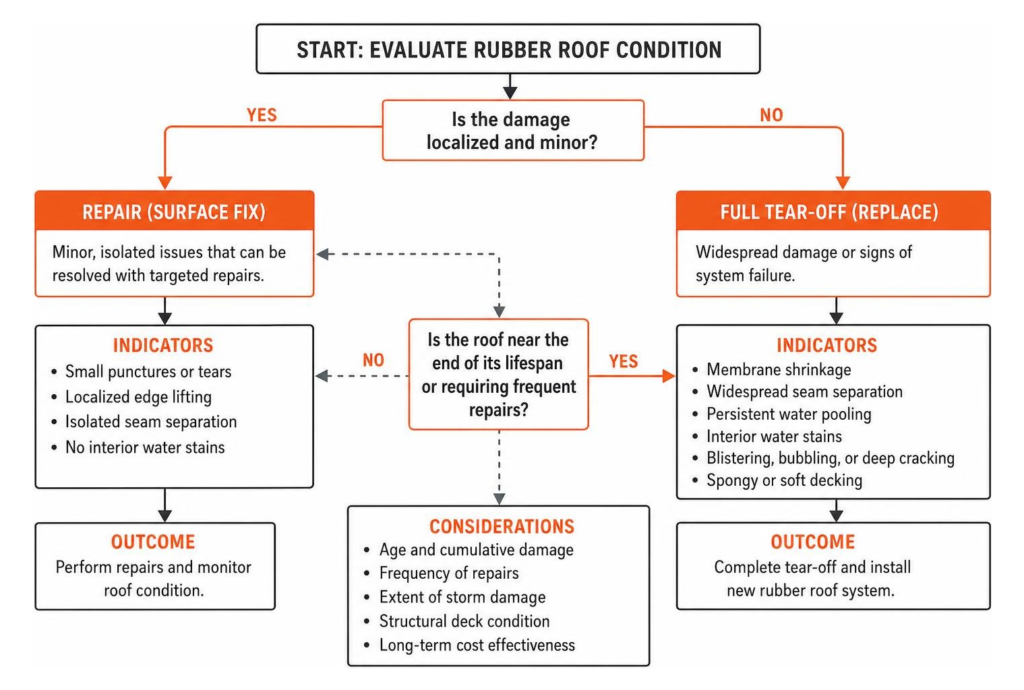
Deciding whether to patch a leak or fully replace rubber roof materials comes down to assessing the total health of the roofing system. Minor punctures from falling tree branches or localized edge lifting can usually be resolved with simple repairs. However, when the membrane exhibits widespread wear, surface patching only delays the inevitable.
Common signs that signal a need for replacement include:
- Membrane Shrinkage: Over time, exposure to intense thermal radiation causes synthetic rubber to contract, pulling the membrane away from parapet walls and edge flashings.
- Widespread Seam Separation: Thermal expansion and contraction during cold Chicago winters weaken adhesives along seams. If seams are lifting across multiple sections, the adhesive bond has failed systematically.
- Persistent Water Pooling: When water sits on a flat roof for longer than 48 hours without evaporating or draining, it degrades the membrane surface and places excess weight on the roof structure.
- Interior Water Stains: Ceiling spots, peeling paint, or interior drywall damage often indicate that water has breached both the membrane and underlayment layers.
For a deeper dive into evaluating surface issues, check out a comprehensive look at flat roof repair and replacement.
Indicators of Structural Roof Membrane Failure
When water breaches the top rubber layer, it migrates into the underlying roof assembly. Left unchecked, this moisture rots the wooden roof decking, destroys insulation board performance, and promotes mold growth.
Key signs of structural deck failure under a flat roof include:
- Spongy or Soft Decking: Walking on the roof feels soft or springy underfoot, indicating rotted OSB or plywood sheathing below.
- Blistering and Bubbling: Trapped moisture beneath the membrane expands into gas when heated by the sun, creating large raised blisters that cannot be flattened.
- Deep Surface Cracking: Advanced UV weathering degrades the chemical polymers in the rubber, causing micro-cracking across the entire surface.
If you are noticing localized issues and want to compare quick fixes against complete overhauls, review our guide to roof repair.
Repair vs. Full Tear-Off Evaluation
When evaluating whether to repair or replace, age and cumulative damage are the deciding factors. Single-ply rubber membranes have an average operational lifespan of 15 to 20 years (though high-grade EPDM can last longer under ideal conditions).
If your rubber roof is approaching the 20-year mark and requires frequent maintenance, continuing to patch surface cracks is no longer practical. Severe storm damage from hail or gale-force winds across large areas also warrants a complete replacement to restore full weather resistance.
Before making a final choice, schedule an inspection through our roof inspection guide to evaluate structural integrity and hidden moisture retention.
Comparing Rubber Roofing Materials: EPDM, TPO, and PVC
Selecting the right single-ply synthetic membrane is crucial for long-term weather protection, particularly in northern climates subject to dramatic temperature swings.
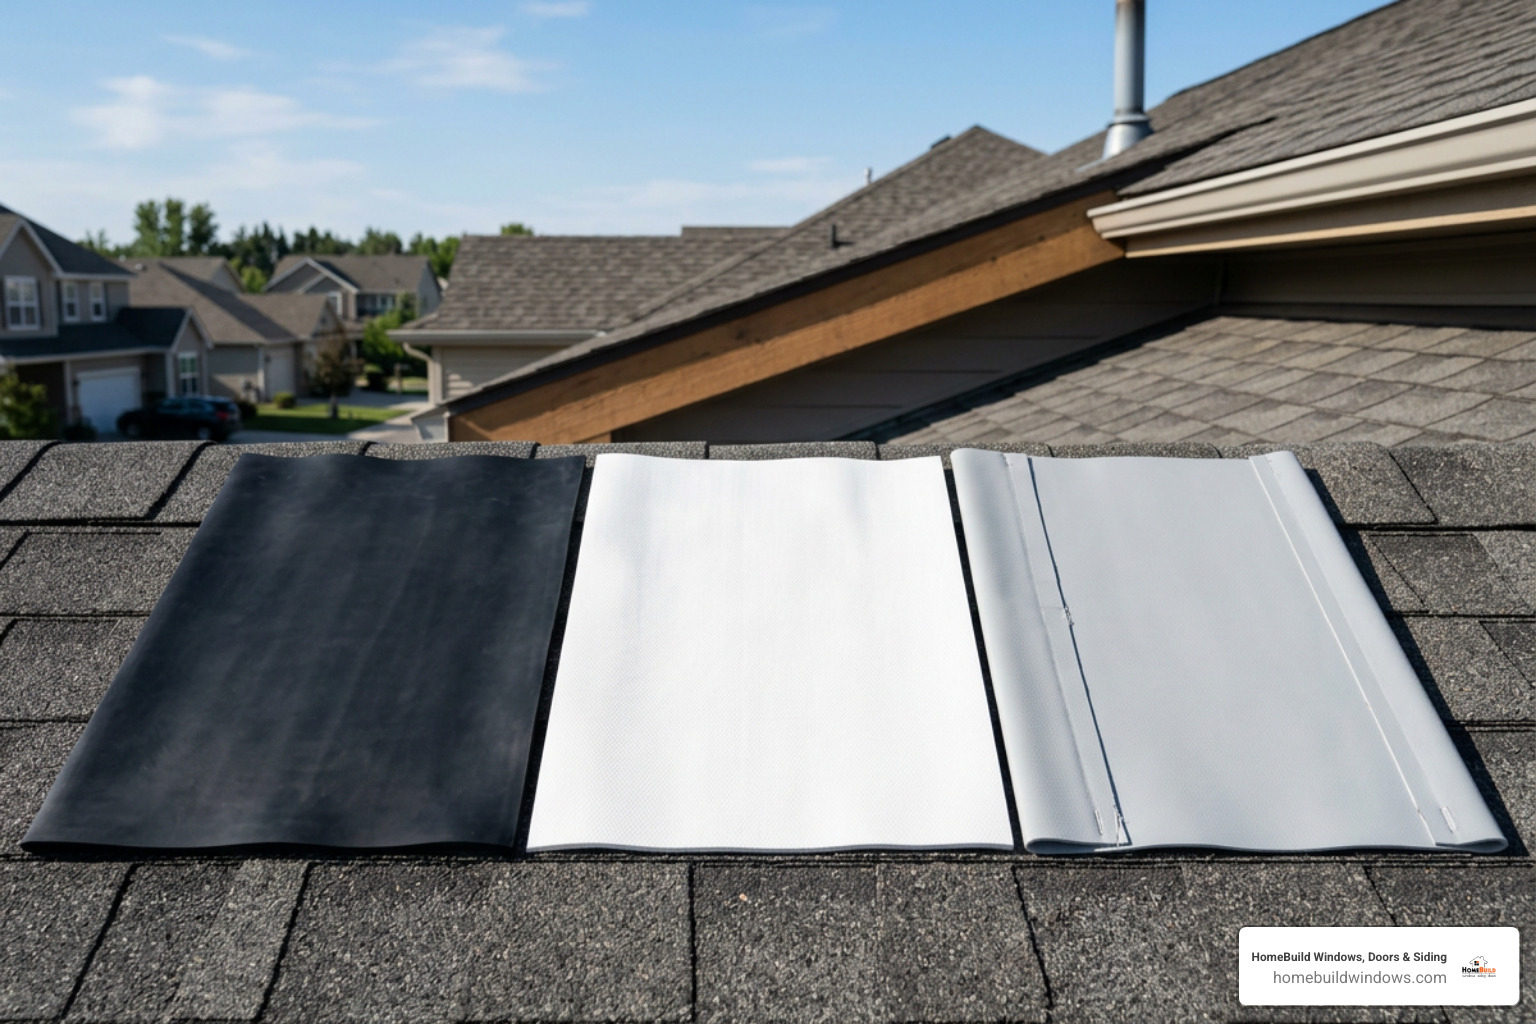
| Feature | EPDM | TPO | PVC |
|---|---|---|---|
| Material Class | Thermoset Synthetic Rubber | Thermoplastic Olefin | Polyvinyl Chloride |
| Typical Lifespan | 15–25 years (up to 50+) | 10–25 years | 20–30 years |
| Seam Joining Method | Contact Adhesive or Seam Tape | Hot-Air Heat Welded | Hot-Air Heat Welded |
| UV & Solar Reflection | Absorbs heat (typically black) | High reflectivity (typically white) | High reflectivity (typically white) |
| Chemical Resistance | Moderate | Good | Excellent |
| Flexibility | Extremely high in cold weather | Moderate | Moderate to High |
EPDM Single-Ply Rubber Membranes
Ethylene propylene diene monomer (EPDM) is a thermoset rubber membrane known for its exceptional flexibility, tear resistance, and cold-weather performance. Because EPDM remains flexible even during sub-zero winter spells, it resists cracking when roof decks contract.
Key characteristics of EPDM include:
- Outstanding resistance to UV radiation and ozone breakdown.
- Exceptional elasticity, expanding and contracting with building movement without strain.
- Proven real-world lifespan exceeding 20 years, with high-end single-sheet installations lasting up to 50 years.
To learn more about detailed technical applications for flat rubber roof preparation, refer to the EPDM Application Guide.
TPO and PVC Thermoplastic Roofing Systems
Unlike EPDM thermoset rubber, Thermoplastic Olefin (TPO) and Polyvinyl Chloride (PVC) are thermoplastics. Instead of using liquid adhesives or specialized seam tapes, thermoplastic seams are melted together using hot-air welding equipment. This creates a continuous, fused bond across seams that is virtually leak-proof when executed properly.
Thermoplastic membranes offer distinct performance benefits:
- Energy Efficiency: White TPO and PVC membranes reflect solar radiation, keeping lower building floors cooler in summer.
- Chemical Resistance: PVC membranes withstand animal fats, grease, and industrial chemicals better than EPDM, making them popular for commercial structures.
- Freeze-Thaw Resistance: Heat-welded seams minimize water ingress along sheet edges, helping prevent freeze-thaw seam rupture during Midwest winters.
DIY vs. Professional Installation: Preparation, Measurement, and Process
Replacing a flat rubber roof requires careful preparation, clear weather windows, and strict adherence to adhesive guidelines.
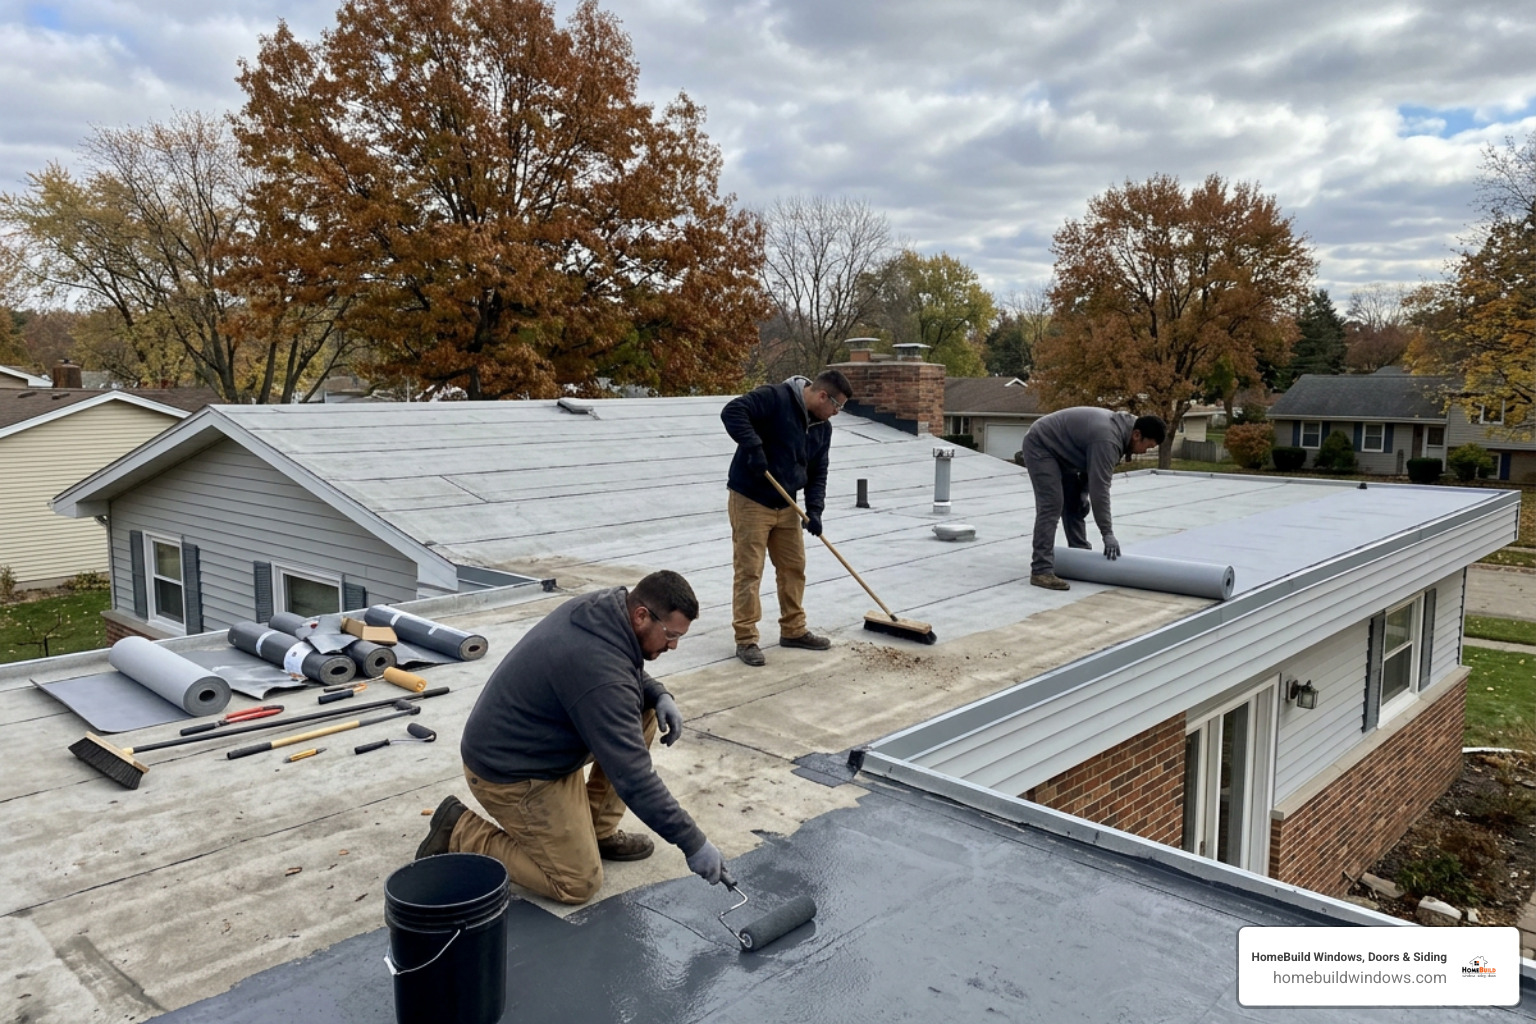
Essential Tools, Materials, and Substrate Preparation
Before laying down new rubber sheeting, complete substrate prep is essential:
- Required Materials: EPDM or TPO membrane roll, water-based deck adhesive, contact adhesive for edges, polyiso foam insulation board, seam primer, microsealant seam tape, self-leveling lap sealant, and metal termination bars.
- Required Tools: 9-inch paint roller, heavy-duty stiff broom, penny roller, utility knife, caulking gun, chalk line, and heavy steel membrane roller.
- Deck Preparation: Remove all old roofing down to the bare wooden substrate. Replace any soft, rotted, or water-damaged OSB or plywood. Ensure the deck surface is clean, dry, and clear of debris, oil, or protruding fasteners.
For complete planning recommendations regarding full residential roof replacement, review the ultimate guide to roof replacement.
Step-by-Step DIY Guide to Replace Rubber Roof Sections
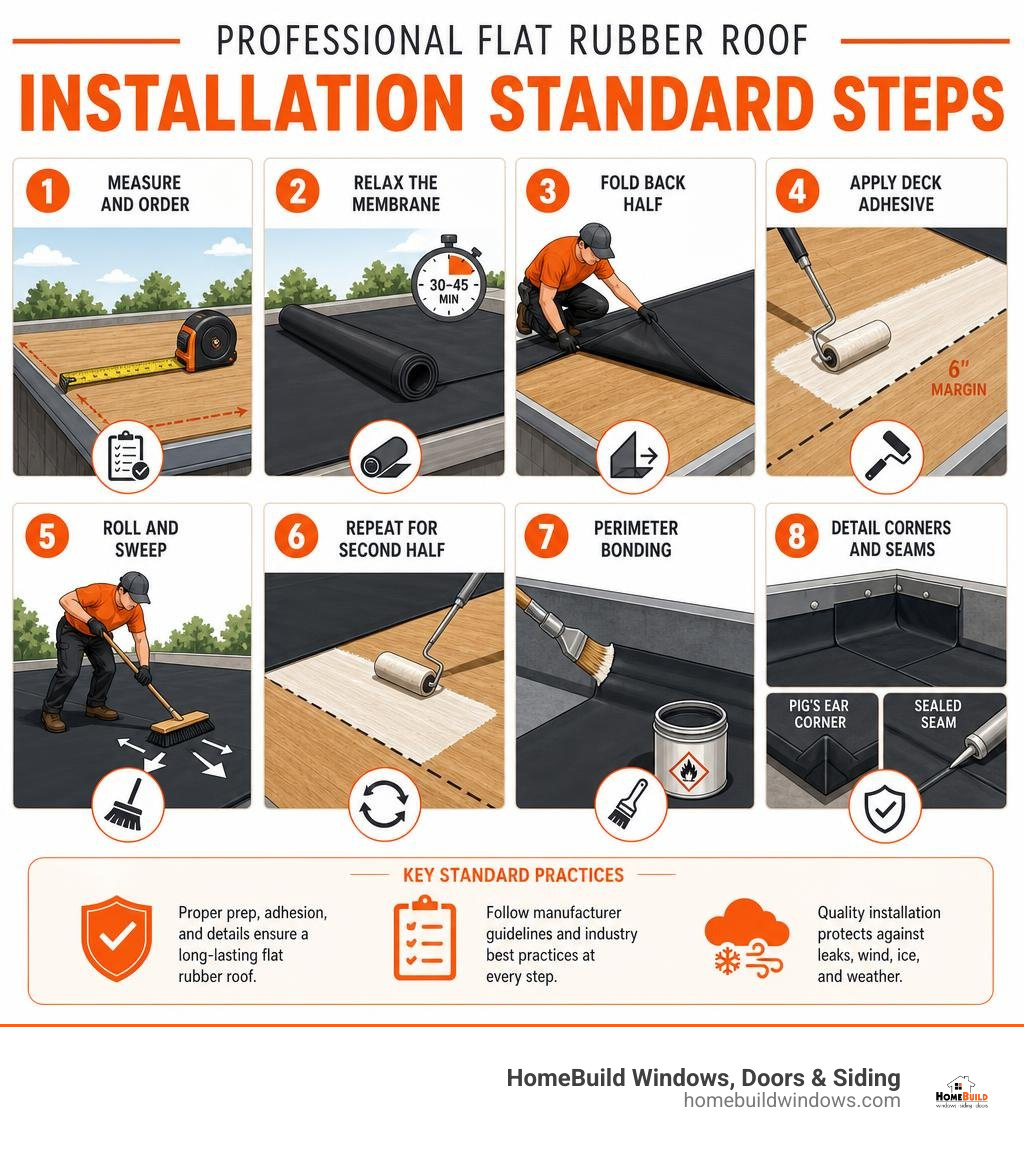
For small accessory structures like detached garages, patios, or porch additions, ambitious homeowners can tackle membrane installation using standard single-sheet EPDM processes:
- Measure and Order: Measure the total length and width of the roof deck. Add at least 1 to 2 feet of overhang along every edge to allow proper wall upstands and perimeter securement.
- Relax the Membrane: Unroll the new EPDM sheet across the roof surface and let it rest undisturbed for 30 to 45 minutes. This releases factory shipping tension and flattens packing wrinkles.
- Fold Back Half: Fold back one half of the membrane sheet to expose the wooden deck beneath.
- Apply Deck Adhesive: Use a paint roller to apply water-based bonding adhesive across the porous wooden deck surface. Leave a 6-inch un-bonded margin around the outer edges.
- Roll and Sweep: Carefully roll the rubber membrane forward into the wet adhesive. Immediately sweep the top surface from the center out toward the edges with a stiff broom to release trapped air bubbles.
- Repeat for Second Half: Fold back the remaining half of the sheet and repeat the adhesive application and sweeping process.
- Perimeter Bonding: Apply solvent-based contact adhesive to both the 6-inch perimeter margin and the underside of the rubber sheet. Allow it to become touch-dry before pressing the surfaces tightly together.
- Detail Corners and Seams: Fold external corner flashing neatly using a “pig’s ear” fold without cutting the main membrane. Secure roof perimeters with termination bars and seal all top seams with self-leveling lap sealant.
For step-by-step guidance on smaller mobile or specialty structures, consult this DIY Rubber Roof Replacement Guide.
Professional Standards to Replace Rubber Roof Materials
While installing a small rubber roof patch on a shed is approachable for a DIY enthusiast, replacing a full flat roof over living spaces demands professional execution. Flat roof installation offers zero margin for error; a single unsealed seam gap or improper wall flashing can ruin interior ceilings and wall insulation.
Working with professional contractors delivers distinct advantages:
- Owner-Supervised Quality: At HomeBuild Windows, Doors & Siding, projects are owner-supervised to guarantee quality control across every seam, drain detail, and parapet connection.
- NRCA Compliance: Standard practice mandates strict adherence to National Roofing Contractors Association (NRCA) installation protocols, ensuring proper foam insulation underlayment compression and seam priming.
- Midwest Climate Adaptation: Professional crews design flashing details capable of handling winter ice dams, wind uplift, and freeze-thaw cycles.
When hiring a contractor for your home, learn how to select qualified experts through our guide on choosing top local flat roofers.
Avoid Common Mistakes During Flat Rubber Roof Installation
Even minor shortcuts during rubber roof installation can cause early system failure. Avoid these common installation pitfalls:
- Applying Water-Based Glue Over Non-Porous Surfaces: Water-based deck adhesives require a porous wood deck (like bare OSB or plywood) to absorb moisture and off-gas properly. Applying water-based glue directly over old synthetic barriers, asphalt residue, or non-porous metal prevents curing, causing the rubber membrane to detach.
- Mixing Incompatible Chemicals: EPDM and TPO require specifically formulated primers, lap sealants, and contact adhesives. Using asphalt-based mastic or incompatible silicone caulk on synthetic rubber degrades the membrane polymers, creating severe leaks.
- Trapping Deck Moisture: Installing new insulation boards or rubber sheeting over damp plywood seals moisture inside the roof frame, accelerating wooden structural rot.
- Skipping Membrane Relaxation: Failing to let the rubber membrane unroll and rest for 30 minutes before applying adhesive creates persistent surface wrinkles, tension pulls, and premature seam failure.
Frequently Asked Questions About Rubber Roof Replacement
How long does a rubber roof replacement take, and how long will the new roof last?
A residential flat roof replacement on a standard home or detached garage typically takes 1 to 2 days for a professional crew. The lifespan of the new system depends on the material chosen:
- EPDM Rubber: 15 to 25+ years (up to 50 years when professionally installed as a single continuous sheet)
- TPO Systems: 10 to 25 years
- PVC Systems: 20 to 30 years
Regular biannual inspections (in spring and fall) significantly extend system service life.
Can I install a new rubber membrane over my existing flat roof?
In limited circumstances, a single layer of EPDM can be installed over an existing flat roof using polyiso recovery board overlays. However, a complete tear-off down to bare wood is strongly recommended.
Tearing off the old material allows contractors to inspect the wooden substrate for rot, repair hidden moisture damage, update roof insulation, and verify proper drainage slope pitch (which should be at least 1/4 inch per foot).
How do I accurately measure and order synthetic rubber membrane rolls?
Measure the total length and width of the flat roof deck at its widest points. Add at least 12 to 24 inches to both dimensions.
This extra material covers wall vertical upstands (usually 6 to 8 inches up parapet walls), edge drip edge wraps, and overhang margins needed for secure perimeter clamping.
Protect Your Home Investment with Expert Flat Roofing
Replacing a flat rubber roof is one of the most critical upgrades a homeowner can make to safeguard their property from weather damage. Choosing high-performance synthetic membranes like EPDM, TPO, or PVC ensures reliable waterproofing, better energy efficiency, and long-term durability.
At HomeBuild Windows, Doors & Siding, we bring over 20 years of exterior remodeling experience to homeowners throughout Chicago and the surrounding northwest suburbs. As an Elite Platinum Pella® Certified Contractor, Andersen Certified Contractor, Angi Super Service Award winner, and Nextdoor Neighborhood Faves recipient backed by 200+ positive Google reviews, our licensed and insured team delivers exceptional craftsmanship on every project.
Every job is owner-supervised to guarantee total accountability, clear communication, and flawless results. Whether you need an aging flat roof replaced, energy-efficient window upgrades, modern entry doors, or durable siding replacement, we stand ready to protect and enhance your home.
Ready to secure your flat roof with trusted local experts? Learn more about our comprehensive exterior remodeling options by visiting our primary HomeBuild Roofing Services page and schedule your free consultation today!