
Window Replacement Steps at a Glance
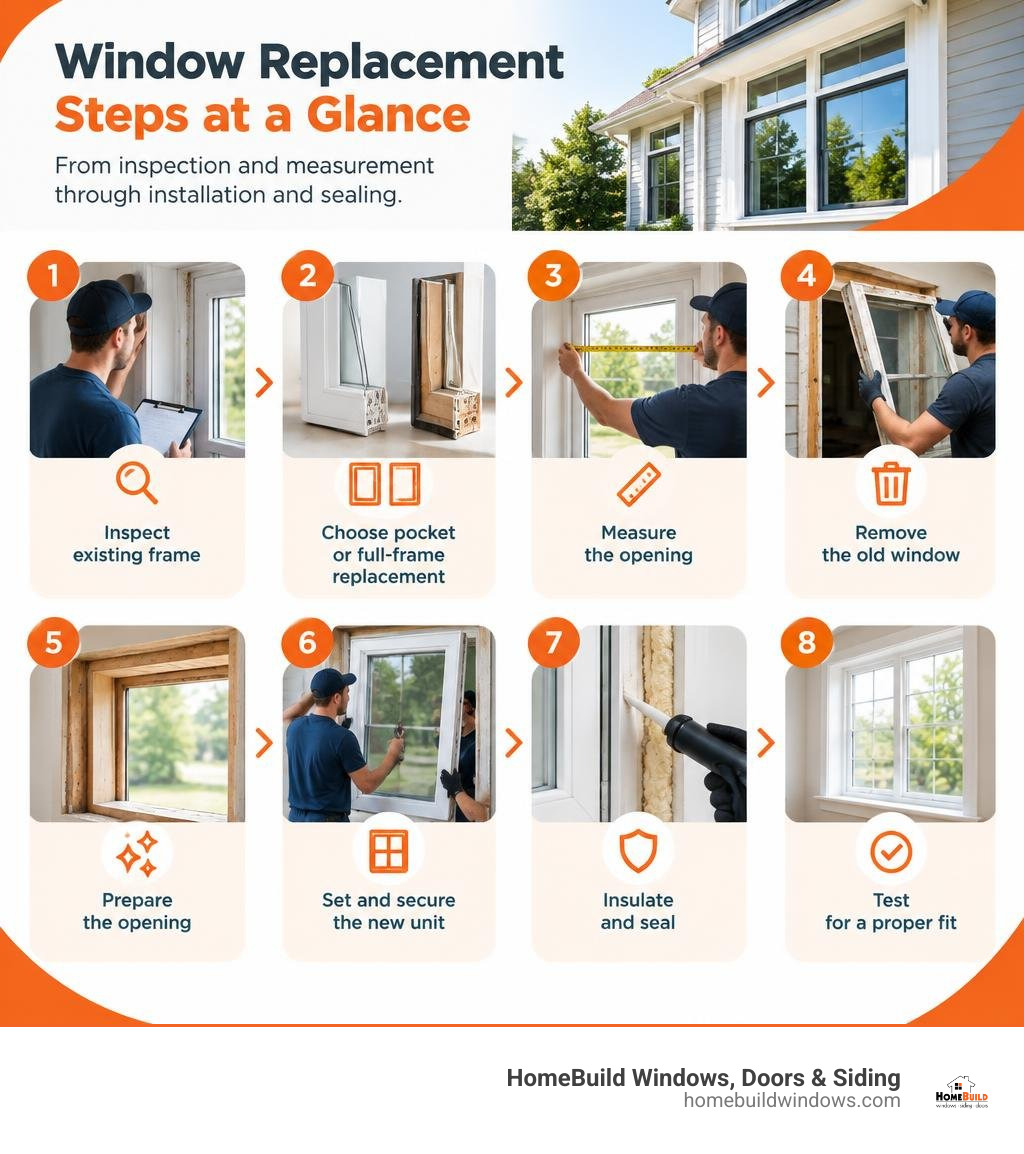
The main window replacement steps are to inspect the existing frame, choose a pocket or full-frame replacement, measure the opening, remove the old window, prepare the opening, set and secure the new unit, then insulate, seal, and test it. A sound frame may allow a pocket replacement; rot or water damage may call for a full-frame replacement. Accurate measurements and careful weatherproofing help prevent drafts and leaks.
I’m Steve Mlynek, founder of HomeBuild Windows, Doors & Siding. I’ve worked with Chicago-area homeowners since 2004, and I visit every job to oversee our in-house crews as they carry out these window replacement steps.
Simple window replacement steps glossary:
Key Replacement Window Styles and Installation Types
Selecting the correct installation technique is the foundation of any successful home upgrade. In the Chicagoland climate—where winter temperatures drop below zero and summer humidity spikes—a window must form a dependable, airtight seal against the elements. Homeowners generally choose between two primary methods: pocket insert installations and full-frame replacements.
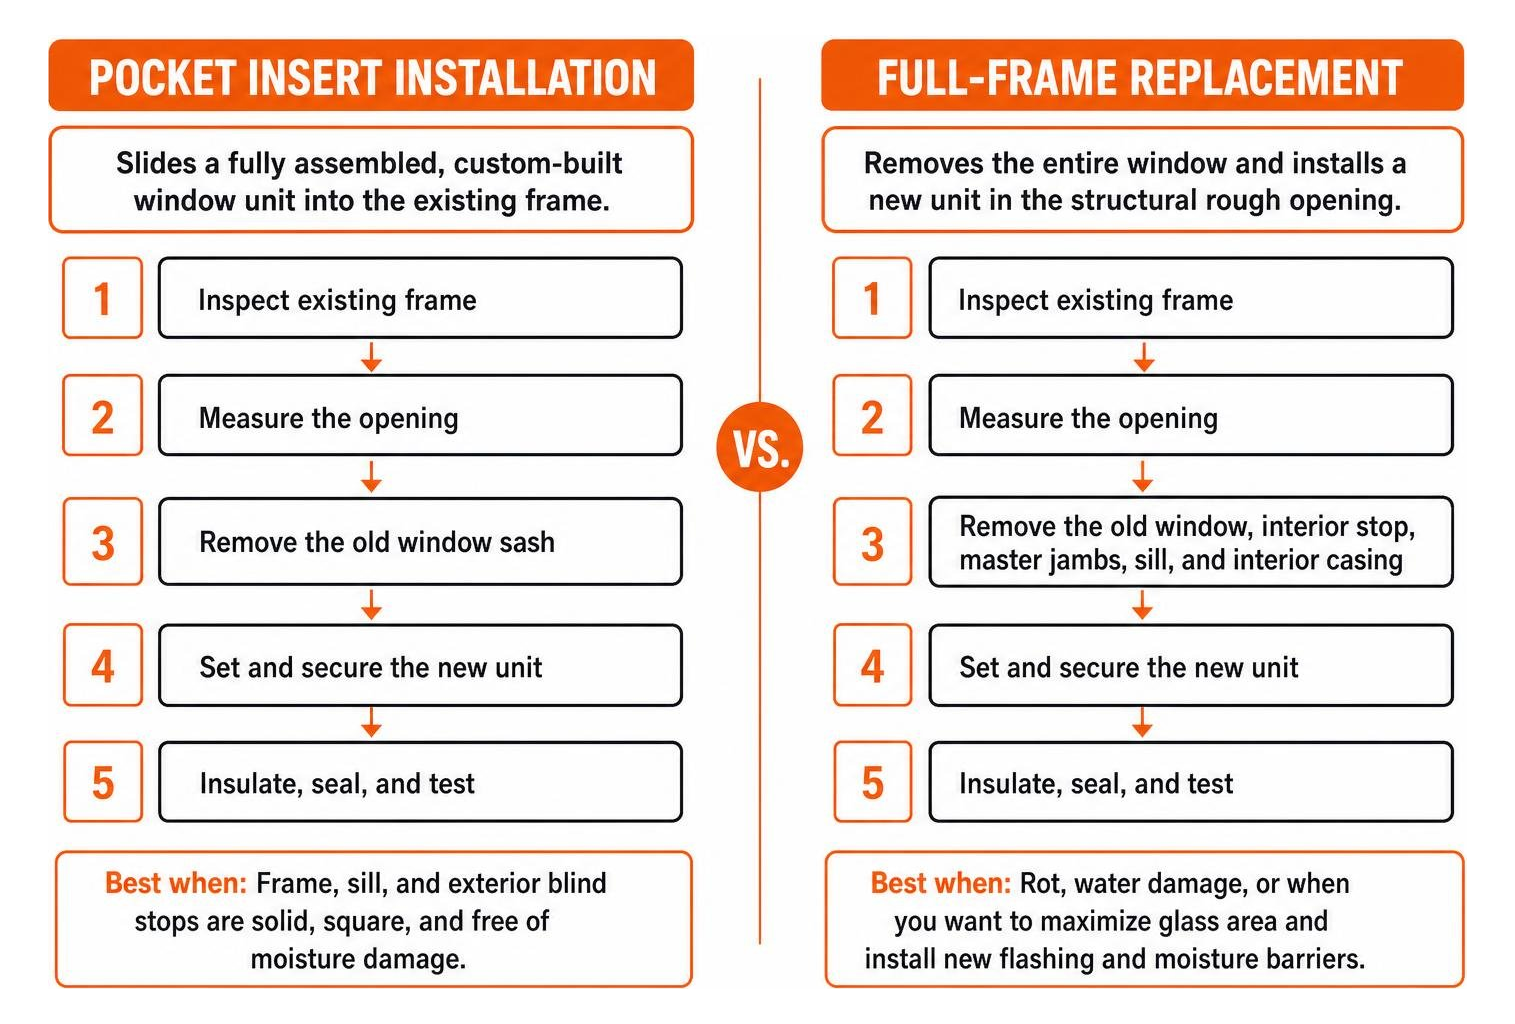
Pocket replacement (or insert replacement) involves sliding a fully assembled, custom-built window unit directly into your existing wood frame or master jamb. This method preserves your interior trim, casing, and exterior siding intact. It is ideal for classic Chicago bungalows or suburban colonials when the underlying structural frame, sill, and exterior blind stops are completely solid, square, and free of moisture damage.
Full-frame replacement, by contrast, requires a total teardown. Installers remove the sashes, the interior stops, the master jambs, the sill, and the interior casing, exposing the raw structural rough opening of the wall. This approach is necessary when decades of freeze-thaw cycles or hidden leaks have caused structural rot, or when you want to maximize glass area and install brand-new exterior flashing and moisture barriers.
| Feature | Pocket Insert Installation | Full-Frame Replacement |
|---|---|---|
| Existing Frame | Preserved in place | Completely removed to rough framing |
| Interior/Exterior Trim | Undisturbed and retained | Removed and replaced or reset |
| Glass Surface Area | Slightly reduced (frame within a frame) | Maximized to rough opening dimensions |
| Best Used For | Sound, square, rot-free existing jambs | Deteriorated frames, water damage, full style changes |
| Air & Water Infiltration Protection | Relies on existing exterior water barrier | Allows brand-new sill pan and membrane flashing |
Whether performing an insert or a full-frame installation, premium materials from trusted manufacturers make a significant difference in long-term thermal performance. We install industry-leading units from Pella, Andersen, and ProVia, ensuring that multi-pane glass packages and durable composite, wood-clad, or vinyl extrusions withstand harsh Midwestern weather. For a deeper look into selecting the right materials and operational styles, review our comprehensive replacement window buying guide.
The Core Window Replacement Steps Explained
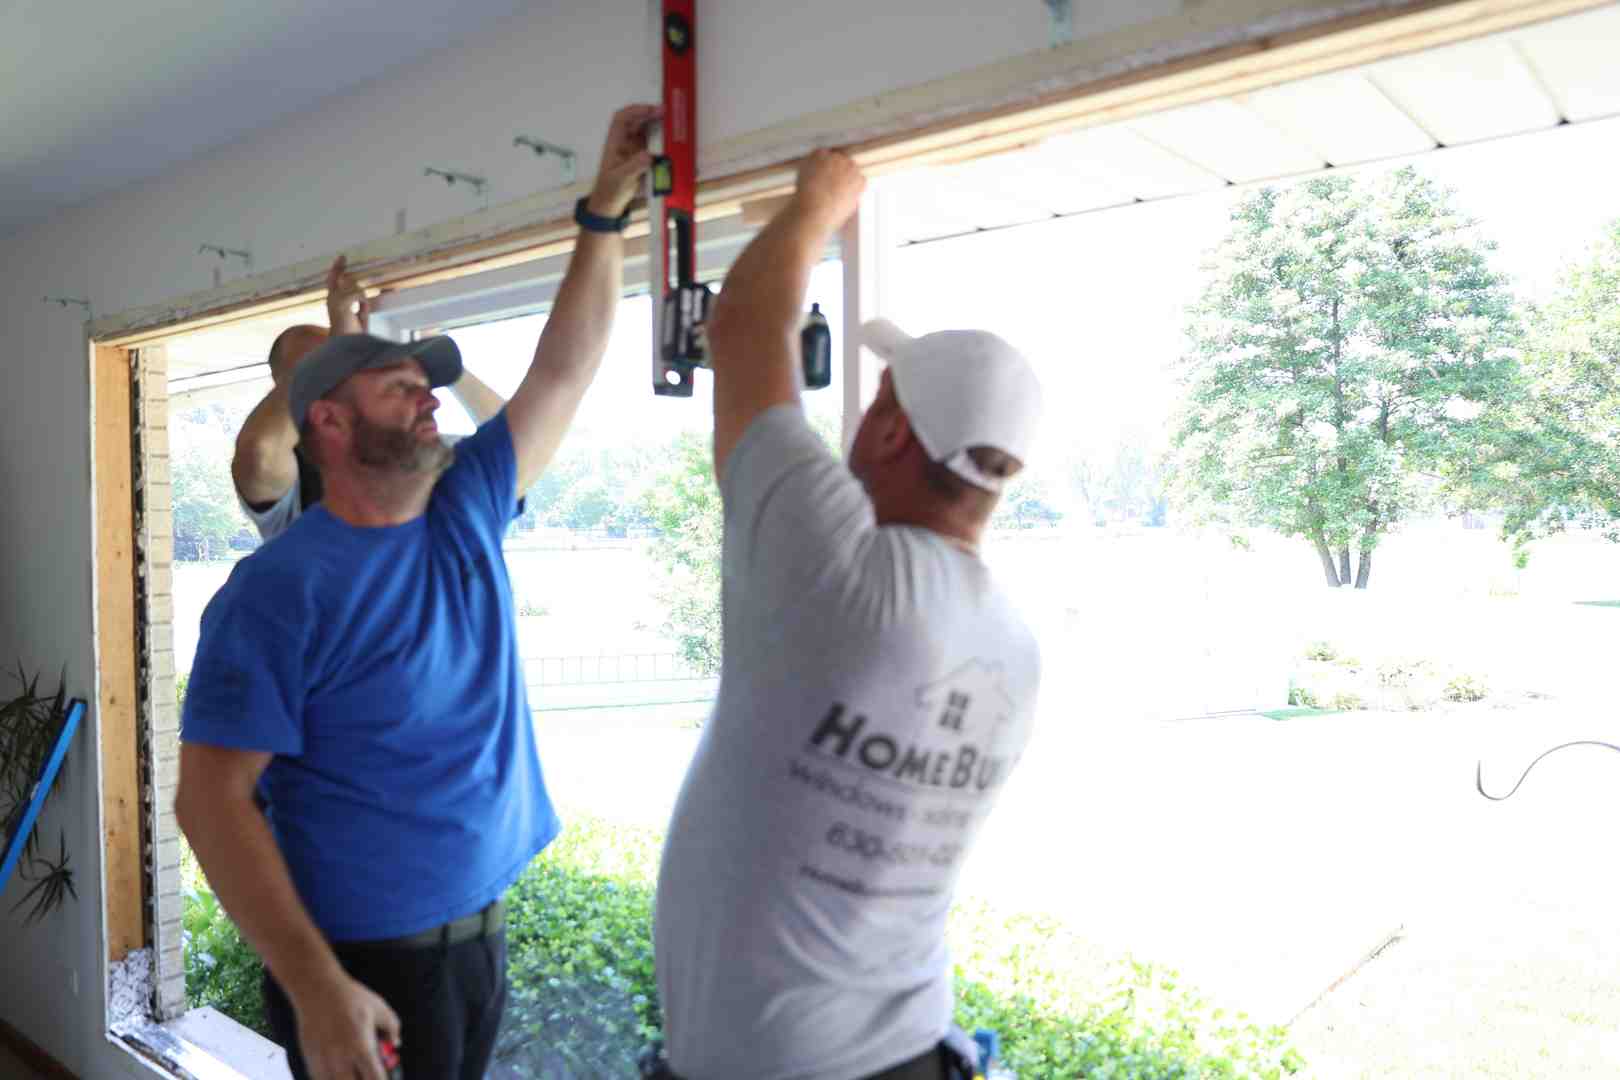
Executing residential window upgrades requires precision carpentry, careful moisture management, and strict adherence to structural tolerances. Each stage builds upon the last to guarantee long-term air and water tightness.
Initial Window Replacement Steps: Measurement and Structural Prep
Precision ordering begins long before any demolition takes place. Installers use three-point measuring techniques to assess both the width and height of the existing pocket or rough opening:
- Width Verification: Measure horizontally across the opening at the top, middle, and bottom between the interior jamb surfaces. Record the narrowest dimension.
- Height Verification: Measure vertically from the high point of the sill to the top header jamb at the left, center, and right. Record the shortest dimension.
- Squareness & Level Check: Measure diagonally from corner to corner. If the two diagonal measurements differ by more than 1/4 inch, the existing frame is out of square and will require specific shimming adjustments or full-frame rebuilding.
- Sill Pitch Inspection: Check the angle of the sill to ensure proper drainage away from the wall structure.
A replacement unit is typically manufactured approximately 3/4 inch smaller than the rough opening dimensions to provide adequate clearance for thermal expansion, composite shimming, and low-pressure insulating foam. To learn more about calculating rough framing parameters, explore our detailed guide on measuring rough openings accurately.
Demolition and Safe Removal of Existing Units
Careful deconstruction protects the surrounding plaster, drywall, and historical woodwork:
- Sash & Stop Removal: Technicians score paint and caulk lines with a sharp utility knife to avoid chipping delicate trim. Interior stop moldings are removed, followed by the lower sash.
- Counterweights & Jamb Liners: In vintage homes with traditional weight pockets, parting beads are pried away, sash cords cut, and cast-iron counterweights safely removed. Modern spring balances or vinyl jamb liners are detached cleanly.
- Subframe Inspection & Prep: The cavity is vacuumed clean of historic debris. Exposed weight-pocket cavities are insulated with dense mineral wool or rigid insulation before sealing.
- Lead-Safe Containment: For structures built prior to 1978, strict lead-safe protocols are enacted, including heavy plastic floor barriers, HEPA filtration vacuums, and misting techniques to prevent lead-paint dust dispersal. Discover how to protect your living spaces by reading about preparing your home for window installation.
Setting, Shimming, and Securing the New Window
Once the opening is prepped and verified, the new window unit is installed:
- Dry-Fitting: The unit is placed into the opening without fasteners or sealants to verify clearances and ensure square alignment.
- Sill Flashing & Sealant Application: Self-adhering, flexible flashing tape is applied across the sill, extending several inches up each vertical jamb to create a continuous water-deflection basin. Continuous beads of high-grade elastomeric sealant are laid against the exterior blind stop.
- Plumb, Level, and Square Placement: Installers rest the unit on the sill, tilt it into the opening, and press it firmly into the exterior caulk bed.
- Composite Shimming: Non-rotting composite shims are inserted behind pre-drilled fastening holes along the side jambs. Installers adjust shims until diagonal measurements match perfectly and side jambs show zero bowing.
- Fastening: Corrosion-resistant structural screws are driven through the factory-drilled side jamb points into the structural framing studs, taking care not to over-torque and distort the frame. Our team follows proven expert window installation techniques to protect manufacturer warranties and guarantee effortless sash operation.
Final Window Replacement Steps: Insulation and Weatherproofing
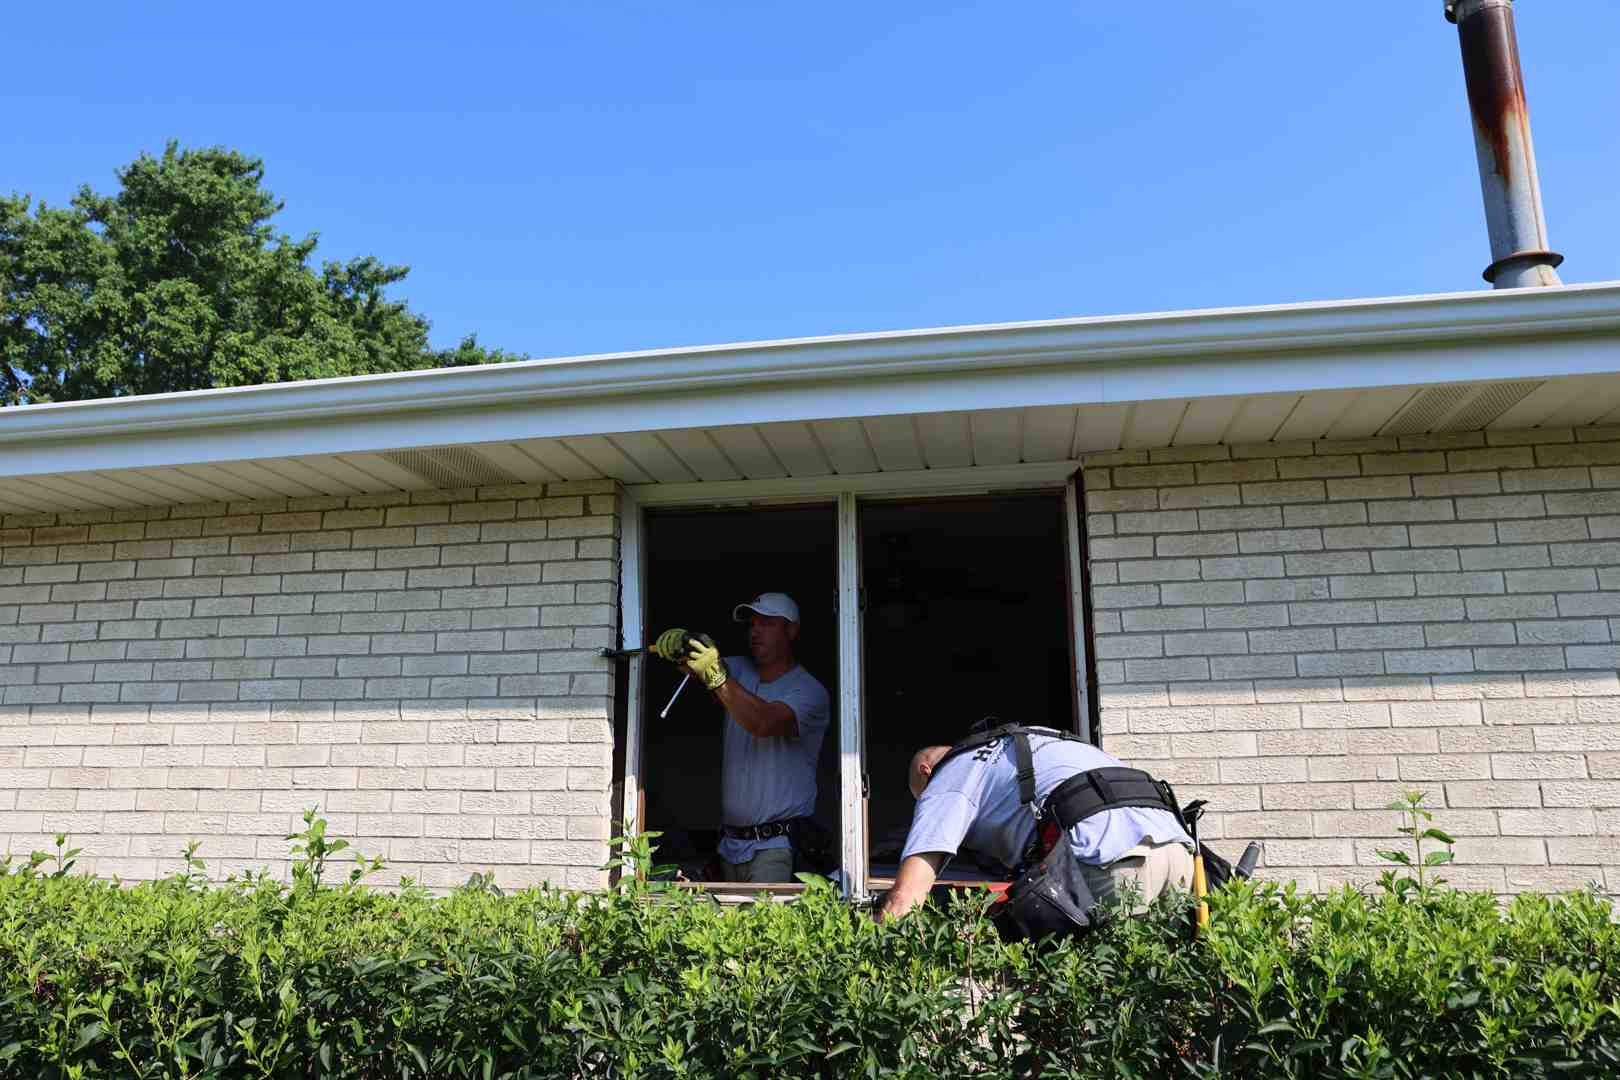
The final phase protects against thermal leakage and moisture entry:
- Air Sealing: Installers apply closed-cell backer rods in wider gaps and inject low-pressure, minimally expanding polyurethane foam specifically formulated for windows and doors. Standard expanding foams must never be used, as their high expansion pressure can bow window jambs and bind moving sashes.
- Exterior Weatherproofing: The exterior perimeter receives a flexible, UV-resistant elastomeric sealant bead. Sill adapters are adjusted to match the existing exterior sill slope, ensuring that built-in weep holes remain unobstructed for drainage.
- Interior Trim Restoration: Interior stop moldings are re-attached using pneumatic nailers, nail holes are filled, and joints are neatly caulked for a clean finish. If your exterior features specialized cladding, see our insights on installing replacement windows with existing vinyl siding.
Building Codes, Permits, and Lead Safety Compliance
Window replacement projects in the Chicagoland area must comply with local zoning, structural, and energy conservation standards. For instance, obtaining a municipal permit helps ensure that emergency egress dimensions are respected in residential sleeping areas. You can consult the official Chicago guidelines for exterior window or door replacement to review local submittal and plan requirements.
Furthermore, federal regulations governed by the EPA Renovation, Repair, and Painting (RRP) rule require certified contractors to handle older homes with specialized containment. Adhering to these safety standards prevents lead contamination and ensures your new investment matches local building performance mandates. To ensure full compliance across all aspects of your project, read our resource on window replacement standards and local permits.
Frequently Asked Questions About Window Replacement Steps
How long does a full window replacement process typically take?
On average, a dedicated crew requires about 4 to 6 hours per window for a complex full-frame replacement on the ground floor, while insert installations take considerably less time. Second-story windows or units requiring scaffolding and complex trim modifications may require additional time. A standard whole-home project involving 10 to 15 windows is typically completed in 1 to 2 business days.
What is the difference between pocket and full-frame window installation?
A pocket installation places a self-contained window unit into an existing, solid wood master frame without disturbing exterior siding or interior casing. A full-frame installation strips the entire window down to the structural wall studs, allowing for new sill pans, perimeter flashing membranes, and fresh interior and exterior trim.
Why is professional installation recommended over DIY window replacement?
Window installation demands advanced carpentry skills, specialized drop cloths and HEPA extraction for lead containment, and precise squaring techniques. A minor measurement error or improper shimming can cause air leaks, stuck sashes, water infiltration inside wall cavities, and voided product warranties. Professional installation ensures full code compliance, airtight thermal barriers, and long-term labor warranty coverage.
Conclusion
Carrying out correct window replacement steps safeguards your home against structural water damage, eliminates winter drafts, and restores effortless beauty to your living spaces. Since 2004, HomeBuild Windows, Doors & Siding has served homeowners across Chicago and the surrounding suburbs with dedicated, detail-oriented service. Every installation is handled exclusively by our trained in-house crews—never subcontractors—and supervised on-site by owner Steve Mlynek.
As an Elite Platinum Pella Certified Contractor and an Andersen Premier Certified Contractor installing exceptional Pella, Andersen, and ProVia products, we bring verified expertise to every project. Our commitment to craftsmanship has earned us an Angi Super Service Award 2025, recognition as a 2025 Nextdoor Neighborhood Faves Winner, and a 4.9-star rating across 220+ Google reviews. Every project includes our 10-year labor warranty alongside our complimentary VIP Protection Plan.
When you are ready to upgrade your home’s comfort and efficiency, explore the replacement window buying guide and schedule a free estimate with our team today.