What Chicago Homeowners Need to Know About Window Frame Replacement
Window frame replacement is one of the most impactful upgrades you can make to a Chicago-area home — but it’s also one of the most misunderstood.
Here’s the short answer most homeowners need:
There are two main methods:
- Insert (pocket) replacement — the new window slides into your existing frame. Faster, less disruptive, and works well when your frame is structurally sound.
- Full-frame replacement — everything comes out, down to the rough opening. Required when frames are rotted, out of square, or when you want to change the window’s size or shape.
Choose insert replacement if:
- Your existing frame is solid, square, and free of rot or water damage
- You want to preserve your interior and exterior trim
- You want a faster installation with less disruption
Choose full-frame replacement if:
- You see soft spots, rot, or moisture damage around the frame
- Your window is visibly out of square
- You want to change the window style, size, or opening
Both methods can dramatically improve your home’s energy efficiency, comfort, and curb appeal — especially in Chicago’s harsh winters, where drafty, aging windows can drive up heating bills significantly. ENERGY STAR-rated windows, for example, can save homeowners 7% to 15% on utility bills on average.
I’m Steve Mlynek, CEO and founder of HomeBuild Windows, Doors & Siding, and over the past 20+ years I’ve overseen hundreds of window frame replacement projects across Chicago and the surrounding suburbs. In this guide, I’ll walk you through exactly how to choose the right method, diagnose your frames, and get the job done right.

Window frame replacement word roundup:
Choosing the Right Window Frame Replacement Method
When we talk about upgrading the glass and wood in your home, we must first establish the scope of the project. Many homeowners assume that getting new windows always means tearing out everything down to the bare wall studs. Fortunately, that is not always the case.
The two primary methods — pocket (insert) installation and full-frame replacement — serve entirely different purposes depending on the structural integrity of your current window openings. In the volatile Chicago climate, where we experience freezing winter blizzards and humid summer heatwaves, making the wrong choice can lead to drafts, condensation, and structural headaches down the road.
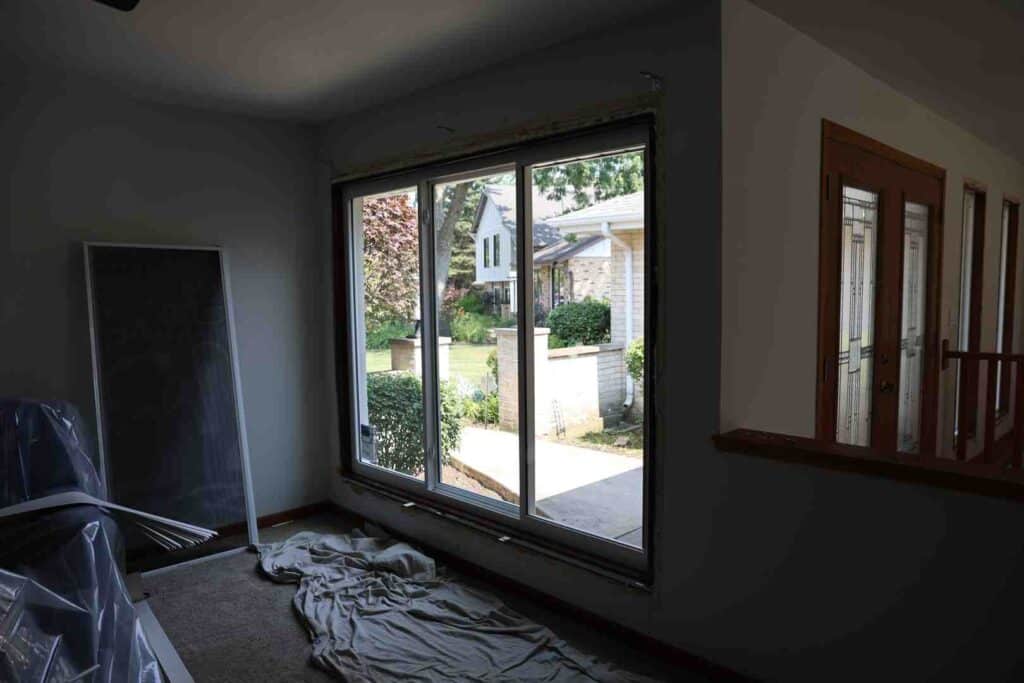
An insert window replacement allows us to leave the existing interior and exterior trim completely undisturbed. Only the old sashes, hardware, and parting stops are removed, and a new self-contained window unit is slid directly into the existing frame. This approach is highly efficient and minimizes the disruption to your daily life. It is an excellent option for historic properties in areas like Glenview or Park Ridge where preserving the original, ornate wood trim is a top priority.
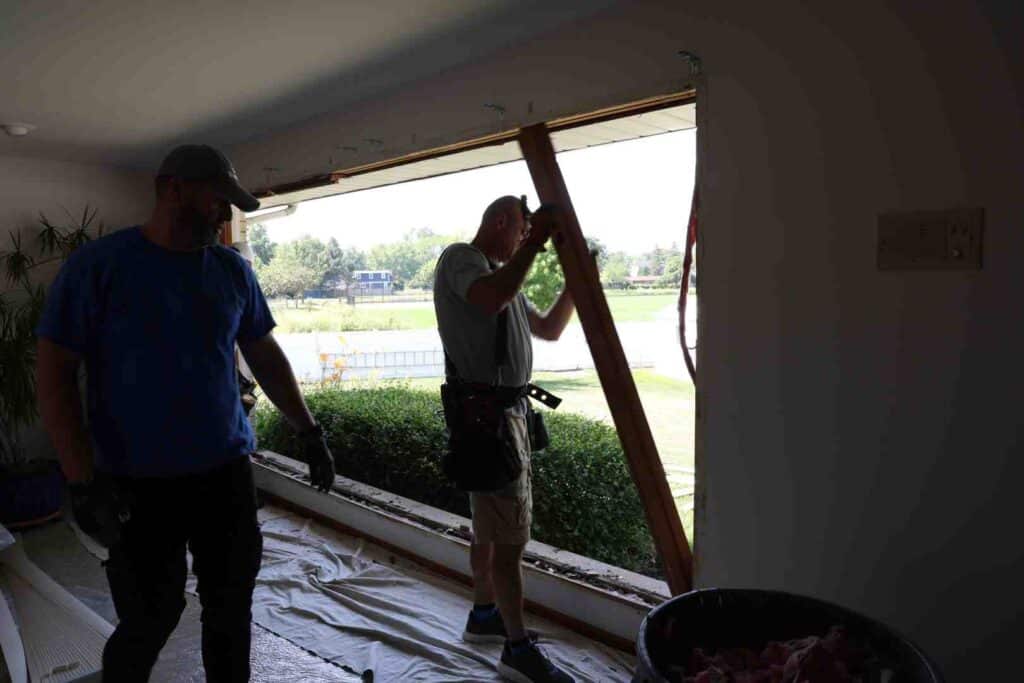
On the other hand, a full-frame replacement is a comprehensive construction project. We strip away the entire window assembly, including the frame, sashes, casing, sill, and trim. This exposes the rough opening in the wall studs. While this requires a more involved installation process, it is the only way to guarantee that hidden water damage is repaired and that the window is properly flashed to prevent future leaks. For a deeper understanding of the mechanics of this process, you can explore our comprehensive window installation guide.
| Feature / Consideration | Insert (Pocket) Replacement | Full-Frame Replacement |
|---|---|---|
| Existing Frame Condition | Must be structurally sound, level, plumb, and square | Can be damaged, rotted, or out of square |
| Trim Preservation | Keeps original interior and exterior trim intact | Removes and replaces all trim, casings, and sills |
| Glass Viewing Area | Slightly reduced due to the “frame-within-a-frame” design | Maximized viewing area, mirroring new construction |
| Design Flexibility | Limited to the existing opening size and window style | Allows you to change window size, shape, and style |
| Installation Speed | Typically completed in a few hours per window | Takes longer due to trim removal and flashing work |
| Weatherization Potential | Relies on the integrity of the existing wall flashing | Allows for brand-new flashing, membrane, and insulation |
Evaluating these factors carefully ensures that your home receives the exact treatment it needs to stay warm, dry, and beautiful.
Diagnosing Your Window Frame: Is It Structurally Sound?
Before we pick up a pry bar or order custom-sized windows, we must perform a thorough diagnosis of the existing frame. Installing a high-end insert window into a rotting or structurally compromised frame is like building a beautiful brick house on a foundation of shifting sand. Eventually, the structure will fail, and water will find its way inside.

To determine if your window frame is structurally sound, we recommend a simple but effective inspection process. Grab a flathead screwdriver or an awl and step outside. You will want to inspect the exterior sill, the jambs, and the brickmould.
First, look closely for visible signs of wood rot, paint peeling, or soft spots. Gently press the tip of your awl into the wood. If the wood is firm, your frame is in good shape. If the tool sinks easily into the material, or if the wood crumbles like dry cake, you have active rot that must be addressed. Wood rot is a common issue in older homes throughout historic Chicago neighborhoods, and it cannot simply be caulked over.
Second, check for evidence of water infiltration. Look for water staining on the interior drywall or plaster directly beneath the window sill. Water can travel through four distinct pathways: between the frame and the rough opening, through the joints in the frame itself, between the frame and the sashes, or between the glass and the sash frame. Understanding these pathways is crucial for a successful remediation, as outlined in the complete window and frame replacement guide.
Finally, we must check the frame’s squareness, level, and plumb. Take a tape measure and measure diagonally from the top-left corner to the bottom-right corner, then from the top-right to the bottom-left. For an insert window to fit and operate smoothly, these two diagonal measurements should be within 1/8 inch of each other for smaller windows, or a maximum of 1/4 inch for larger openings. If the frame is severely warped or out of square, a pocket window will bind, leak air, or fail to lock. In this scenario, you must perform a full-frame installation. If you need assistance with checking these dimensions, you can learn how to measure a rough opening to ensure your new units fit perfectly.
Step-by-Step Guide to Window Replacement Methods
Whether you are preparing to tackle this project yourself or simply want to understand what our professional crew is doing in your home, knowing the steps involved brings peace of mind. Proper preparation, safety gear (such as safety glasses and heavy-duty gloves), and meticulous attention to detail are required for both methods.

Before starting any work, it is wise to familiarize yourself with the general principles of window removal and opening preparation. For a broad overview of the process, refer to our guide on how to replace windows.
Step-by-Step Insert Window Frame Replacement
If your inspection confirmed that your existing wood frame is solid, square, and dry, you are ready to proceed with an insert replacement. This process is highly efficient and keeps the exterior envelope of your home intact.
- Remove the Old Sashes and Hardware: Begin by scoring the paint along the interior stop beads with a utility knife to prevent the wood from splintering. Carefully pry off the stops and set them aside if you plan to reuse them. Remove the lower sash, disconnect the balance cords or chains, and then remove the parting stop to release the upper sash.
- Clean and Prep the Existing Frame: Clear out any old pulleys, balance weights, or spring hardware. If your home was built before 1978, be mindful of lead paint regulations and use lead-safe work practices. Vacuum away all debris, dust, and peeling paint. Inspect the bare wood frame one last time for any hidden issues.
- Dry-Fit the New Insert: Place the new window insert into the opening to verify the fit. If you are using a high-quality double-hung vinyl window, such as the American Craftsman replacement window specifications, make sure the unit sits flush against the exterior blind stops.
- Apply Sealant and Install the Unit: Apply three continuous beads of high-grade exterior silicone caulk: one along the inside face of the exterior blind stop, one across the interior windowsill, and one along the header. Slide the insert into place, pressing it firmly against the caulk to create a weather-tight seal.
- Fasten and Insulate: Secure the window frame to the existing jambs using the manufacturer-provided installation screws. Do not over-tighten, as this can bow the vinyl frame. Fill any remaining gaps around the perimeter with low-expansion foam specifically labeled for windows and doors. Standard expanding foam can exert too much pressure and warp the frame, preventing the sashes from operating.
- Reinstall Trim and Seal: Reattach your interior stops. On the exterior, apply a clean bead of silicone sealant along the joint where the new window frame meets the old wood trim to keep out wind and rain.
Step-by-Step Full-Frame Window Frame Replacement
When the existing frame is rotted, structurally compromised, or when you want to change the size of the opening, a full-frame replacement is necessary. This method mirrors new construction and provides the ultimate protection against the elements.
- Remove Trim and Strip the Opening: Remove the interior casing and trim. On the exterior, remove the brickmould or trim. If your home has siding, you may need to cut back the siding slightly to access the window’s nailing fin. Carefully pry the old window frame out of the rough opening.
- Inspect and Repair the Rough Framing: With the framing exposed, inspect the wall studs and the sill plate for water damage or insect infestation. Replace any rotted wood with fresh, structurally sound lumber. Ensure the rough opening is level, plumb, and square.
- Apply Waterproof Membrane and Flashing: This is the most critical step for water management. Line the sill of the rough opening with a self-adhered flashing membrane or pan flashing. Ensure the membrane extends at least 4 inches up the sides of the jambs and out onto the exterior wall plane. For detailed, brand-specific instructions on this process, you can consult the Andersen full-frame installation guide.
- Install the New Window: Apply a thick bead of sealant to the back of the window’s integrated nailing fin. Lift the window into the opening. Use shims to level and square the unit within the opening. Secure the window by nailing or screwing through the flashing fin into the exterior sheathing.
- Integrate with the Weather-Resistant Barrier (WRB): Apply flashing tape over the side nailing fins, then over the top fin, shingling the layers so that water naturally sheds downward. Ensuring a proper seal here is the key to a long-lasting, leak-free installation, which is detailed in our guide on leak-proof window flashing.
- Insulate and Finish: Fill the interior gap between the window frame and the rough opening with low-expansion foam. Reinstall new interior casing and exterior trim, ensuring all exterior joints are sealed with high-performance caulk. If you are constructing or modifying an opening, it is helpful to refer to standard rough window opening sizes to ensure everything aligns with local building standards.
Key Considerations: Permits, Energy Efficiency, and Value
Embarking on a window frame replacement project involves more than just carpentry; it requires a clear understanding of local building codes, energy standards, and long-term property value.
First, let’s address building permits and codes. In Chicago and surrounding suburbs like Arlington Heights, Des Plaines, and Schaumburg, local municipalities have strict guidelines regarding window installations. While a simple “like-for-like” pocket replacement that does not alter the structural framing may not always require a complex permit, a full-frame replacement almost always does.
This is especially true if you are altering the size of the opening, converting a double-hung window into a picture window, or replacing windows in bedrooms where emergency egress requirements must be met. To avoid costly compliance issues, always check your local municipal codes or read our guide on window replacement standards and permits.
Second, energy efficiency is a major driver for this upgrade. Modern, high-efficiency windows feature double or triple-pane glass filled with insulating argon gas, Low-E coatings to reflect heat, and advanced frame materials like vinyl, fiberglass, or clad wood.
In the Midwest, look for windows that carry the ENERGY STAR label and pay close attention to the U-factor (which measures how well the window prevents heat from escaping). A lower U-factor means better insulation, which translates directly into lower heating bills when wind chills drop below zero off Lake Michigan.
Finally, consider the long-term impact on your home’s resale value. Upgrading your windows is widely recognized as one of the most reliable home improvement investments. Prospective buyers in the Chicagoland area place a high premium on homes with updated, low-maintenance, and energy-efficient building envelopes. A professional, owner-supervised installation not only improves your daily comfort but also signals to future buyers that the home has been meticulously maintained.
Frequently Asked Questions About Window Frame Replacement
How long does the installation process take?
For a professional crew, a standard insert (pocket) window replacement is incredibly fast. We can typically complete several insert installations in a single day, as the process is non-invasive and does not require exterior trim work.
A full-frame replacement takes longer because it involves removing exterior siding or brickmould, replacing interior trim, and installing flashing membranes. A professional team can usually complete a full-frame replacement in about 3 to 5 hours per window.
If you are attempting this as a DIY project, we recommend doubling those timelines, especially if you encounter unexpected wood rot or out-of-square framing. Weather also plays a major role; we recommend scheduling window replacements during the spring, summer, or fall to avoid exposing the interior of your home to freezing winter temperatures.
Do I need a permit for this project in Chicago?
Yes, in most cases, a permit is required for window replacement projects in Chicago and the surrounding suburbs, especially for full-frame installations. Local building departments require permits to ensure that the new windows meet strict energy-efficiency standards, wind-load requirements, and emergency egress codes (particularly in bedrooms).
If your home is located in a designated historic district, you may also need approval from a local landmark commission to ensure the new windows match the architectural style of the neighborhood. Working with a licensed and insured contractor who understands local permitting processes can save you significant time and hassle.
What tools are required for DIY installation?
If you plan to tackle a pocket installation yourself, you will need a solid collection of basic hand and power tools:
- Safety glasses and heavy-duty work gloves
- Utility knife (for scoring paint and caulk)
- Pry bar and chisel (for removing stops and trim)
- Tape measure and level (critical for ensuring squareness)
- Power drill and driver bits
- Caulking gun with high-quality exterior silicone sealant
- Low-expansion polyurethane foam (specifically formulated for windows and doors)
- Wood shims (for leveling and squaring the unit)
For a full-frame replacement, you will also need a circular saw or reciprocating saw to cut back siding or framing, flashing tape, a hammer, and replacement interior and exterior trim.
Conclusion
Upgrading your home’s windows is a significant project, but with the right approach, it doesn’t have to be overwhelming. By understanding the differences between insert and full-frame installations, diagnosing the health of your existing frames, and adhering to proper installation standards, you can ensure a warm, draft-free, and beautiful home for decades to come.
While a handy homeowner can successfully complete a pocket installation, full-frame replacements and complex structural modifications are best left to the professionals. At HomeBuild Windows, Doors & Siding, we bring over 20 years of local experience to every project. As an Elite Platinum Pella® Certified Contractor and an Andersen Certified Contractor, we hold our work to the highest industry standards. Every project we undertake is owner-supervised, ensuring absolute accountability, premium craftsmanship, and exceptional attention to detail.
Whether you are dealing with drafty frames in Barrington, aging siding in Crystal Lake, or simply want to explore your options for improving your home’s curb appeal and energy efficiency, we are here to help. We are proud to be recognized as an Angi Super Service Award winner and a Nextdoor Neighborhood Favorite, backed by over 200 positive Google reviews from your neighbors throughout the Chicago area.
Ready to take the next step toward a more comfortable, energy-efficient home? We invite you to explore our replacement window buying guide or contact us today to schedule a consultation with our expert team.