
How to Install New Siding on an Old House
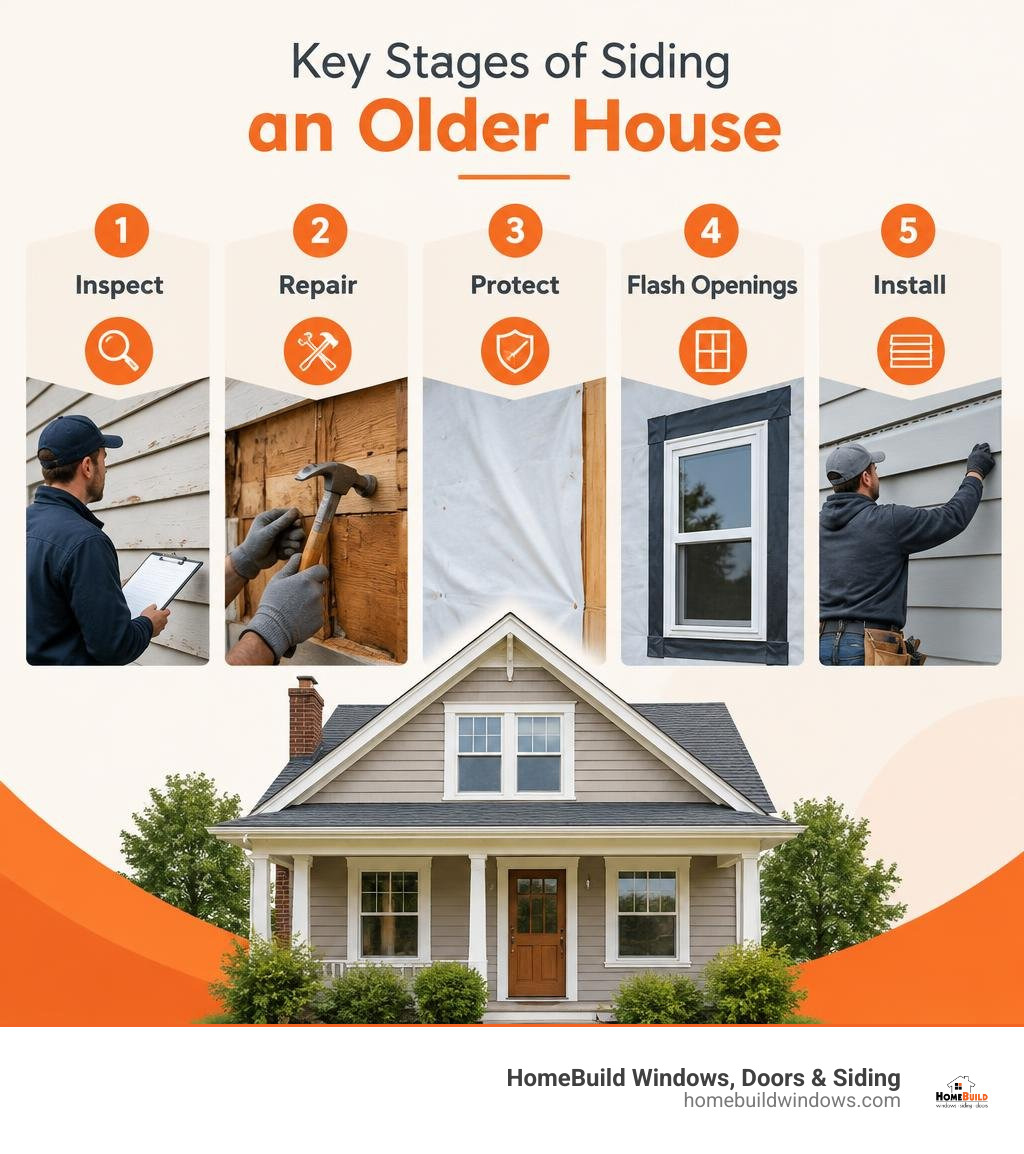
To install new siding on an old house, a professional first checks the existing walls for rot, insects, and water damage. The crew repairs the wall, adds a weather-resistive barrier and flashing, adjusts trim around windows and doors, then installs the new siding. Old siding does not always have to come off, but removal is often the better choice when its condition or the wall beneath it is uncertain.
I’m Steve Mlynek, founder of HomeBuild Windows, Doors & Siding. After more than 20 years serving Chicago-area homeowners, I know that people searching “how to install new siding on old house” need to understand the wall beneath the siding first.
How to install new siding on old house helpful reading:
Assessing the Wall: Remove Existing Siding or Overlay?
When dealing with vintage Chicagoland homes—such as classic brick-and-frame bungalows, Victorian two-flats, or mid-century split-levels—the first critical decision is whether to strip the exterior down to the structural sheathing or install new cladding over the existing layer.
While overlaying might seem like a shortcut, building science and local climate conditions dictate a cautious approach. Chicago’s extreme freeze-thaw cycles, driving lake-effect rain, and humid summers place immense moisture stress on residential building envelopes. Reviewing the signs indicating when to replace exterior siding can help determine if the existing material has reached the end of its functional life.
| Factor | Complete Tear-Off & Removal | Overlaying Existing Siding |
|---|---|---|
| Substrate Inspection | Complete view of sheathing, framing, and insulation | Hidden substrate; existing decay remains unseen |
| Moisture Management | Allows seamless installation of modern water-resistive barriers | Risk of creating double vapor barriers and trapping moisture |
| Window/Door Projections | Preserves original jamb depth and clean architectural sightlines | Can swallow window casings, requiring custom extensions |
| Wall Alignment | Permits shimming and leveling of uneven older framing | Telegraphs wall bows and uneven surfaces to new panels |
| Warranty & Longevity | Maximizes manufacturer warranty protection and lifespan | May compromise manufacturer installation specifications |
According to building science research on wall moisture barriers, managing moisture drainage planes is paramount when upgrading older walls. Trapping damp air between two layers of siding without an active drainage gap can quickly lead to accelerated structural rot.
Evaluating Substrate Damage and Hidden Decay
Older homes frequently hide decades of environmental wear beneath their outer skin. When aging wood planks or deteriorating sheet siding stay in place, installers cannot evaluate whether rainwater has bypassed old flashings to rot the structural wood sheathing beneath.
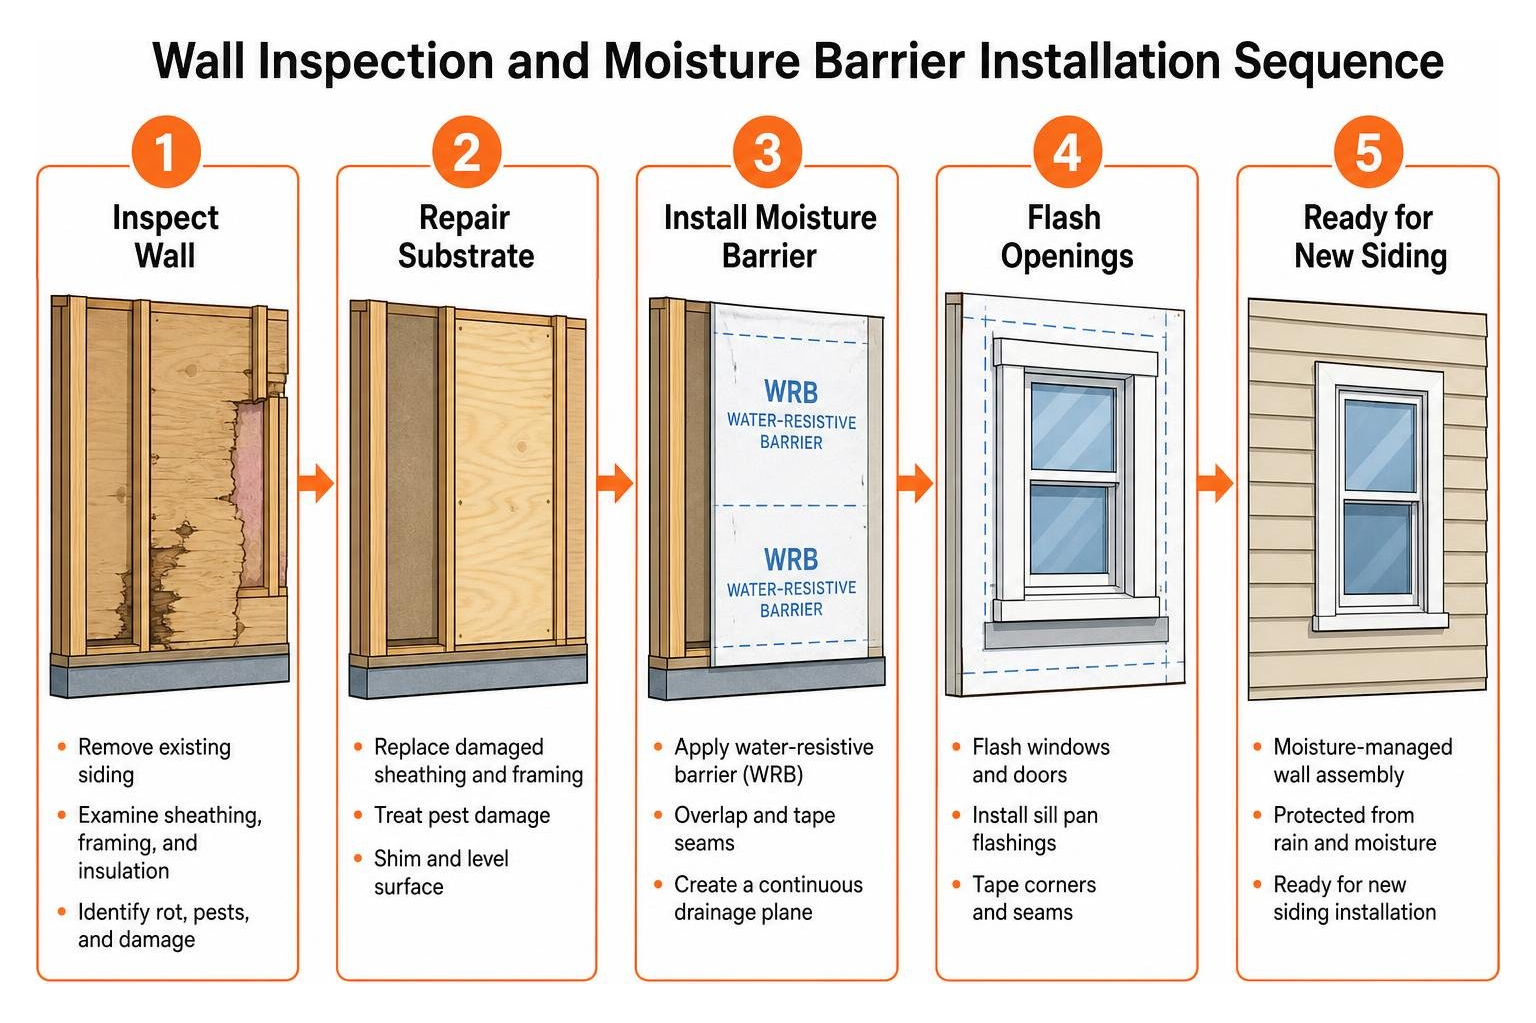
Removing the existing cladding exposes hidden pest intrusions, insect damage, rotted sill plates, and deteriorated fiberglass or cellulose insulation. It also gives professionals the opportunity to evaluate framing alignment. Older dimensional lumber studs often settle or bow over time; addressing these framing irregularities directly on the exposed sheathing ensures that the new cladding hangs straight and true without unsightly waves.
Handling Window and Door Frame Projections
A major technical challenge when adding layers to an exterior wall is managing window and door depths. Older homes were constructed with exterior casings that sit flush with a single layer of cladding.
Adding an overlay—especially when paired with continuous rigid foam insulation—builds out the wall profile significantly. This extra thickness can cause the new siding to project past the original window trim, creating water-trapping ledges and awkward aesthetics. Experienced installers solve this by building custom jamb extensions, applying custom-bent aluminum coil stock around exterior casings, and integrating integrated sill flashings. For maximum architectural harmony and weather protection, many homeowners choose coordinated window and siding upgrades to replace aging openings simultaneously with custom Pella, Andersen, or ProVia units.
What Professional Installation of New Siding on Old House Structures Involves
Upgrading an older building envelope is a meticulous engineering process, not a cosmetic cover-up. Because older structures have settled, shifted, and expanded over decades, modern cladding requires strict sequencing, precision leveling, and advanced weatherproofing.
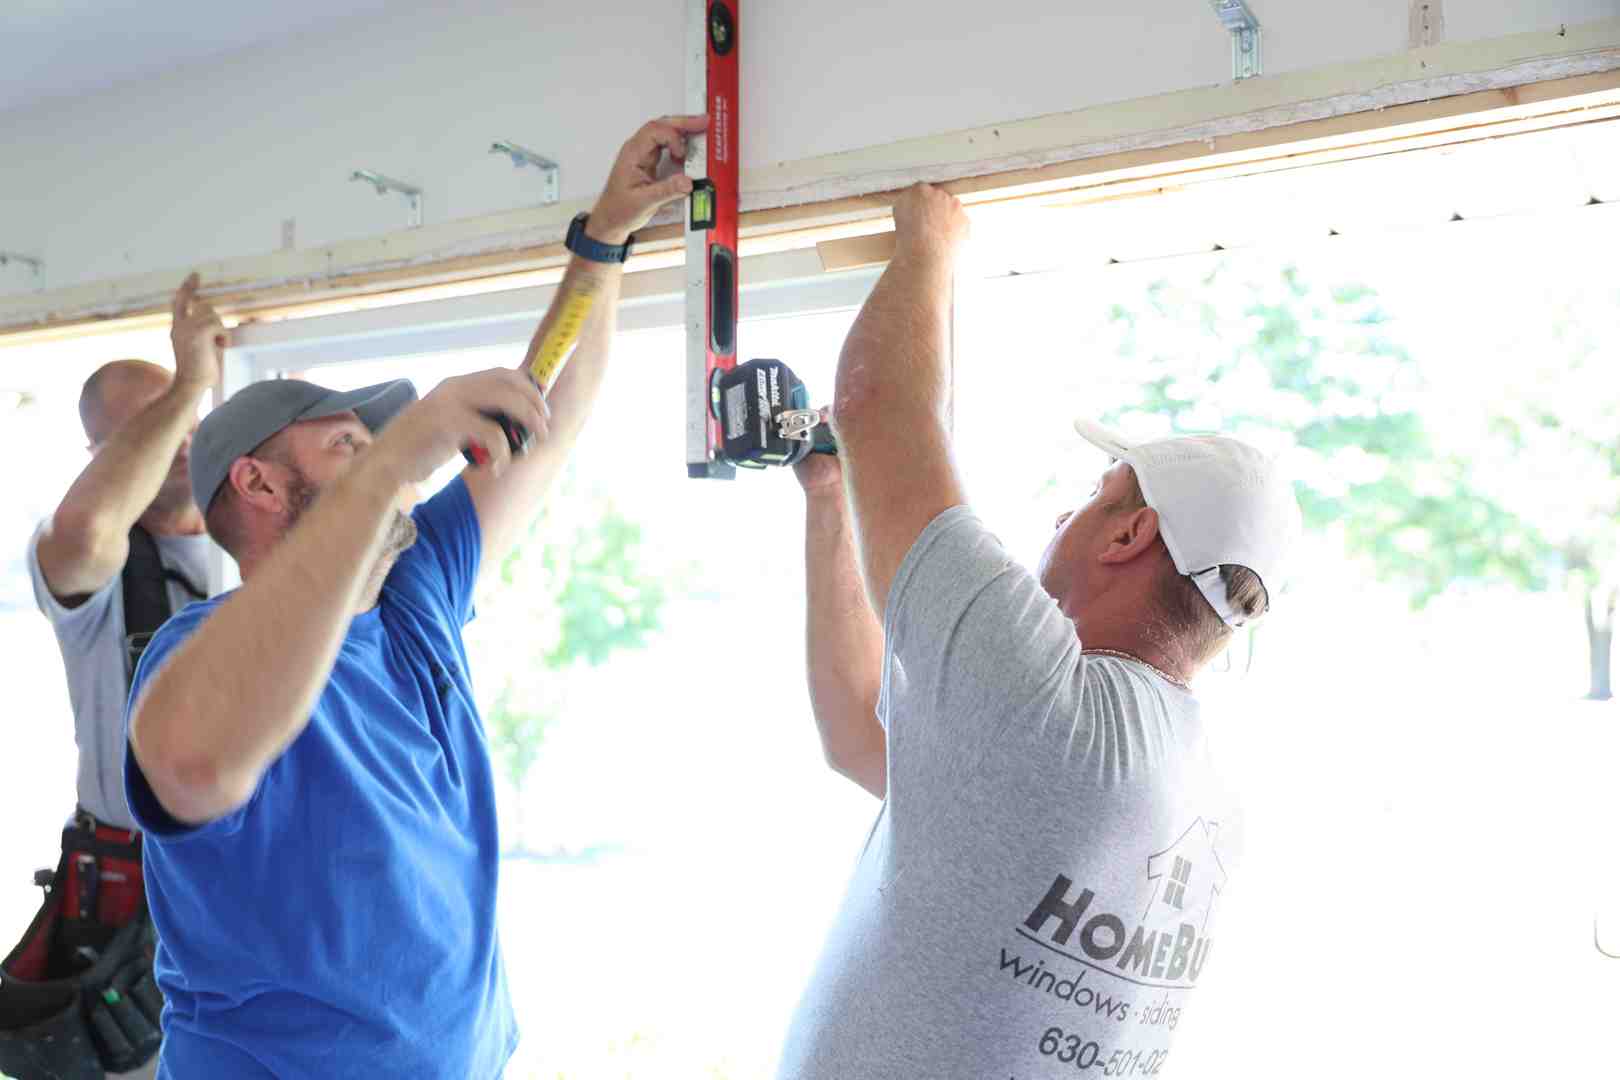
Following professional guidance on exterior siding application ensures that every layer—from framing repairs to final trim pieces—functions together as a weather-tight drainage plane.
Structural Wall Assessment: Preparing Old House Sheathing for New Siding
Once the old walls are stripped bare, installers repair any compromised plywood, oriented strand board (OSB), or original diagonal plank sheathing. Loose boards are refastened securely to the wall studs to eliminate squeaks and movement.
Next comes the critical weather-resistive barrier (WRB). The crew applies a continuous, vapor-permeable housewrap starting from the foundation and working upward, overlapping horizontal seams by several inches and taping all joints with specialized exterior seam tape. This layer allows internal water vapor to escape while preventing wind-driven rain from contacting structural wood. Pairing this barrier with contoured energy efficient vinyl siding solutions adds continuous thermal protection across the home’s exterior studs, reducing thermal bridging during bitter winter cold snaps.
Trim and Flashing: Preparing Old House Openings for Professional Siding Installation
Before hanging a single field panel, installers establish the structural perimeter and trim framework. This stage dictates the water-shedding performance and visual symmetry of the entire installation:
- Level Starter Strips: Installers snap chalk lines around the base of the home to mount heavy-duty starter strips, guaranteeing the first row of siding is level regardless of foundation settling.
- Corner Posts: Outside and inside corner posts are plumbed and fastened to receive siding ends, allowing adequate internal clearance for seasonal panel expansion.
- J-Channels & Undersill Trim: Custom J-channels are fitted around window frames, entry doors, and gable transitions. Professional installers cut integrated drip tabs at the top corners of window J-channels to divert runoff away from the frame.
- Flashing Integration: Metal drip caps are installed over all window and door heads beneath the housewrap to ensure complete gravitational drainage.
For additional insight into traditional craftsmanship and architectural detailing, exploring craftsmanship insights on architectural siding highlights the importance of water management around vintage trim profiles.
Fastening Cladding for Thermal Movement and Long-Term Durability
Vinyl and composite sidings expand and contract significantly as outdoor temperatures change. A standard 12-foot length of vinyl siding can expand as much as five-eighths of an inch across Chicago’s seasonal temperature extremes.
To prevent warping, buckling, or unhooking, professionals follow strict fastening rules outlined in our complete overview of siding replacement. Fasteners must be corrosion-resistant galvanized steel or aluminum roofing nails driven dead-center into the pre-punched nailing slots. Crucially, nails are never driven tight against the siding hem; installers leave approximately 1/32-inch to 1/16-inch of space under the nail head, allowing the panel to hang freely and glide horizontally as temperatures shift.
Material Considerations for Aging Architectural Walls
Preserving the character of a classic residential neighborhood in areas like Arlington Heights, Glenview, or Park Ridge requires selecting materials that complement historic rooflines while standing up to Midwest weather.

Homeowners can balance timeless curb appeal with modern impact resistance by exploring durable fiber cement exterior options as well as advanced vinyl and engineered wood systems.
Insulated Vinyl Systems and Profile Selections
Modern vinyl siding has evolved far beyond the thin plastics of past decades. High-grade systems feature virgin PVC resins with advanced UV inhibitors and rich color palettes designed to resist fading and thermal distortion.
Insulated vinyl siding incorporates factory-laminated, contoured rigid foam backing that supports the panel profile, dramatically improving impact resistance against hail or stray baseballs. Furthermore, completing the exterior renovation with proper soffit and fascia integration creates a continuous attic ventilation pathway that prevents winter ice dams and lowers summer cooling loads.
Traditional Wood Clapboard and Engineered Alternatives
For homeowners seeking an authentic vintage appearance on classic colonials or craftsman homes, natural cedar clapboard provides unmatched organic grain and character. However, real wood requires diligent caulking, priming, staining, or painting every few years to ward off moisture rot and carpenter bees.
Engineered wood and fiber cement planks offer an attractive alternative, delivering deep cedar woodgrain textures with dimensional stability that resists rot, pests, and fire. These materials hold paint coatings significantly longer than traditional timber, providing classic curb appeal without demanding continuous exterior upkeep.
Frequently Asked Questions About Siding Older Homes
Is it acceptable to install new siding directly over old siding?
While overlaying new siding over sound, flat wood siding is technically permitted in some non-structural situations, full removal is strongly recommended for older homes. Stripping old cladding is the only way to inspect the underlying sheathing for hidden water damage, carpenter ants, and dry rot. It also allows installers to apply modern housewrap and flashing, preventing moisture traps that could void new siding warranties.
How do installers accommodate thermal expansion during installation?
Installers accommodate thermal movement by driving fasteners through the exact center of the panel’s pre-slotted nailing hem without setting the nail head tight against the vinyl. Panels are hung rather than pinned, and a minimum 1/4-inch expansion gap (widened to 3/8-inch when installing in freezing temperatures) is maintained inside all corner posts and J-channel trim tracks.
What surface preparation is required before hanging new cladding?
Surface preparation involves removing previous cladding, replacing rotted plywood or plank sheathing, refastening loose substrate to wall studs, and applying a continuous water-resistive barrier with taped seams. Installers also flash all door and window perimeters, shim uneven framing surfaces, and mount dedicated starter strips and trim receivers before hanging the first siding course.
Conclusion: Transforming and Protecting Your Historic Exterior
HomeBuild Windows, Doors & Siding is a locally owned Chicago-area contractor serving homeowners since 2004—over 20 years. Every project is installed exclusively by in-house crews, never subcontractors, and owner Steve Mlynek visits and supervises every job site. Credentials include Elite Platinum Pella Certified Contractor, Andersen Premier Certified Contractor, Angi Super Service Award 2025, 2025 Nextdoor Neighborhood Faves Winner, and 4.9 stars from 220+ Google reviews. Each installation includes a 10-year labor warranty and a complimentary VIP Protection Plan lasting 1, 2, or 5 years depending on project size; schedule a free estimate through HomeBuild’s contact page.