Why Vinyl Soffit Installation Matters for Your Home
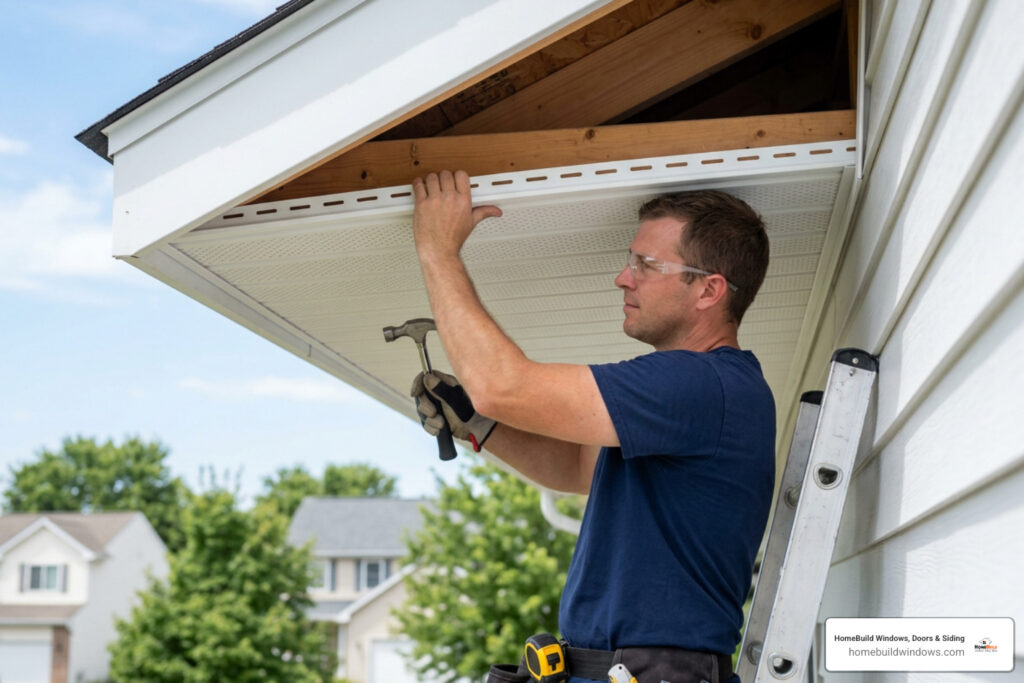
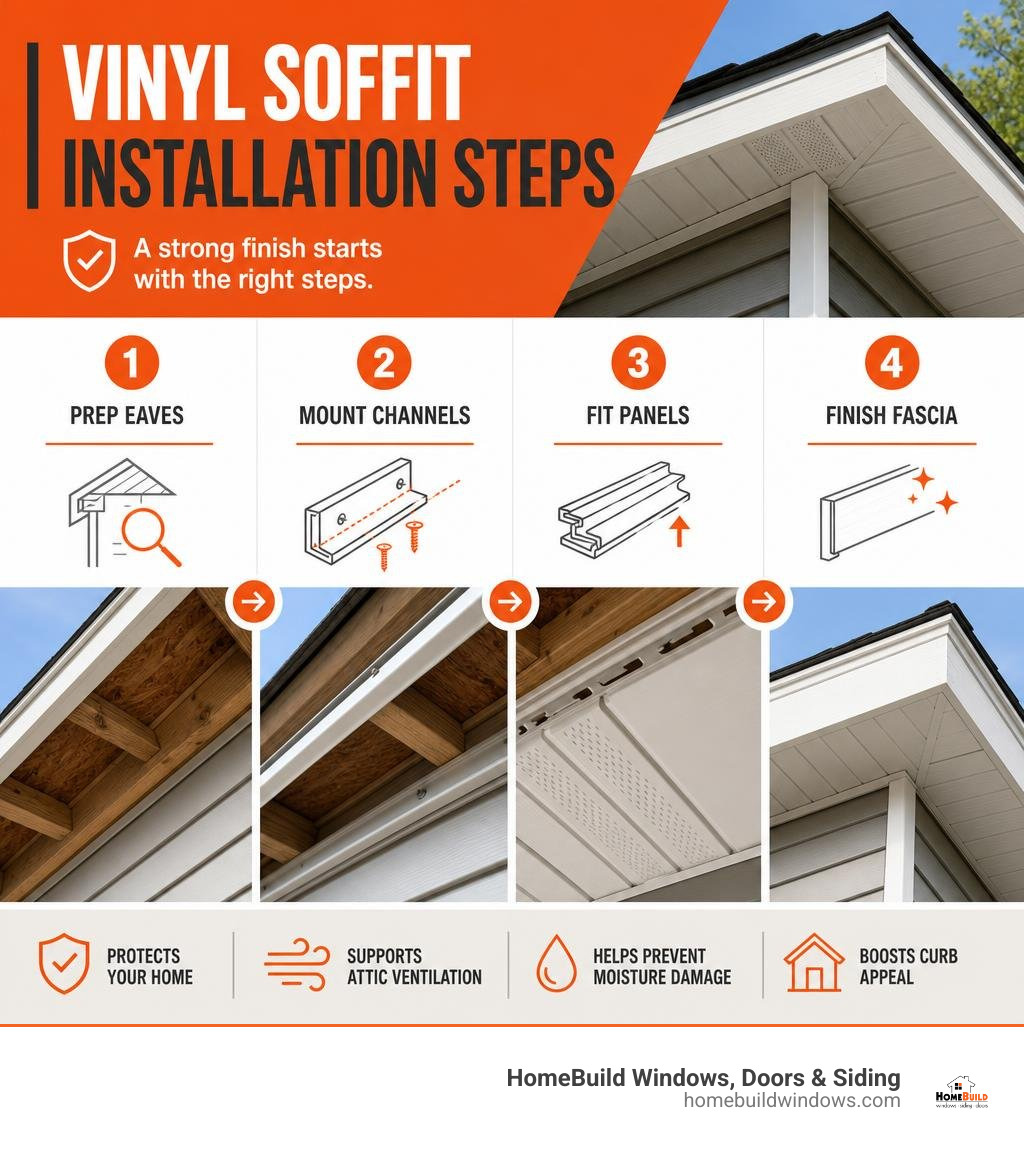
Vinyl soffit installation closes and protects the underside of a roof overhang while helping fresh air enter the attic. The basic process is to inspect and repair the eave area, install J-channel or F-channel receivers, cut panels slightly short for temperature movement, lock the panels into place, and finish with fascia trim.
- Choose the right panel: Solid panels provide a clean finish; vented or center-vented panels support attic airflow.
- Prepare the eaves: Repair rot, secure loose materials, and add nailing strips where the span needs support.
- Leave room for movement: Vinyl expands and contracts with changing Chicago-area temperatures, so panels and nails cannot be installed too tightly.
- Finish the system: Proper channels, fascia covers, and ventilation details help prevent moisture issues, pest entry, and premature exterior damage.
Soffit is more than a finishing detail. It shields exposed rafters, supports a polished siding installation, and works with roof exhaust vents to move air through the attic. Whether your home has open rafters or an enclosed wood soffit, careful installation protects durability, ventilation, and curb appeal.
I’m Steve Mlynek, founder of HomeBuild Windows, Doors & Siding, with more than 20 years of experience guiding Chicago-area exterior projects, including siding and vinyl soffit installation. As a licensed and insured contractor and Elite Platinum Pella Certified Contractor, I believe the best results start with sound preparation and precise details.
Learn more about vinyl soffit installation:
- how to install home siding in 5 simple steps
- the ultimate guide to vinyl siding options and installation
- residential siding contractors that won’t leave you hanging
Understanding Vinyl Soffit Types and Attic Ventilation Requirements
Before picking up a hammer or cutting a single panel, we need to look at how vinyl soffits fit into the broader envelope of your home. The underside of your roof overhang (the eave) does far more than hide exposed structural rafters. It establishes the baseline elevation for wall siding and inside or outside corner posts, while acting as the primary intake manifold for your home’s attic ventilation system.
When we evaluate standard home construction across Chicagoland, we frequently encounter drafty, uninsulated attics affected by trapped humidity during cold Midwest winters. Without continuous airflow under the roof deck, warm interior air rises into the attic space, condenses against cold roof sheathing, and leads to structural rot, mold growth, or destructive ice damming. Installing proper vinyl soffits prevents these issues by allowing cool exterior air to enter through the eaves, pushing warm, moist air out through roof ridges or gable vents.
All reputable manufacturers, adhering to ASTM D4756 (the standard practice for installation of vinyl siding and soffit), emphasize that soffit panels must be integrated with surrounding exterior components like siding and aluminum trim. Following an official Installation Guide ensures that your home achieves optimal Net Free Vent Area (NFVA) while remaining protected against wind-driven rain and nesting pests. If you are coordinating soffit upgrades with broader exterior remodeling, review our walkthrough on how to install home siding in 5 simple steps to see how these systems lock together seamlessly.
Solid vs Vented Panels
Choosing the right vinyl soffit profile comes down to balancing ventilation needs with weather exposure. Manufacturers engineer soffit panels in three distinct styles:
- Solid Vinyl Soffit Panels: Featuring a smooth or subtle wood-grain embossment without perforations, solid panels are used primarily in areas that do not require attic intake airflow. We frequently install solid vinyl panels along deep porch ceilings, covered entryways, or gable overhangs (rakes) where attic venting is unnecessary. Solid panels offer maximum rigidity and block wind-driven rain from entering non-ventilated ceiling cavities.
- Fully Vented Vinyl Soffit Panels: Built with micro-perforations across the entire panel surface, fully vented soffits maximize air intake. They are essential for homes with small roof overhangs or low-slope roof pitches where every square inch of intake space counts toward meeting regional building code ventilation minimums. Modern “invisible vent” designs provide high Net Free Vent Area while maintaining the clean look of solid panels from ground level.
- Center-Vented Vinyl Soffit Panels: These panels feature a triple-four or double-five profile where only the middle channel contains perforations, flanked by solid outer strips. Center-vented soffits offer a balanced aesthetic and are ideal for standard 12-to-24-inch eave spans across traditional single-family homes, keeping moisture levels balanced without compromising panel stiffness.
Essential Tools and Materials for Vinyl Soffit Installation
Completing a clean, durable vinyl soffit installation requires specialized hand tools and exterior-grade hardware designed to withstand thermal expansion. Here is the foundational inventory we rely on:
- Vinyl Soffit Panels: Selected in solid, vented, or center-vented profiles based on your roof’s ventilation design.
- Receiving Channels (F-Channel and J-Channel): Extruded vinyl channels that support panel edges against the exterior wall and subfascia board.
- H-Bar / Double Receiving Channels: Heavy-duty trim channels used to join panels cleanly along diagonal corner miters or long porch ceiling spans.
- Corrosion-Resistant Fasteners: Aluminum, stainless steel, or hot-dipped galvanized roofing nails with a minimum 5/16-inch head diameter and 1/8-inch shank. Fasteners must penetrate solid framing wood by at least 3/4 inch (or 1-1/4 inches overall per structural siding standards).
- Cutting Tools: A circular saw equipped with a fine-tooth blade mounted in reverse (12 to 16 teeth per inch) for smooth crosscuts, along with straight-cut aviation snips for detail work around corners.
- Layout and Safety Gear: Chalk line, spirit level, measuring tape, protective eyewear, and stable scaffolding or ladders.
If your existing soffit area exhibits sagging wood or water damage, pairing your panel replacement with a broader siding installation replacement project ensures that subfascia boards, flashing, and wall framing are fully rehabilitated before installing new vinyl components.
Step-by-Step Vinyl Soffit Installation Guide

Whether you are retrofitting open eave rafters or enclosing a porch ceiling, executing a professional vinyl soffit installation comes down to controlling thermal movement. Because rigid PVC expands and contracts significantly with seasonal outdoor temperature swings, panels and channels must be installed floating rather than pinned tightly.
As outlined in How to Install a Vinyl Soffit – Fine Homebuilding, proper preparation and precision cutting prevent panel bowing, buckling, or dislodging during severe Midwest windstorms.
Step 1: Eave Preparation and Nailing Strip Setup
Before unboxing vinyl materials, inspect the underside of your roof overhang. Look for water stains, soft or rotted subfascia wood, loose rafter tails, or old pest entries. Replace damaged lumber completely, as vinyl soffit serves as protective cladding rather than a structural fix for rotted timber.
Next, evaluate the framing structure under your eaves:
- Open Eave Framing: If your roof features exposed rafter tails without a wood ceiling enclosure, inspect the span between the exterior wall and the subfascia board. If the overhang span exceeds 16 inches, building code requires intermediate support. We install 2×2 or 2×4 nominal wood nailing strips along the wall and along the inner face of the subfascia.
- Establishing Elevation: Using a spirit level, transfer the bottom height of the subfascia board over to the exterior wall. Snap a straight chalk line along the wall studs to establish a perfectly level plane for mounting receiving channels. Fasten a continuous 2×2 wood nailer strip along this chalk line using 10d common nails driven into wall studs.
Step 2: Receiver Channel Mounting (J-Channel & F-Channel)
With nailing strips securely fastened, attach the receiving channels that anchor the edges of your soffit panels. F-channel is the standard choice against flat exterior walls because its angled leg fastens directly to the face of your wooden nailer while creating a receiving slot for the panel end. J-channel can also be used against existing wall trim or corner transitions.
Follow these strict fastening guidelines:
- Fastener Positioning: Drive nails straight through the center of the factory-punched nailing slots. Never nail through the vinyl material itself.
- Fastener Clearance: Leave roughly 1/32 to 1/16 inch of space between the fastener head and the vinyl flange—approximately the thickness of a dime. The channel must slide freely back and forth to accommodate weather changes.
- Fastener Spacing: Space fasteners every 8 to 12 inches along receiving channels. In recognized high-wind zones, keep fastener spacing strictly at 8 to 10 inches on center.
- Corner Gaps: Where channel ends meet inside corners or wall intersections, leave a 1/4-inch expansion gap between adjacent channel runs.
Step 3: Measuring, Cutting, and Thermal Expansion Allowances
Measuring vinyl soffit requires calculating proper expansion gaps. Rigid vinyl contracts in freezing Chicagoland winters and expands under summer heat. Cutting panels too long causes them to buckle upward when temperatures rise.
Measure the distance from the back inside pocket of the wall-mounted channel to the inside pocket of the outer subfascia channel (or subfascia wood face). Then apply these precise subtractions:
- Standard Measurement Deduction: Subtract 1/2 inch overall from your span measurement. For instance, if the total distance between channel pockets measures 18 inches, cut your soffit panel to exactly 17-1/2 inches. This leaves a 1/4-inch expansion gap inside each channel pocket.
- Temperature Tactics: If installing in cold conditions (below 40°F), vinyl is fully contracted. Cut panels slightly longer (3/8 inch short of full span) to ensure panel ends remain seated inside channels when cold weather persists. In extreme summer heat (above 90°F), vinyl is pre-expanded; cut panels up to 5/8 inch short of full span to avoid summer warping.
- Clean Cutting Technique: Clamp multiple panels together on a flat cutting table and use a miter saw fitted with a fine-tooth circular saw blade installed backward. Push the saw blade slowly through the material to produce smooth, burr-free edges without chipping the vinyl.
Step 4: Installing and Locking Soffit Panels
With your panels measured and cut, begin installation at one end of the eave run, working sequentially along the side of the house:
- Insertion: Slide the wall end of the soffit panel deep into the wall-mounted F-channel or J-channel, then swing the outer end into the subfascia receiver trim.
- Interlocking Lock Mechanism: Push the tongue hem of the second panel into the buttlock groove of the previous panel. Push upward until you feel and hear the continuous interlocking factory lock snap into place along the full length of the joint.
- Fastening Panels: Align the panel perpendicular (90 degrees) to the wall line. Drive a corrosion-resistant trim nail through the center of the pre-punched nail slot along the panel’s outer edge into the wood subfascia or outer nailer strip. Just as with channels, leave a dime’s thickness of clearance beneath the nail head so the panel can move laterally.
- Intermediate Support: On eave spans wider than 16 inches, secure the panel to the intermediate wood nailing strip by driving a nail through the center nail slot provided along the panel profile.
Step 5: Corner Transitions, Gable Peaks, and Fascia Finishing
Turning corners cleanly and capping the outer roof edge completes the system. As highlighted in Vinyl Soffit Installation: Your Handy How-To Guide | HowStuffWorks, proper corner mitering and fascia capping protect vulnerable end-grain framing from moisture intrusion while delivering crisp architectural lines.
- Mitered Corner Joints: Where two eave runs meet at a 90-degree corner, install a double-receiving H-bar (or two J-channels mounted back-to-back) diagonally from the wall corner to the outer fascia corner. Cut soffit panels at precise 45-degree angles to create a professional mitered pattern. Remember to subtract 1/4 inch from mitered cuts to allow for diagonal expansion.
- Gable Peak Transitions: Along gable end rakes, mount J-channels back-to-back down the center slope or bend a custom soffit panel across the peak angle using a sheet metal brake.
- Fascia Cover Application: To protect subfascia boards, install pre-formed aluminum or vinyl fascia covers over the outer wood face. Hook the bottom lip of the fascia cover under the bottom leg of the F-channel or soffit panel lock. Fasten the fascia cover by driving painted stainless steel trim nails into the bottom return leg no more than 24 inches on center. Never face-nail fascia covers tightly through the vertical front plane.
Post-Installation Finishing Touches and Long-Term Maintenance
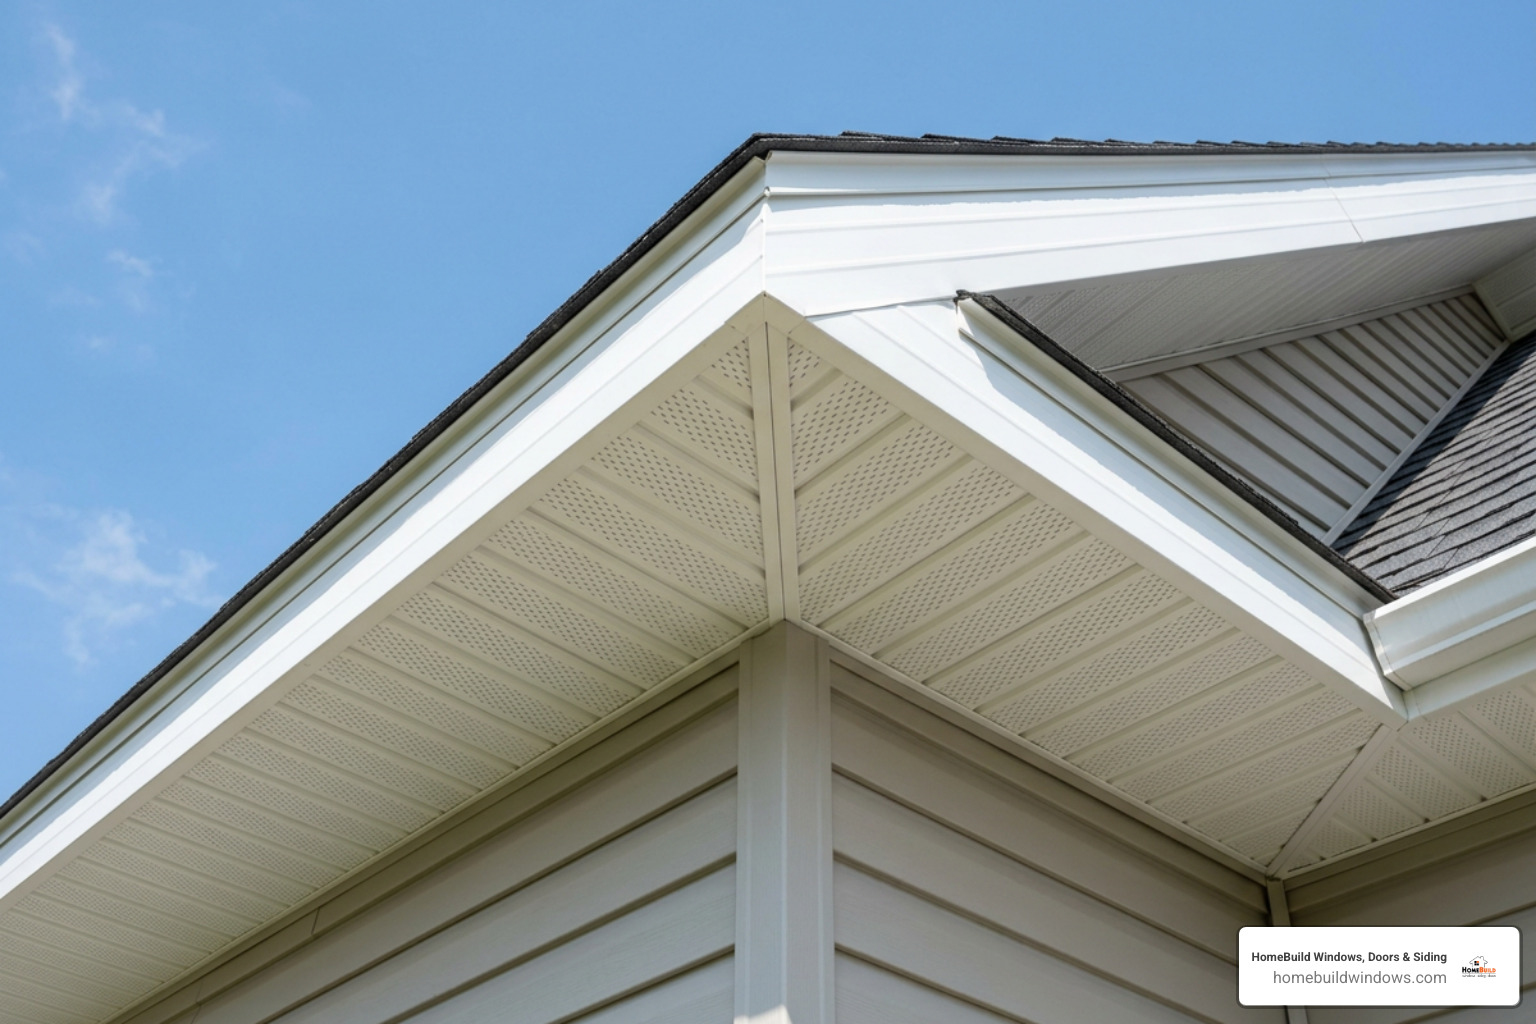
Once your vinyl soffit installation is complete, inspect the work from ground level and up close. Ensure every panel lock is fully engaged, all channel end gaps remain open for movement, and no nails are driven tightly against vinyl flanges.
Vinyl soffit is renowned for low maintenance, but routine care keeps it looking new:
- Annual Wash: Clean the undersides of eaves once a year to remove dust, spiderwebs, and airborne dirt. Use a soft-bristle wash brush connected to a garden hose along with a mild household detergent solution. Avoid pointing high-pressure power washers directly up into vented soffit perforations, which can blast water into your attic space.
- Vent Clearing: Periodically inspect vented soffit channels to ensure dust, bird nesting material, or blown-in attic insulation isn’t blocking perforations. Unobstructed vents maintain continuous attic airflow.
- Gutter and Flashing Audit: Inspect surrounding roof flashings, gutters, and downspouts each spring and fall. Overflowing gutters spill water into subfascia boards and behind receiving channels, compromising the underlying wood structure. If your existing trim shows signs of rot or decay, explore our dedicated services for fascia soffit and guttering replacement near me to restore full system integrity.
When to Call Professionals for Vinyl Soffit Installation
While straightforward single-story eave runs can be tackled by experienced DIYers, many residential soffit projects present significant structural and safety challenges. We strongly recommend contacting our expert installation team at HomeBuild Windows, Doors & Siding when facing:
- Multi-Story Homes & Steep Pitches: Working on extension ladders or high staging 20 to 30 feet above ground requires professional scaffolding, fall-protection harnesses, and experienced crew coordination.
- Extensive Subfascia Rot: Discovering rotted rafter tails, decayed roof decking, or structural framing damage requires professional carpentry to rebuild load-bearing elements before soffit panels can be installed safely.
- Complex Roof Geometry: Homes with multiple hip roofs, turret corners, non-standard gable angles, or integrated porch ceilings benefit from custom-bent aluminum trim and mitered H-bar joinery.
- Integrated Siding and Insulation Upgrades: If you are updating wall cladding, window wrapping, or attic insulation simultaneously, hiring a full-service contractor ensures that moisture barriers, starter strips, and soffit receivers are layered correctly. Review our localized guidance on hiring a certified siding contractor in chicago to ensure your home improvement project is completed correctly.
Frequently Asked Questions About Vinyl Soffit
What Expansion Clearance Is Needed When Installing Vinyl Soffit Panels?
Standard vinyl soffit rules call for subtracting 1/2 inch overall from your measurement between the back of the wall channel and the fascia channel. This creates a 1/4-inch expansion gap at each panel end inside the receiving pockets.
When installing in cold winter weather (below 40°F), vinyl is contracted, so you should leave up to 3/8 inch clearance per end. In hot summer weather (above 90°F), vinyl is already expanded, so leaving a 1/4-inch overall gap is sufficient. Always leave a 1/32-inch space under fastener heads so panels can slide freely.
Can vinyl soffit panels be installed directly over existing wooden soffits?
Yes, vinyl soffit panels can be installed over existing wood soffits (enclosed eaves), provided the underlying wood is structurally sound, flat, and free of rot. Before installing vinyl over old wood soffits:
- Inspect the wood thoroughly for moisture damage, mold, or decay, replacing any soft sections.
- Secure all loose wooden boards, trim, or moulding.
- If installing vented vinyl soffit to improve airflow, cut large ventilation openings into the existing solid wood soffit board first. Covering solid wood with vented vinyl without cutting holes will block attic air intake.
What is the difference between J-channel and F-channel?
Both are extruded receiving channels used to hold soffit and siding panel edges, but their shapes and installation positions differ:
- F-Channel: Shaped like the letter “F”, this trim features an extra mounting flange that fastens directly to the wall face or wood nailer. The perpendicular channel receives the soffit panel end. F-channel is the standard receiver installed against open eave walls.
- J-Channel: Shaped like the letter “J”, this versatile receiver features a single mounting flange and hook pocket. It is used against existing wall trim, inside corners, gable rakes, and window or door perimeters where an open side receiving slot is required.
Conclusion
A correct vinyl soffit installation is one of the most effective ways to protect your roof eaves, safeguard your attic against moisture and rot, and give your home’s exterior a clean finish. By selecting the right combination of solid and vented panels, setting up straight receiving channels, and strictly observing thermal expansion gaps, you ensure that your home stays beautiful and properly ventilated through severe Midwest winters and hot summers.
At HomeBuild Windows, Doors & Siding, we specialize in high-performance exterior remodeling for homeowners throughout Chicago and the surrounding northwest suburbs. Whether you need complete soffit and fascia replacement, energy-efficient window upgrades, custom entry doors, or premium siding installation, our team delivers top-quality products, expert installation, and exceptional customer service.
As a trusted, locally owned contractor with over 20 years of experience, we bring unmatched attention to detail to every project. Our commitment to excellence is backed by top industry credentials, including being an Elite Platinum Pella® Certified Contractor, Andersen Certified Contractor, Angi Super Service Award winner, Nextdoor Neighborhood Fave, fully licensed and insured, and backed by over 200 positive Google reviews from satisfied local homeowners.
Ready to improve your home’s curb appeal, energy efficiency, and structural protection? Contact our friendly team today to schedule your consultation and get a free estimate for your project. Learn more about our comprehensive home exterior solutions by visiting our specialized page on siding installation chicago.