How to Put Up House Siding
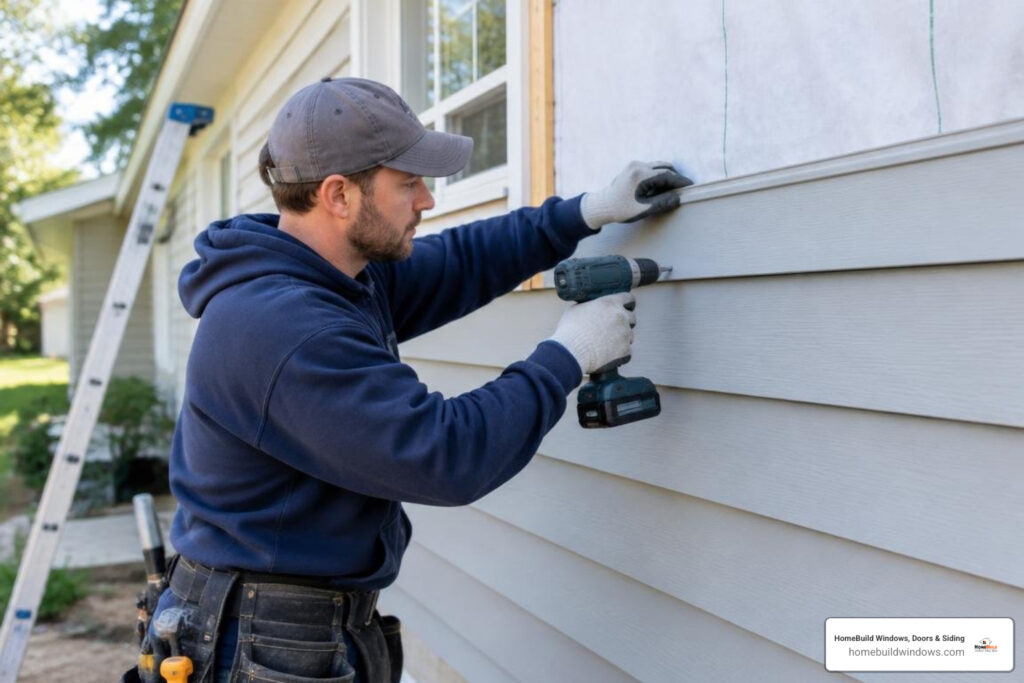
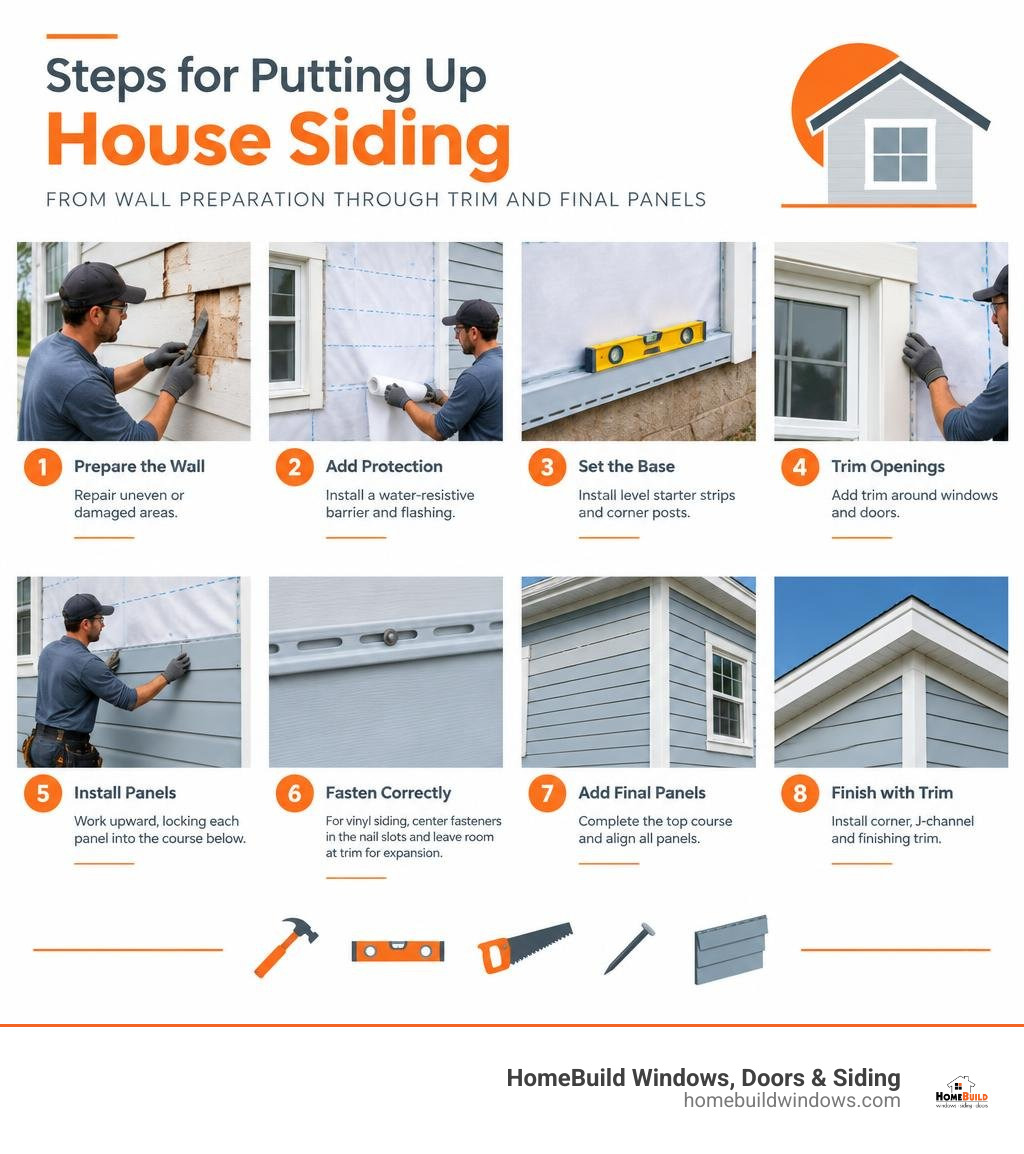
Putting up siding involves preparing the wall surface, installing a water-resistive barrier and flashing, setting level starter strips and corner posts, trimming around windows and doors, and working upward so each panel locks into the course below. For vinyl siding, professional installers center fasteners in the nail slots and leave room at trim so panels can expand without buckling.
The sections below cover the tools, trim, panel layouts, and finishing details that go into a durable exterior.
I’m Steve Mlynek, founder and CEO of HomeBuild Windows, Doors & Siding, a locally owned, licensed, and insured Chicago-area contractor serving homeowners since 2004. I supervise every project and bring more than 20 years of exterior remodeling experience to putting up siding.
Putting up siding vocab to learn:
Essential Rules and Tools for Putting Up Siding
Putting up siding across Chicagoland requires precise engineering. Our region experiences extreme temperature swings, from sub-zero winter chills to humid summer heat waves. Because exterior cladding expands and contracts continuously, understanding material physics is the foundation of durable craftsmanship. Vinyl siding can expand or contract 1/2 inch or more over a standard 12-foot-6-inch panel length. If cladding is fastened tightly against the wall, it cannot move, which leads to unsightly ripples, warping, and premature failure.
Industry benchmarks like ASTM D3679 and standard INSTALLATION MANUAL guidelines require leaving a minimum of 1/4 inch of clearance at all openings, corner channels, and stops during mild weather. When installing panels in temperatures below 40°F, that clearance must increase to 3/8 inch to account for future thermal expansion.
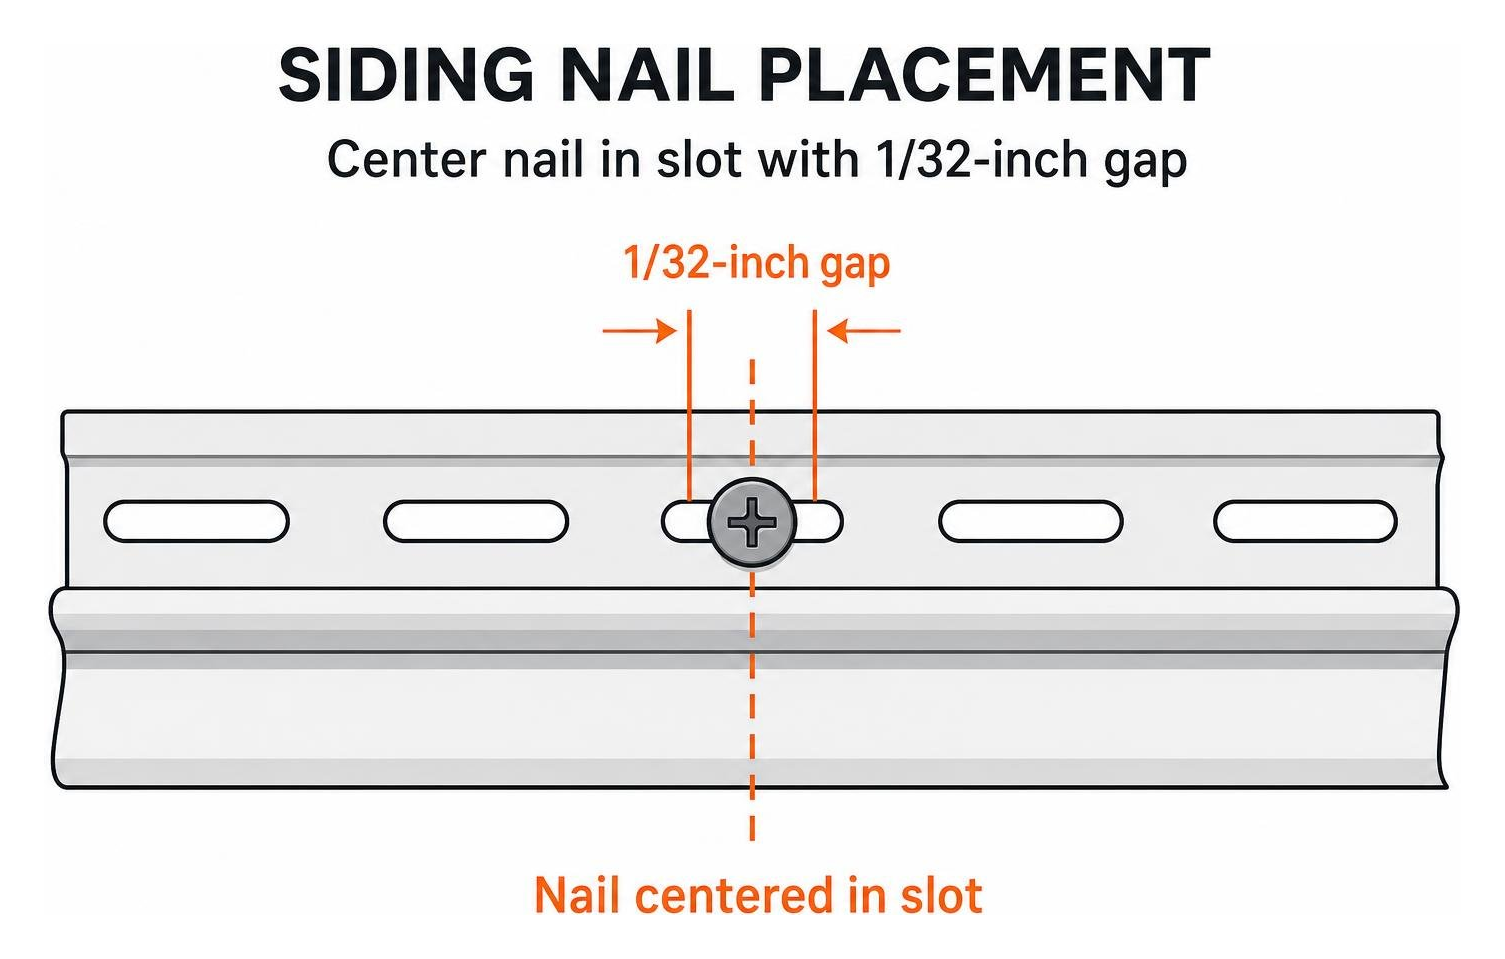
Fastening Standards and Material Expansion
The most critical rule when putting up siding is to hang the panels rather than pinning them in place. Fasteners must always be driven straight and level into the exact center of the factory pre-punched nailing slots. Installers maintain a 1/32-inch gap—roughly the thickness of a dime—between the fastener head and the vinyl hem.
Fastener spacing varies depending on the profile, material, and structural substrate:
| Material / Profile | Fastener Spacing | Expansion Clearance at Openings | Key Fastening Requirement |
|---|---|---|---|
| Horizontal Vinyl Siding | 12 to 16 inches on center | 1/4″ (3/8″ below 40°F) | Centered in slots; 1/32″ head clearance |
| Vertical Vinyl Siding | 12 inches on center | 1/4″ (3/8″ below 40°F) | First nail at top of upper slot; rest centered |
| Vinyl Accessories & Trim | 8 to 10 inches on center | 1/4″ at channel ends | Fasten securely without over-driving |
| Steel Siding Panels | 16 inches on center | 1/16″ gap into channels | Min. 3/4″ penetration into framing |
| Steel Board & Batten | 12 inches on center max | 1/16″ into J-channel / Z-flashing | Top nail in top slot; remainder centered |
For steel siding, the expansion rate is approximately 1/16 inch per 12-foot panel over a 100°F temperature shift. Nails must penetrate studs or solid wood sheathing by at least 3/4 inch to withstand heavy Lake Michigan wind loads.
Essential Tools for Putting Up Siding Efficiently
Professional siding crews rely on dedicated trade tools to ensure clean cuts, secure interlocking, and smooth finishes:
- Snap Lock Punch: Punches raised horizontal tabs along the cut edges of siding panels so they lock securely into finish trim under eaves and window sills.
- Nail Hole Slot Punch: Creates elongated fastener slots in trimmed panels where factory slots were cut away, preserving the panel’s ability to slide.
- Zip Lock Tool (Sideswipe): Unhooks and re-engages interlocks when inspecting wall barriers, replacing damaged courses, or securing tricky transitions.
- Siding Cutters & Aviation Snips: Specialized compound snips allow quick, clean cuts through vinyl and metal trim profiles.
- Circular Saw with Reverse Fine-Tooth Blade: Running a high-tooth plywood blade in reverse produces smooth, clean cuts through vinyl panels without cracking cold material.
Wall Preparation and Installing Base Trim Components
A beautiful exterior depends entirely on what lies underneath. Whether outfitting a classic Chicago brick bungalow, a two-flat in the city, or a suburban colonial in Schaumburg or Arlington Heights, proper substrate preparation is essential.
The International Residential Code (IRC) requires a continuous, code-compliant weather-resistive barrier (WRB) over all exterior wall sheathing before cladding is installed. Vinyl and steel siding shed bulk rainwater, but they function as a rainscreen rather than a completely waterproof membrane. Reviewing proper exterior wall preparation explains why sheathing seams are taped, rotted wood is replaced, and window flanges are sealed with self-adhering flashing tape before the first panel goes up.
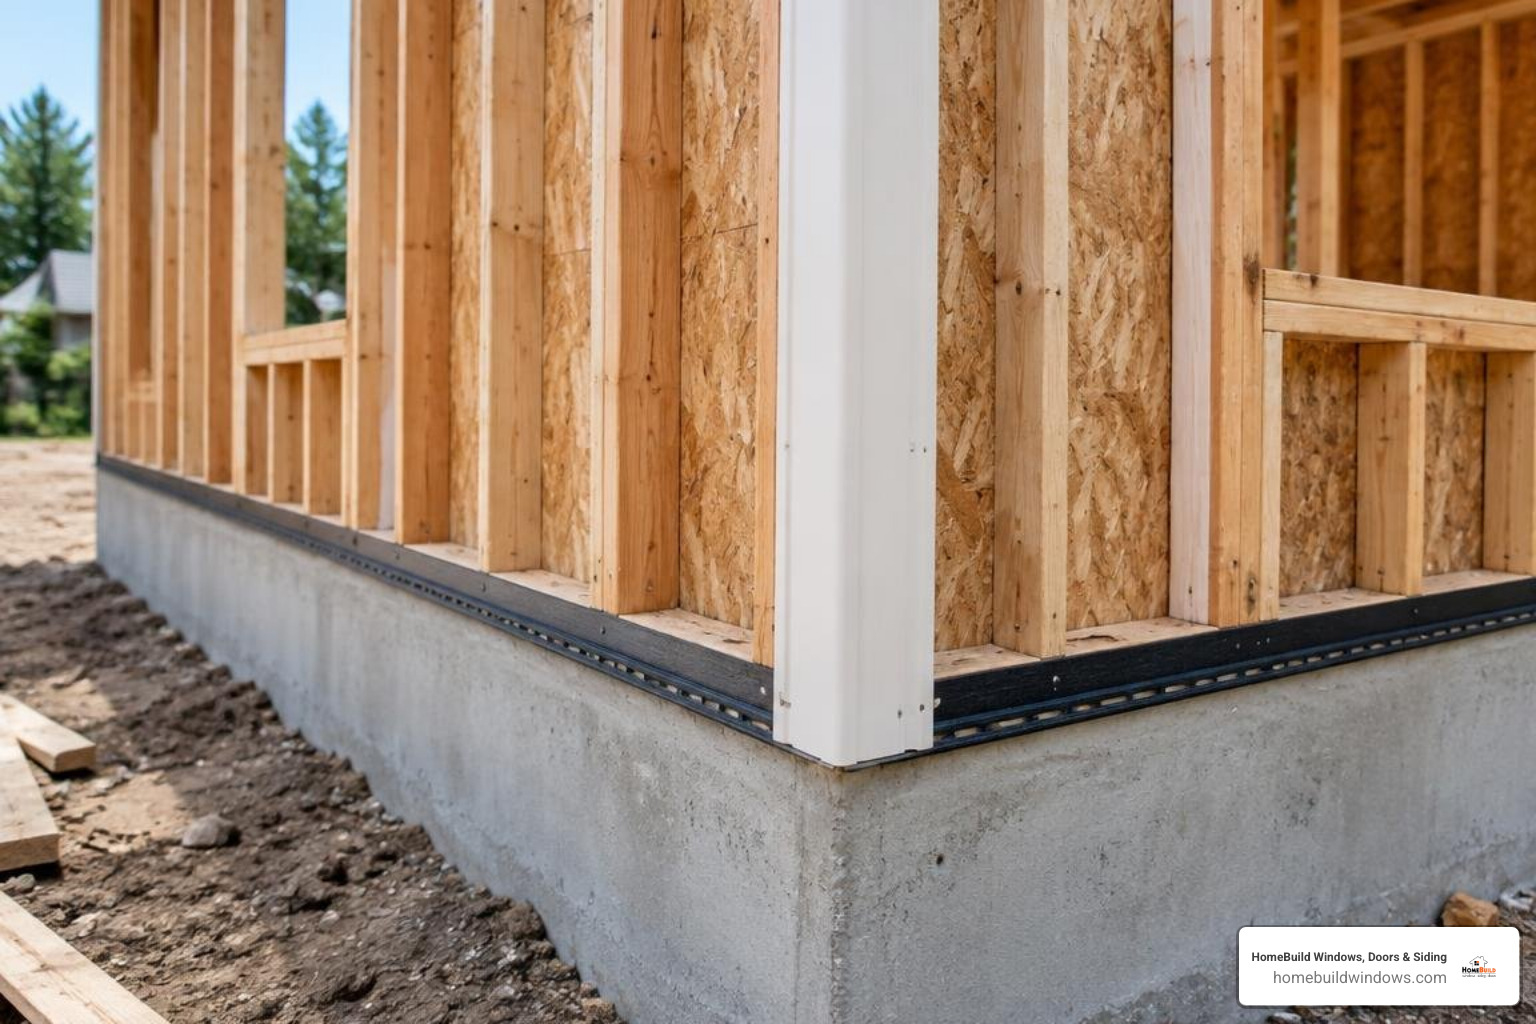
Setting Starter Strips and Corner Posts
The starter strip establishes the baseline for the entire building. If this initial element is out of level, every subsequent course will magnify the error up to the roofline. Professional installers find the lowest corner of the existing framing, strike a crisp level chalk line around the perimeter, and align the top of the starter strip with that reference. For vinyl, corrosion-resistant fasteners are placed every 10 inches into structural studs; for steel, starter strips are secured at 12-inch intervals with at least 6 inches of clearance above finished ground level. A 1/4-inch space between adjoining starter sections prevents buckling.
Inside and outside corner posts are plumbed so they hang freely from the top fastener, with all remaining fasteners centered in the slots every 8 to 12 inches. Corner posts extend 3/4 inch below the starter strip to shield the foundation joint.
Flashing and J-Channel Integration Around Openings
Windows and entry doors require integrated water management. Integrated trim pieces, such as J-channels, frame openings and conceal raw cut panel edges.
Before side and top J-channels are installed, the window sill is protected with sill flashing and drip caps protect the head casing. The bottom J-channel is cut flush with the window frame, side channels are left with extra material at the top and bottom to create drainage tabs, and the top J-channel is notched and mitered so water running down the wall bypasses the window casing and drains down the face of the WRB.
Installing Horizontal, Vertical, and Metal Siding Panels
Once the trim network is plumb, level, and flashed, field panels go up quickly. Every panel interlocks along its bottom edge with the panel below and is fastened through the top hem.
Engage each panel firmly into the locking bead below without pulling upward with excessive force. Stretched vinyl causes smile-shaped distortions across the wall and binds the sliding mechanism. Overlap horizontal lap joints by 1 inch for vinyl and approximately 1/2 inch for steel panels. Stagger vertical seams by at least 2 to 3 feet between courses, and direct factory overlap edges away from primary sightlines, such as front entryways or backyard patios. Choosing professional siding installation and replacement ensures seams stay weather-tight against severe Midwestern windstorms.
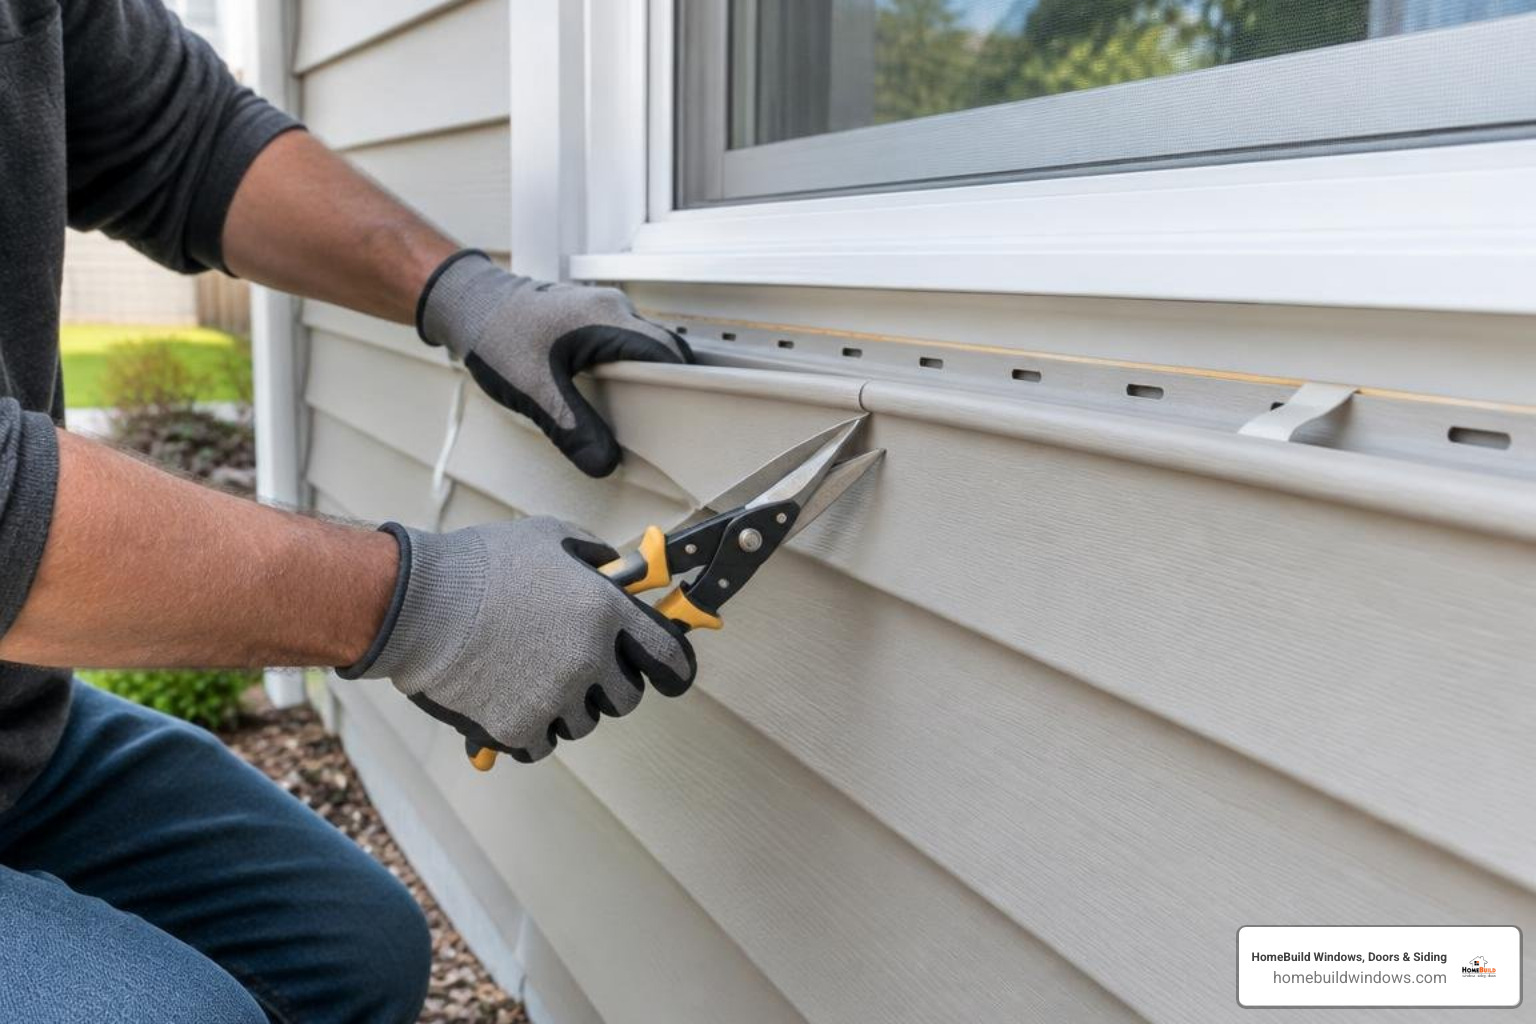
Pro Techniques for Putting Up Siding Around Obstacles
Siding around utility penetrations, exterior hose bibbs, electrical boxes, and window sills demands meticulous custom fitting:
- Window Sill Transitions: Measure the distance from the last full siding lock to the underside of the window sill, subtracting 1/4 inch for clearance. Cut the panel, then use a snap lock punch to create outward-facing tabs every 6 inches along the cut edge. Slide this edge into an undersill utility trim strip fastened beneath the sill. The punched tabs lock into the trim without visible face nails.
- Fixture Cutouts: Never wedge siding tight against pipes or meter bases. Install split mounting blocks with built-in J-channels around pipes and conduits to allow clean expansion room and create a neat, weather-tight perimeter.
Installing Vertical Panels and Steel Board and Batten
Vertical siding and modern steel board-and-batten profiles offer striking architectural accents for split-levels and ranches.
When installing vertical siding, plumb the initial panel carefully. Unlike horizontal siding, vertical panels are hung by placing the first fastener at the top of the highest nail slot, with all remaining fasteners centered at 12-inch intervals. Where vertical courses meet lower horizontal walls or foundations, install horizontal transition bands with Z-flashing to shed water away from underlying joints. Maintain a 1/16-inch expansion gap inside steel J-channels to ensure panels never bow or telegraph stress ripples, as outlined in the manufacturer Installation Guide.
Soffit, Fascia, and Specialized Siding Transitions
The roofline structure ties the exterior siding package into an integrated attic ventilation system. Properly installed eaves and overhangs protect roof rafters from driven rain and rot.
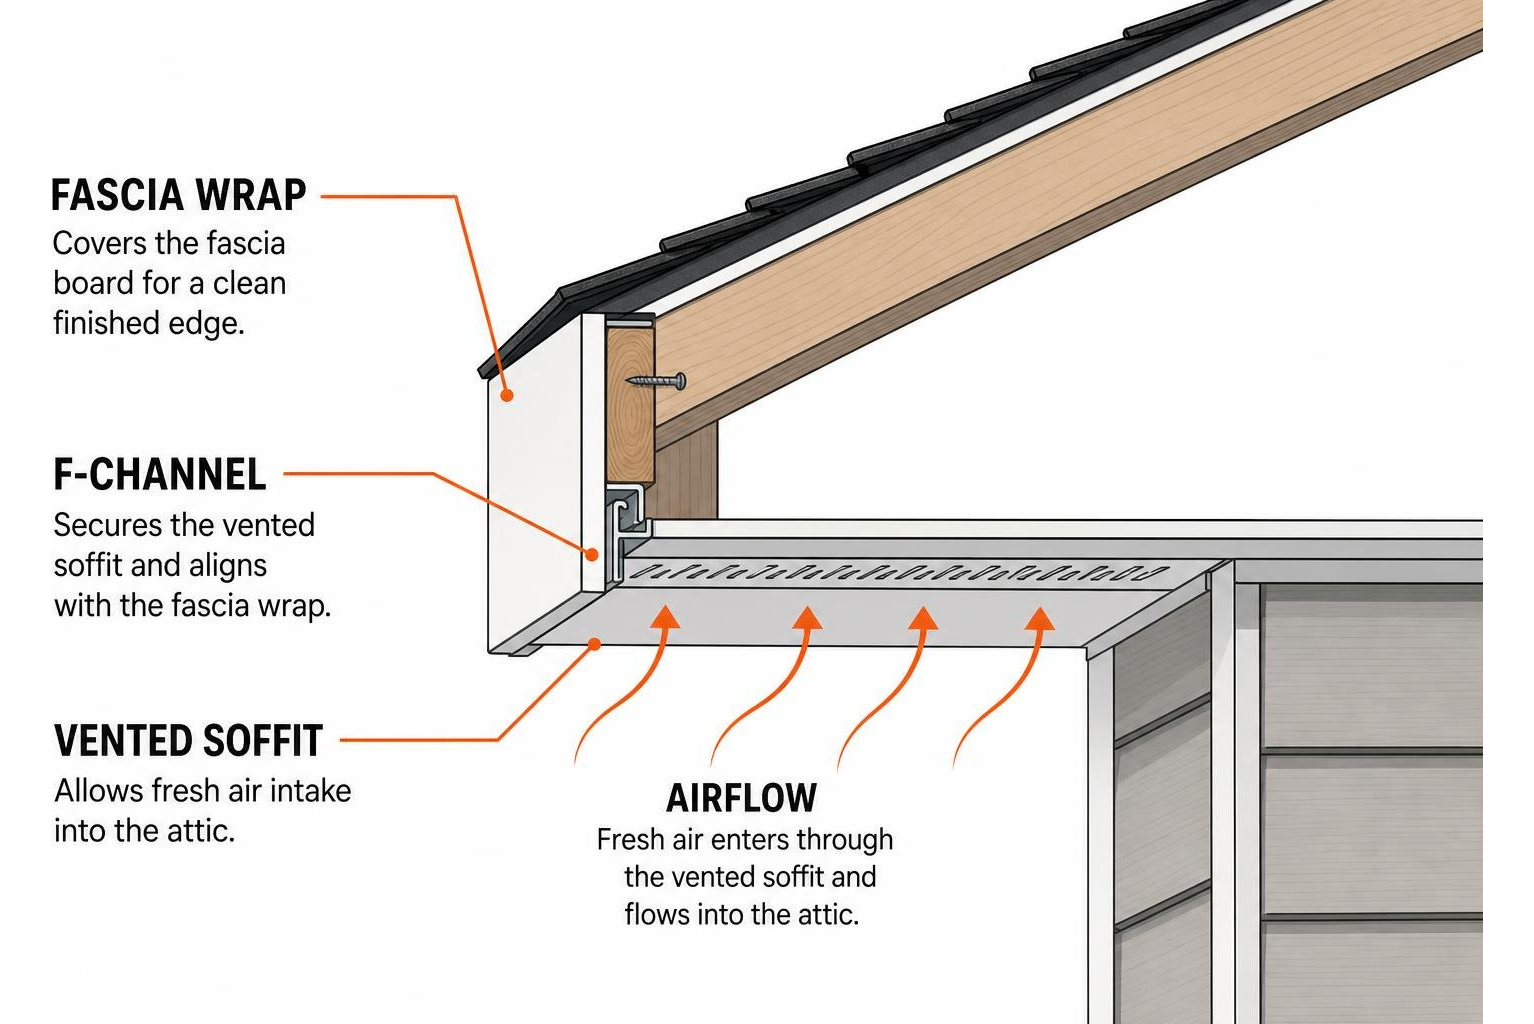
Gable End Layout and Eaves Termination
Gable walls require panels cut at steep angles that match the roof pitch. J-channel runs along the underside of the rake board, and each panel is measured, marked, and cut to follow the roofline while allowing the standard 1/4-inch expansion gap inside the J-channel.
At the very top of a horizontal wall, the final course is ripped to width and secured into finish trim nailed at the roofline. This top-course transition is one of the most common places for water intrusion when it is not handled correctly, which is why professional installation matters for long-term performance.
Overhang Finishing and Ventilation Integration
Installing high-performance eaves involves coordinating structural trim:
- Receiving Channels: F-channel or back-to-back J-channel is fastened along the wall and the inner face of the sub-fascia board.
- Soffit Panels: Perforated vented soffit panels are cut 1/4 inch short of the total span and slid into the receiving channels.
- Continuous Airflow: Balanced soffit ventilation allows fresh air into the attic, which prevents winter ice dams and lowers cooling loads during humid Chicago summers. Learn more about installing vinyl soffit and fascia to protect your roofline.
- Fascia Wrap: Structural wood fascia is covered with custom-bent aluminum coil wrap, tucked securely under the roof drip edge.
Maintenance, Panel Replacement, and Job Site Safety
Modern exterior cladding requires very little ongoing maintenance. An annual wash using a soft-bristle brush, garden hose, and mild household detergent keeps colors vibrant and washes away urban soot. High-pressure power washers should never be pointed upward into panel weep holes, as this can force moisture behind the weather-resistive barrier.
If a stray tree branch or severe hail damages a siding panel, a professional repair involves releasing the interlock between the damaged panel and the course above, removing the fasteners, and sliding a matching replacement panel into place. The replacement is fastened with centered nails that leave a 1/32-inch gap, and the upper panel’s locking leg is re-engaged over the new nail hem. This process requires a zip lock tool and a careful touch to avoid cracking surrounding panels or compromising the weather-resistive barrier.
Professional siding crews also observe OSHA ladder and scaffolding safety standards on the job site, wear safety glasses when scoring, cutting, or fastening materials, and keep heat sources like outdoor grills at least 10 feet away from exterior walls to prevent heat damage.
Frequently Asked Questions About Siding Installation
What space should be left between siding nails and panels?
Installers should leave roughly 1/32 inch—about the thickness of a dime—between the fastener head and the siding panel’s nail hem. Fasteners must never be driven tight against the siding. Leaving this small gap allows the cladding to slide freely as temperatures rise and fall, preventing thermal buckling and surface waviness.
Can you install new siding over existing exterior cladding?
While siding can sometimes be installed over old cladding using vertical furring strips or contoured fanfold insulation, stripping down to the original wall sheathing is the preferred approach. Removing old materials allows installers to inspect the framing for hidden rot or pest damage and ensures a seamless weather-resistive barrier and flashing system.
How do you cut siding panels cleanly?
Vinyl siding panels are cleanly cut using a circular saw equipped with a fine-tooth plywood blade mounted backward, which prevents chipping. For small cutouts and notches around windows and fixtures, aviation tin snips or a utility knife used to score and snap the material work best.
Conclusion
Putting up siding correctly protects your home against intense Midwest weather, boosts curb appeal, and improves energy efficiency. HomeBuild Windows, Doors & Siding is a locally owned, licensed, and insured contractor serving the Chicago area since 2004. With over 20 years of exterior remodeling experience, every project is owner-supervised by Steve Mlynek to ensure top-tier craftsmanship and lasting protection.
To discuss your home exterior project or schedule a free consultation with our team, contact expert Chicago siding installation specialists at https://homebuildwindows.com/contact/ today.