


Why a Leaking Roof Demands Action — Not Excuses
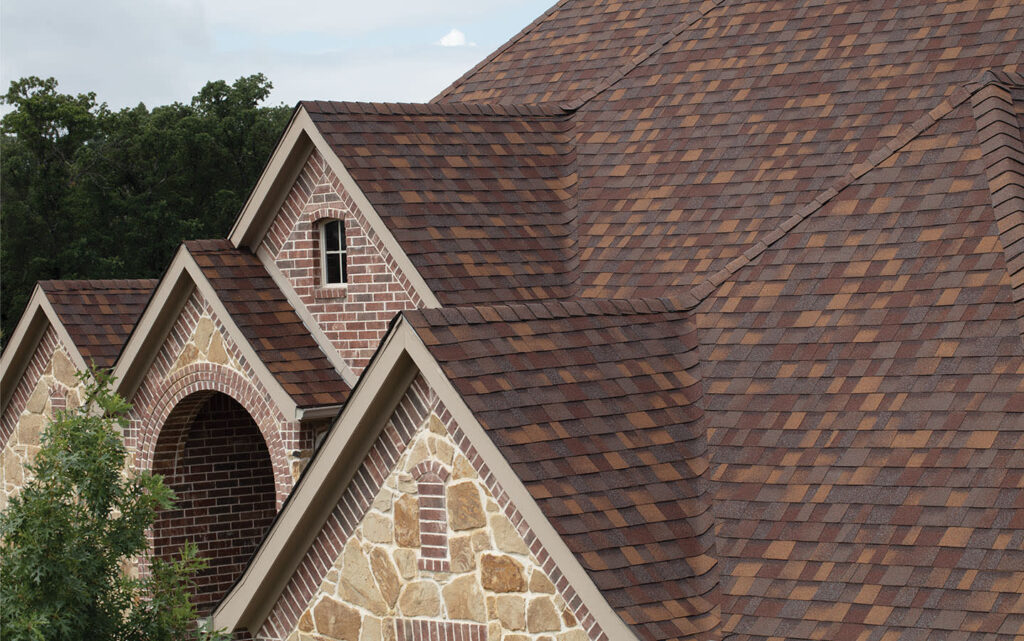
Asphalt shingle roof replacement is one of the most important home improvement decisions you’ll make as a homeowner — and one of the most common. Asphalt shingles cover more than 70% of American homes, making them the go-to roofing material for good reason: they’re durable, low-maintenance, and built to last 20 to 30 years.
But shingles do fail. And when they do, water finds a way in — fast.
Here’s what you need to know right away:
Quick Answer: Asphalt Shingle Roof Replacement — The Essentials
- When to act: Replace when shingles are curling, cracking, missing, or your roof is 20+ years old
- DIY vs. professional: Small, localized damage (a few shingles) can be a DIY fix; widespread damage requires a pro
- Two-layer rule: Building codes allow a maximum of 2 shingle layers — after that, a full tear-off is required
- How long it takes: Most professional replacements are completed in 1 to 3 days
- Best time to replace: Late spring through early fall, when temperatures stay above 40°F for proper shingle sealing
- ROI: A new asphalt shingle roof returns roughly 60% to 70% of its value when you sell your home
Whether you’ve spotted a few damaged shingles after a Midwest storm or you’re staring at a water stain spreading across your ceiling, this guide walks you through exactly what to do — from quick DIY repairs to knowing when it’s time to call in a professional.
Chicago winters are brutal on roofs. Freeze-thaw cycles, ice dams, and heavy snow loads accelerate shingle wear faster than in milder climates. Catching damage early — and acting on it — is what separates a simple shingle swap from a full deck replacement.
I’m Steve Mlynek, CEO and founder of HomeBuild Windows, Doors & Siding, with over 20 years of experience helping Chicago-area homeowners protect and improve their homes — including guiding hundreds of asphalt shingle roof replacement projects across the northwest suburbs. In this guide, I’ll share what I’ve learned so you can make smart, confident decisions about your roof.
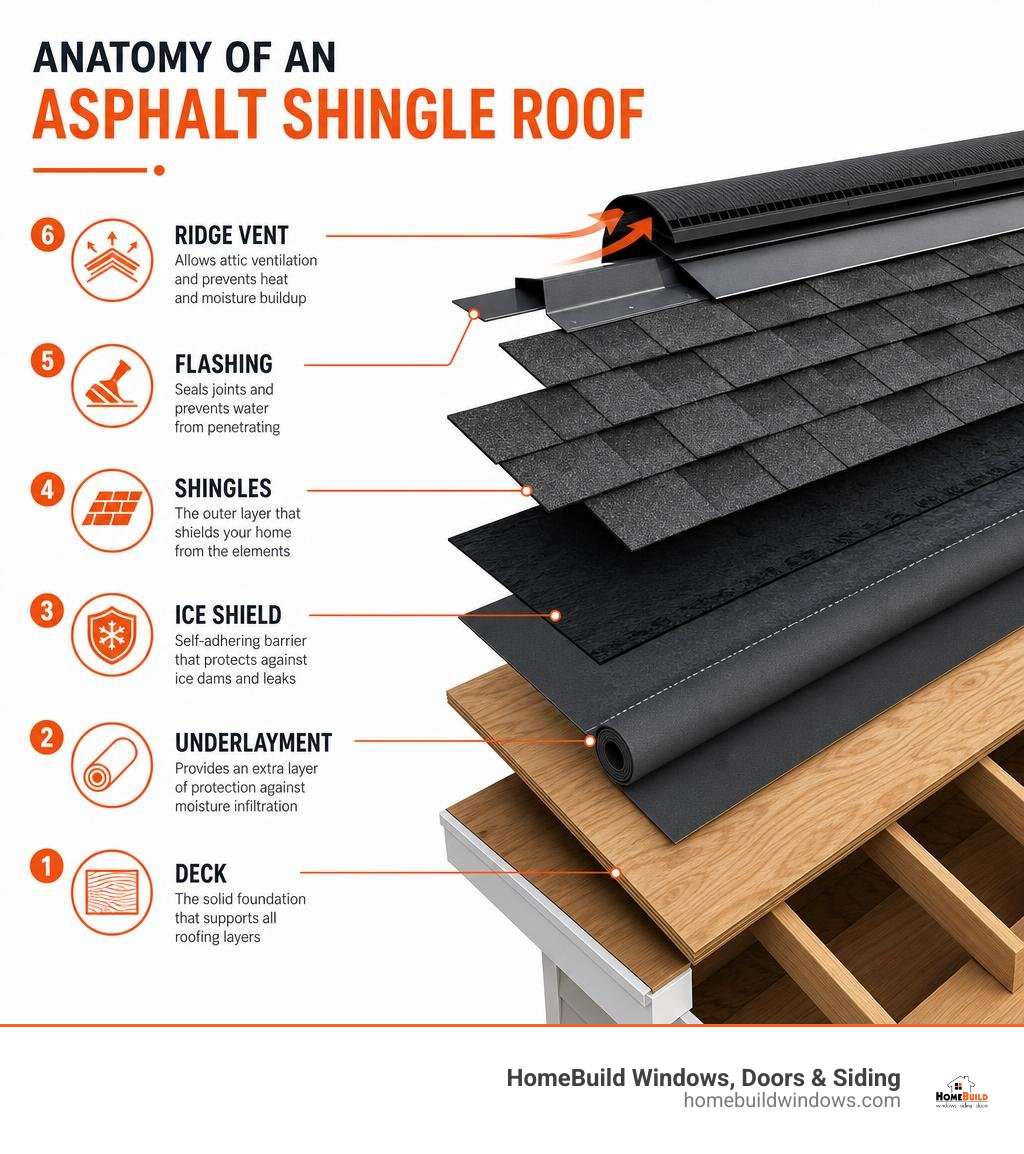
Basic asphalt shingle roof replacement terms:
When to Choose DIY Repair vs. Full Asphalt Shingle Roof Replacement
Every homeowner eventually faces the classic dilemma: should you patch up the roof yourself, or is it time to bring in the pros for a complete overhaul? The answer depends heavily on three factors: the age of your roof, the extent of the damage, and the climate you live in.
In the Chicagoland area, our roofs must endure blistering summer heat, heavy spring rains, and freezing winter blizzards. This constant thermal expansion and contraction can age shingles prematurely. If your roof is approaching the 20-year mark, the shingles are likely reaching the end of their functional lifespan. At this stage, attempting localized DIY repairs is often just a temporary band-aid on a system that is fundamentally worn out. The asphalt becomes brittle, the granules wear away, and the shingles lose their flexibility, making them highly susceptible to wind uplift and cracking.
For younger roofs, however, localized damage is a prime candidate for a DIY fix. If a recent windstorm peeled back two or three shingles on an otherwise healthy ten-year-old roof, replacing those specific pieces is a straightforward afternoon project. On the other hand, if a major storm has damaged more than 20% to 25% of the total roof surface, localized patching is no longer practical. In those situations, you need professional intervention to ensure your home remains completely water-tight. For more details on localized fixes, explore our guide on Expert Roof Repair Services Protecting Your Home from the Elements.
Warning Signs Your Roof Needs Immediate Attention
Before climbing up a ladder, you need to know exactly what to look for. Roof damage isn’t always as obvious as a giant hole or a fallen tree branch. Often, the warning signs are subtle, developing slowly over several seasons.
Here are the critical warning signs that indicate your roofing system is failing:
- Granule Loss: Take a look inside your gutters after a heavy downpour. Do you see piles of coarse, sand-like material? These are protective mineral granules. When shingles lose their granules, the underlying asphalt is exposed to direct sunlight and UV rays, which rapidly degrades the material.
- Curling or Cupping Shingles: As shingles age and dry out, their edges start to curl upward (cupping) or their centers begin to bulge (clawing). This prevents them from lying flat, leaving your roof highly vulnerable to wind damage and rain infiltration.
- Interior Water Stains: Check your attic and top-floor ceilings. Water stains, peeling paint, or mold growth on rafters are clear indicators of active leaks.
- Sagging Roof Deck: If you notice a wavy or dipping roofline from the street, this is a major structural warning sign. A sagging deck usually means moisture has rotted the underlying plywood sheathing, requiring immediate professional reconstruction.
If you spot several of these red flags, a simple patch job won’t suffice. Evaluating structural damage early is critical to preventing extensive water damage to your home’s interior and maintaining its structural integrity.
Roof Replacement vs. Roof Recover: The Two-Layer Rule
If you’ve decided that a full roof upgrade is necessary, you will have to choose between a complete “tear-off” and a “roof recover” (also known as an overlay).
A roof recover involves leaving the existing shingles in place and nailing a brand-new layer directly over them. While this might seem like a convenient shortcut, we strongly advise against it for several reasons. First, building codes in Chicago and most surrounding municipalities strictly limit residential roofs to a maximum of two layers. If your roof already has two layers of shingles, a complete tear-off is your only legal option.
Second, installing new shingles over old ones traps heat and moisture, which can shorten the lifespan of your new shingles by up to 25%. It also adds immense structural weight to your rafters and prevents the installation team from inspecting the wooden roof deck for hidden rot or water damage. A full tear-off allows us to inspect the decking, replace any soft or rotted boards, and install modern waterproofing barriers. To understand how this decision impacts your home’s long-term protection, read The Ultimate Guide to Roof Replacement What Homeowners Need to Know.
Comparing Asphalt Shingles to Alternative Roofing Materials
When preparing for an exterior upgrade, it is helpful to compare asphalt shingles with other popular roofing options to see how they stack up in terms of durability, weight, and aesthetic appeal.
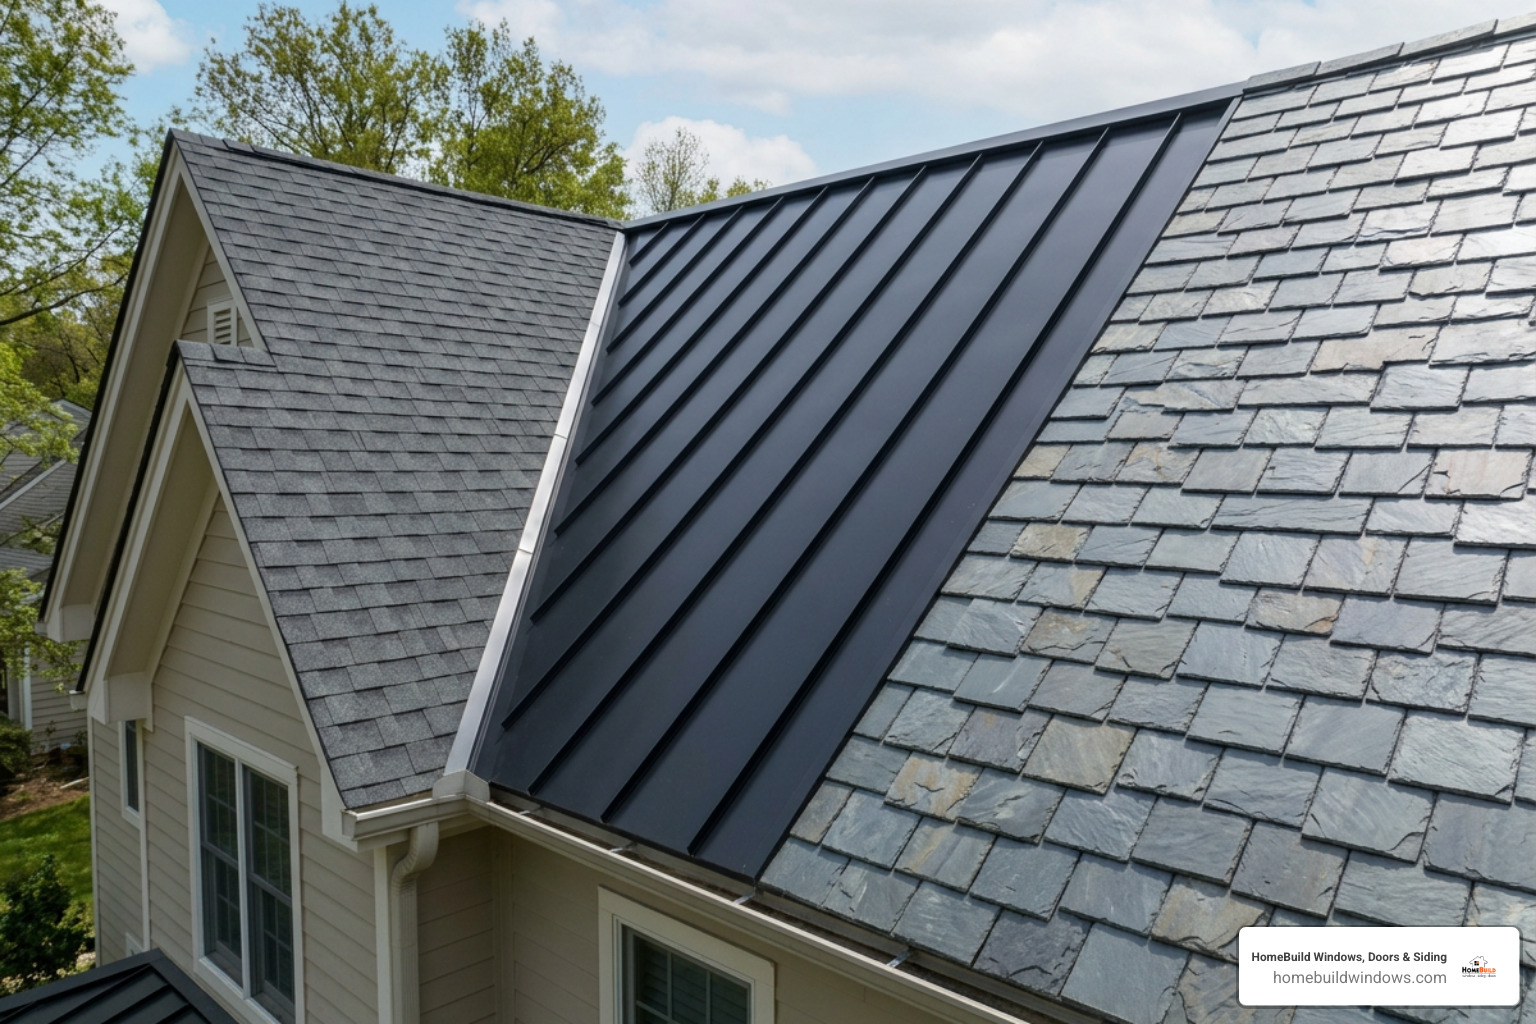
While alternative materials have their unique advantages, asphalt shingles remain the dominant choice for homeowners in northern Illinois due to their excellent balance of performance, versatility, and weather resistance.
The Pros and Cons of Asphalt Shingle Roof Replacement Options
Every roofing material comes with its own set of trade-offs. Understanding these pros and cons will help you decide if asphalt is the right path for your property.
Pros of Asphalt Shingles:
- Outstanding Versatility: They can be installed on almost any roof pitch and complement virtually any architectural style, from traditional Chicago bungalows to modern suburban estates.
- Strong Wind Resistance: Modern dimensional shingles are engineered and tested to withstand wind speeds of up to 110 to 130 mph when installed with proper nailing patterns.
- Class A Fire Rating: Most high-quality asphalt shingles carry the highest fire-resistance rating available, offering superior protection for your family.
- Low Maintenance: Unlike wood shakes, which require regular staining and chemical treatments to prevent rot, asphalt shingles require very little upkeep beyond occasional gutter cleaning.
Cons of Asphalt Shingles:
- Shorter Lifespan Than Premium Materials: While asphalt shingles last a respectable 20 to 30 years, they cannot match the 50-to-100-year lifespan of natural slate or premium standing seam metal systems.
- Vulnerability to Extreme Heat Cycles: Rapid temperature swings — like going from a freezing Chicago morning to a sunny afternoon — can cause shingles to expand and contract, slowly degrading the material over time.
For a comprehensive comparison of how different materials perform over decades of service, consult the Complete Roof Replacement Guide (2026) – Planning to Completion | ShinglesCalculator.
Comparing 3-Tab, Architectural, and Luxury Shingles
If you choose asphalt, you will need to select from three primary categories: 3-tab, architectural (also called dimensional), and luxury (premium) shingles.
| Shingle Type | Typical Lifespan | Wind Resistance Rating | Aesthetic & Curb Appeal |
|---|---|---|---|
| 3-Tab Shingles | 15–20 Years | Up to 60 mph | Flat, uniform, traditional appearance |
| Architectural | 25–30 Years | 110–130 mph | Textured, multi-dimensional wood-shake look |
| Luxury / Premium | 30–50+ Years | 130+ mph | Thick, heavy-duty slate or hand-split shake replica |
3-tab shingles are the traditional option, recognizable by their flat, single-layer design. However, architectural shingles have become the industry standard, representing the vast majority of modern installations. They feature multiple layers of laminated fiberglass and asphalt, creating a beautiful dimensional shadow line that mimics the look of natural wood shakes. Luxury shingles are even thicker and heavier, designed to replicate the elegant look of natural slate while offering maximum impact and wind resistance.
Step-by-Step Guide: How to Replace Damaged Shingles Yourself
If your roof is relatively young and you only have a few damaged shingles, you can tackle the repair yourself. However, safety must always be your top priority.

Before you begin, evaluate your roof’s pitch (steepness). If your roof has a steep slope, or if you do not feel comfortable working at heights, do not risk it — call a professional. Always work on a clear, dry day. Shingles become brittle in cold weather (below 40°F) and can crack easily, while extremely hot days can make the asphalt too soft, causing you to scuff the protective granules with your boots.
Tools and Materials Needed for Shingle Repair
To complete a clean, professional-grade repair, gather the following tools before heading up the ladder:
- Replacement Shingles: Try to match the brand, style, and color of your existing shingles. If you don’t have spare shingles left over from your original installation, you can bring a damaged piece to a local supplier to find a close match.
- Flat Pry Bar (Roofing Pry Bar): Essential for carefully breaking the sealant bonds and pulling nails without tearing surrounding shingles.
- Utility Knife: For trimming shingles to size.
- Roofing Nails: Use 1-1/4 inch galvanized steel roofing nails.
- Asphalt Roofing Cement (Sealant): To seal down the new shingle tabs.
- Hammer: A standard claw hammer or specialized roofing hatchet.
The DIY Shingle Replacement Process
Follow these steps carefully to ensure a seamless, leak-proof repair:
- Locate and Assess: Identify the damaged shingle. You will need to remove the damaged shingle as well as the nails holding it in place. Because shingles overlap, the nails securing the damaged piece are actually located under the shingle directly above it.
- Break the Adhesive Seal: Slide your flat pry bar gently under the tabs of the shingle directly above the damaged one. Gently wiggle the bar to break the factory sealant bond. Do the same for the damaged shingle itself.
- Expose and Remove the Nails: Lift the tabs of the shingle above to expose the nail heads. Slide the pry bar under the nail head, pop it up slightly, and then pull the nail out from the top. You will need to remove four to six nails to free the damaged shingle.
- Slide Out the Old Shingle: Once all the nails are removed, gently slide the damaged shingle down and out.
- Prep and Insert the New Shingle: Slide your new replacement shingle up into the empty slot. Make sure it aligns perfectly with the shingles on either side.
- Secure with New Nails: Lift the overlapping shingle tabs and drive new galvanized roofing nails into the designated nail line of the new shingle. Avoid nailing into the exact same holes as before; shift the nails slightly to ensure a tight grip in the wood deck.
- Re-seal the Tabs: Apply a few dime-sized dabs of asphalt roofing cement under the tabs of both the new shingle and the shingle above it. Press them down firmly to ensure a strong, wind-resistant seal.
Following these steps carefully will help you achieve a clean, secure repair that protects your home from the elements.
Planning a Professional Roof Remodeling Project
While DIY repairs are great for minor fixes, a complete asphalt shingle roof replacement is a massive undertaking that requires professional execution. Choosing the right contractor is the most critical decision you will make.
When interviewing local roofing companies in the Chicago area, always verify that they are fully licensed, bonded, and insured. Ask for proof of both general liability insurance and workers’ compensation coverage to protect yourself from liability. Look for established local contractors with a physical office in your area, positive reviews, and a track record of quality work. For a step-by-step hiring checklist, read our guide on Choosing the Right Roofing Company A Comprehensive Guide.
Crucial Components of an Asphalt Shingle Roof Replacement
A high-performance roof is a complete engineered system, not just shingles nailed to wood. When we perform a replacement, we install several critical layers to ensure maximum protection:
- Ice and Water Shield: In our harsh Midwest climate, ice dams are a constant threat. We install a self-adhering, rubberized asphalt membrane along the eaves, valleys, and around chimneys. This creates a watertight seal that prevents water from backing up under the shingles when snow melts and refreezes.
- Synthetic Underlayment: Gone are the days of traditional felt paper. We use advanced synthetic underlayment, which is incredibly tear-resistant and provides an extra layer of moisture protection over the entire roof deck.
- Starter Shingles: Specially designed starter shingles are installed along the eave and rake edges. They have a factory-applied adhesive strip that locks down the first course of field shingles, preventing wind uplift during storms.
- Ridge Ventilation: Proper attic ventilation is essential for extending the life of your shingles and preventing ice dams. We install continuous ridge vents along the peaks of your roof, allowing hot, humid air to escape while drawing fresh air in through the soffit vents.
Preparing Your Home for Professional Roof Installation
A professional roof replacement is a highly active construction project. To ensure everything goes smoothly, you can take a few simple steps to prepare your home:
- Clear the Driveway: Move all vehicles, trailers, and garbage cans away from the house. The installation team will need easy access to the roof and space to park their materials and debris trailers.
- Protect Your Landscaping: Move patio furniture, potted plants, and delicate yard ornaments to a safe area. Professional crews will drape tarps over your bushes and flower beds to catch falling debris.
- Secure Interior Items: The constant hammering on your roof will cause minor vibrations throughout your home. Remove loose picture frames, mirrors, and delicate decorations from your walls to prevent them from falling.
- Keep Kids and Pets Indoors: Construction sites can be hazardous. Ensure children and pets remain safely inside during the installation process.
Most standard residential roof replacements are completed in just one to three days, depending on the size and complexity of your roof.
Understanding Manufacturer and Workmanship Warranties
When investing in a new roof, you want peace of mind that your investment is protected. It is important to understand the difference between the two types of warranties you will receive:
- Manufacturer Material Warranty: This covers defects in the roofing materials themselves (such as premature granule loss or cracking). Standard material warranties typically range from 25 years to lifetime, depending on the shingle line.
- Contractor Workmanship Warranty: This covers the actual installation of those materials. If a leak develops because a shingle was nailed incorrectly, the installing contractor is responsible for repairing it. Workmanship warranties can range from 2 to 10 years, though certified premium contractors can often offer extended, manufacturer-backed workmanship warranties.
Working with a certified contractor ensures your warranties remain valid and fully enforceable. To learn more about navigating these coverages, read Dont Get Soaked by Your Roof Replacement Insurance.
Frequently Asked Questions about Roof Replacement
How many layers of shingles are allowed by building codes?
Most municipal building codes, including those throughout Chicago and the surrounding suburbs, allow a maximum of two layers of shingles on a residential roof. If your home already has two layers, a complete tear-off of all existing materials down to the bare wooden deck is required before any new shingles can be installed.
What is the best time of year to schedule a roof replacement?
The ideal time to schedule a roof replacement is from late spring through early fall. During these months, the weather is dry and temperatures are consistently warm enough (above 40°F to 45°F) for the asphalt shingles’ self-sealing adhesive strips to activate and bond properly. While experienced crews can perform installations year-round, winter installations require specialized cold-weather techniques and hand-sealing.
Does homeowners insurance cover a new shingle roof?
Homeowners insurance typically covers roof replacement if the damage is caused by a sudden, accidental event, such as a severe hailstorm, fallen tree limbs, or high winds. However, insurance policies generally do not cover roof replacement if the damage is due to normal wear and tear, neglect, or lack of maintenance. It is always best to review your specific policy declarations and consult with a professional inspector to document any storm damage before filing a claim.
Conclusion
Your roof is your home’s first line of defense against the elements. Whether you are tackling a minor DIY repair or planning a complete asphalt shingle roof replacement, taking action early is the key to protecting your property and maintaining its value.
At HomeBuild Windows, Doors & Siding, we have been helping homeowners throughout Chicago and the northwest suburbs protect their homes for over 20 years. Every project we undertake is owner-supervised, ensuring our high standards of quality, professionalism, and attention to detail are met on every single job.
We are proud of our industry credibility and certifications, including being an Elite Platinum Pella® Certified Contractor, an Andersen Certified Contractor, and a recipient of the Angi Super Service Award and Nextdoor Neighborhood Faves. With over 200 positive Google reviews, we work closely with top-tier brands like Pella, Marvin, Alside, Therma-Tru, Simpson, and James Hardie to deliver beautiful, energy-efficient, and durable exterior solutions.
If you are ready to upgrade your home’s exterior, protect your property from the elements, and boost your curb appeal, contact us today to schedule a professional consultation. Explore our Expert Roofing Services Protecting Your Home with Quality Craftsmanship to get started on your home improvement journey.