How to Replace a Single-Hung Window Unit
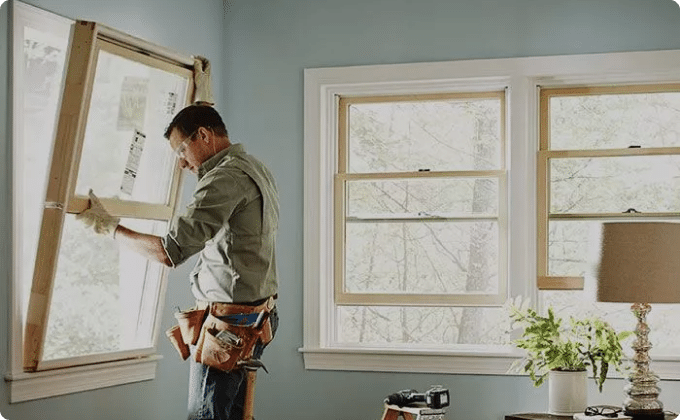
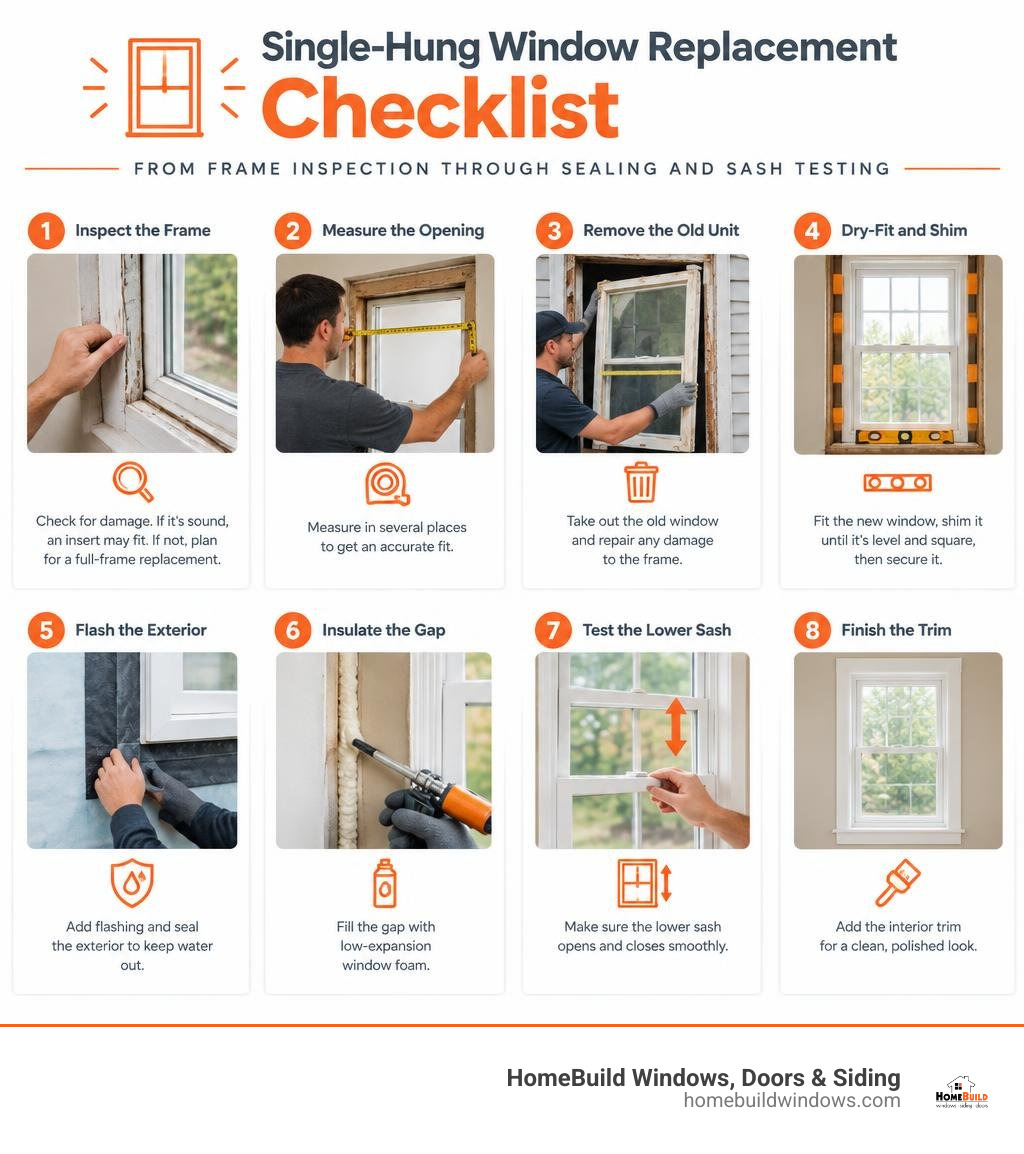
To replace a single-hung window, start by checking the old frame. If it is sound, an insert may fit; if it is damaged, you may need a full-frame replacement. A professional installation team measures the opening in several places, removes the old unit, and repairs any damage. They then dry-fit the new window, shim it until it is level and square, and secure it. The crew flashes and seals the exterior, insulates the gap with low-expansion window foam, and tests the lower sash before finishing the trim.
I’m Steve Mlynek, founder of HomeBuild Windows, Doors & Siding, and I’ve spent over 20 years helping Chicago-area homeowners understand how to replace a single hung window. I owner-supervise every project at our locally owned, licensed, and insured company, which has served the Chicago area since 2004.
How to replace a single hung window vocabulary:
Introduction
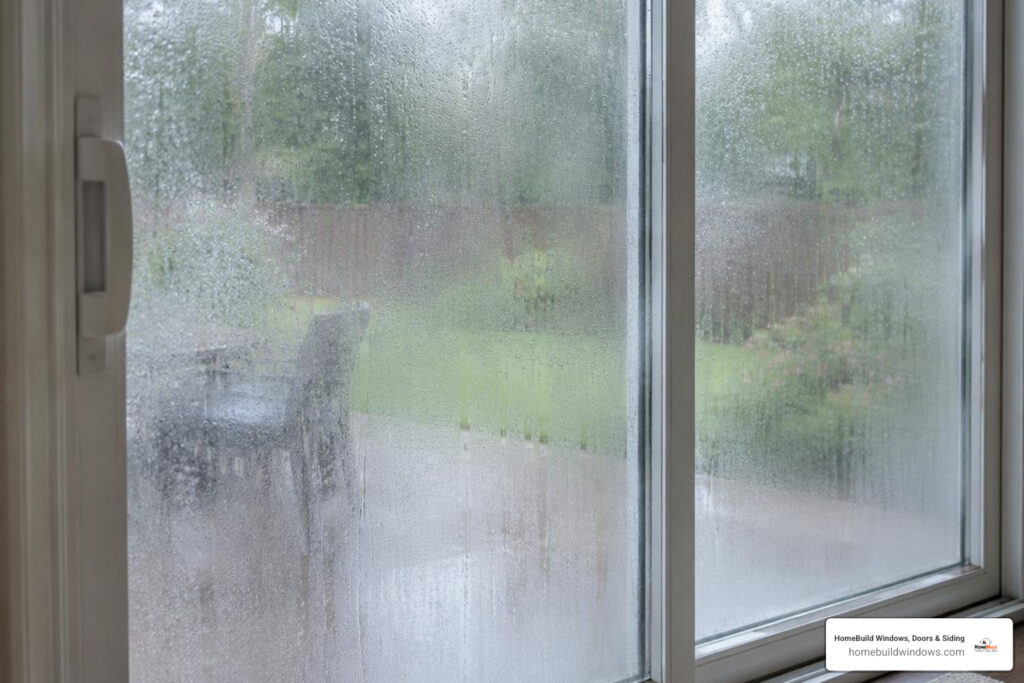
In the Chicagoland area, residential architecture spans everything from classic brick bungalows and historic two-flats to suburban split-levels and sprawling colonials. Each of these homes faces our notorious local climate: bitter winter freezes, heavy lake-effect winds, constant freeze-thaw cycles, and hot, humid summers. When windows begin to age, these weather swings quickly lead to drafts, condensation, fogged insulated glass, and sky-high utility bills.
Replacing an outdated window unit restores structural integrity, stops moisture intrusion, and provides lasting thermal comfort. Whether upgrading an old builder-grade unit or modernizing an older property, understanding what the project entails ensures your home remains protected against harsh Midwestern seasons. If your home would benefit from more ventilation options, you may also want to compare single hung windows against double hung windows replacement.
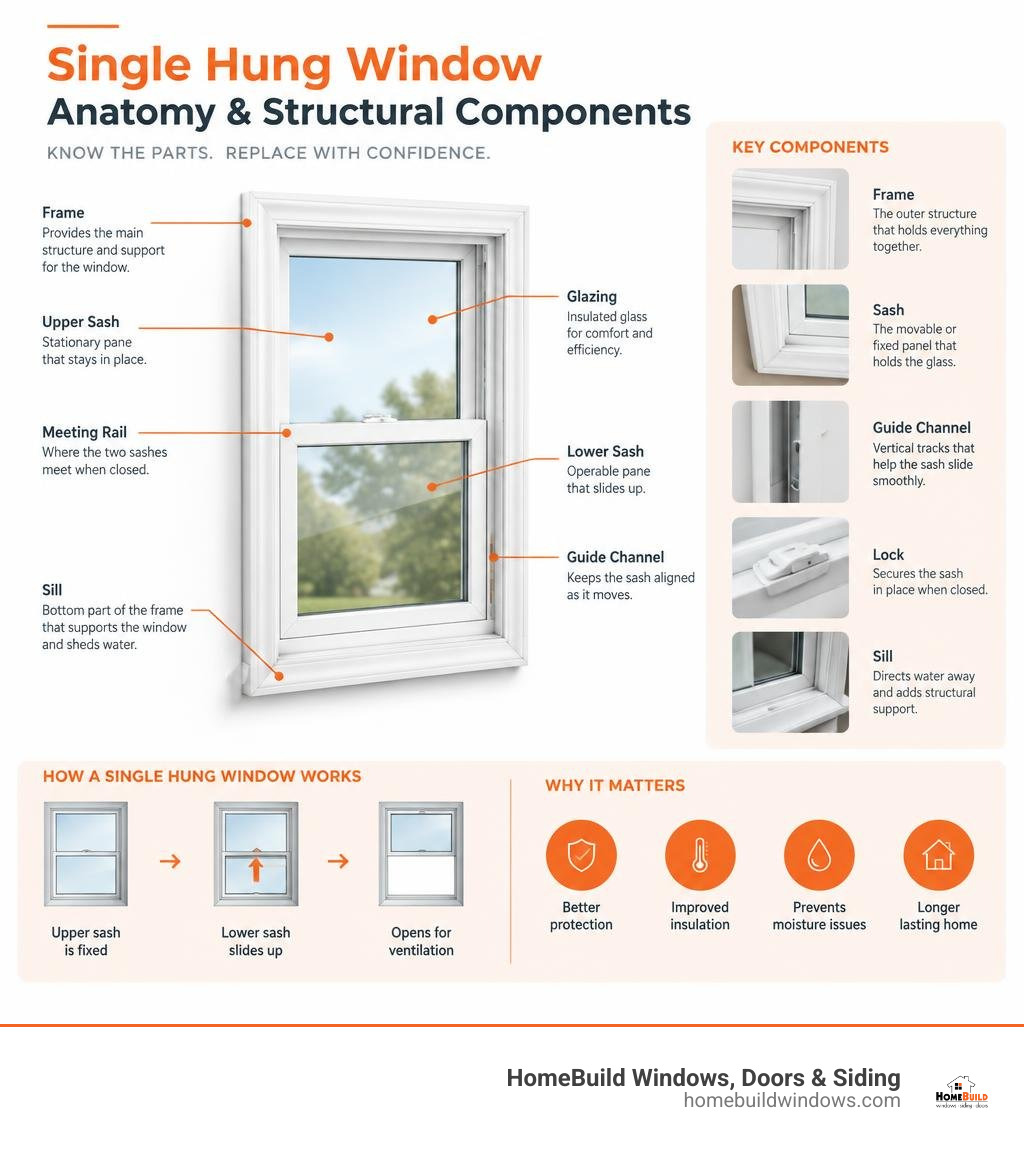
Single Hung Window Fundamentals: Sashes and Replacement Types
Single hung windows are a staple in residential design. Their straightforward mechanical design features a stationary upper pane and an operable lower sash that glides upward along interior channel guides. Understanding how these components work together is the first step in assessing a replacement project.
| Feature | Single Hung Windows | Double Hung Windows |
|---|---|---|
| Operable Sashes | Bottom sash only | Both top and bottom sashes |
| Air Infiltration | Lower risk due to fixed, sealed top sash | Slightly higher potential along upper meeting rail |
| Cleaning | Interior lower tilt; exterior top cleaned outside | Both sashes tilt inward for easy indoor cleaning |
| Mechanical Parts | Fewer moving parts (single balance system) | Dual balance sets and upper sash latches |
| Ideal Locations | Ground floors, patios, narrow walkways | Second-story rooms, spaces needing top ventilation |
Single Hung vs. Double Hung Operation
A single hung unit maintains an airtight seal along the upper half because the top sash is built directly into the frame. The bottom sash travels vertically, held in place by internal balances (such as spiral balances or constant-force spring systems) and tilt latches that allow the bottom glass to swing inward for maintenance.
Because the top sash never moves, single hung windows naturally offer exceptional resistance against winter wind infiltration. However, if your room requires multi-directional airflow or upper-story exterior cleaning from indoors, exploring double hung windows replacement may better suit your layout.
Pocket Insert vs. Full-Frame Replacement
When planning a replacement, homeowners must choose between two distinct installation approaches:
- Pocket Insert Replacement: The existing exterior frame, sill, and interior trim remain intact. Installers remove only the old sashes and balance hardware, placing a new self-contained window unit into the existing structural pocket. This method preserves historic interior casing and exterior masonry or siding.
- Full-Frame Replacement: The entire window assembly—including the frame, jamb extensions, exterior brickmould, and interior trim—is completely removed down to the rough framing studs. This allows installers to inspect the rough opening for hidden water damage, install new sill pan flashing, and rebuild a modern thermal barrier.
If the existing wooden frame has suffered rot from repetitive freeze-thaw cycles, a full-frame window replacement is essential to prevent structural deterioration.
Preparation, Sizing, and Required Tools
Proper setup protects your living space and guarantees that your custom-ordered window will fit the wall opening securely. Before any work begins, it helps to learn how to prepare for a window installation, including moving furniture, taking down window treatments, and laying heavy drop cloths to protect flooring from plaster or wood debris.
Measuring Rough Openings: How to Replace a Single Hung Window Accurately
Accurate sizing prevents installation delays and air leaks. When ordering a new window unit, professional installers take measurements that reflect the narrowest points of the opening.

A professional measurement process includes:
- Measuring Width: The installer measures the horizontal distance between the side jambs at three points: top, middle, and bottom, recording the smallest measurement.
- Measuring Height: The installer measures the vertical distance from the high point of the sill to the top head jamb at the left, center, and right, recording the smallest measurement.
- Checking for Square: The installer measures diagonally from corner to corner in an ‘X’ pattern. If the two diagonal measurements differ by more than 1/8 inch, the opening is out of square and will require careful shimming during installation.
- Deducting Clearances: A new window unit is typically sized 1/2 inch narrower and 1/2 inch shorter than the rough opening (a 1/4-inch gap around all sides) to allow for leveling, thermal expansion, and insulation.
To dive deeper into measuring tolerances, read our guide on how to size replacement windows.
Essential Tools and Safety Gear
Professional installation teams utilize specialized tools to ensure clean removal and a weather-tight fit:
- Safety Equipment: Impact-resistant safety glasses, heavy cut-resistant work gloves, and dust masks.
- Demolition & Removal: Utility knives (to score painted seams), stiff putty knives, pry bars, and reciprocating saws for stubborn structural nails.
- Installation & Alignment: 2-foot and 4-foot spirit levels, composite shims (which resist moisture rot better than wood), and variable-speed cordless drill-drivers.
- Weatherproofing & Sealing: Closed-cell backer rods, low-expansion polyurethane insulating foam, advanced exterior silicone sealant, and a commercial caulk gun.
Step-by-Step Guide: How to Replace a Single Hung Window
Understanding the mechanics of professional window installation illustrates why precision matters at every phase of the project.
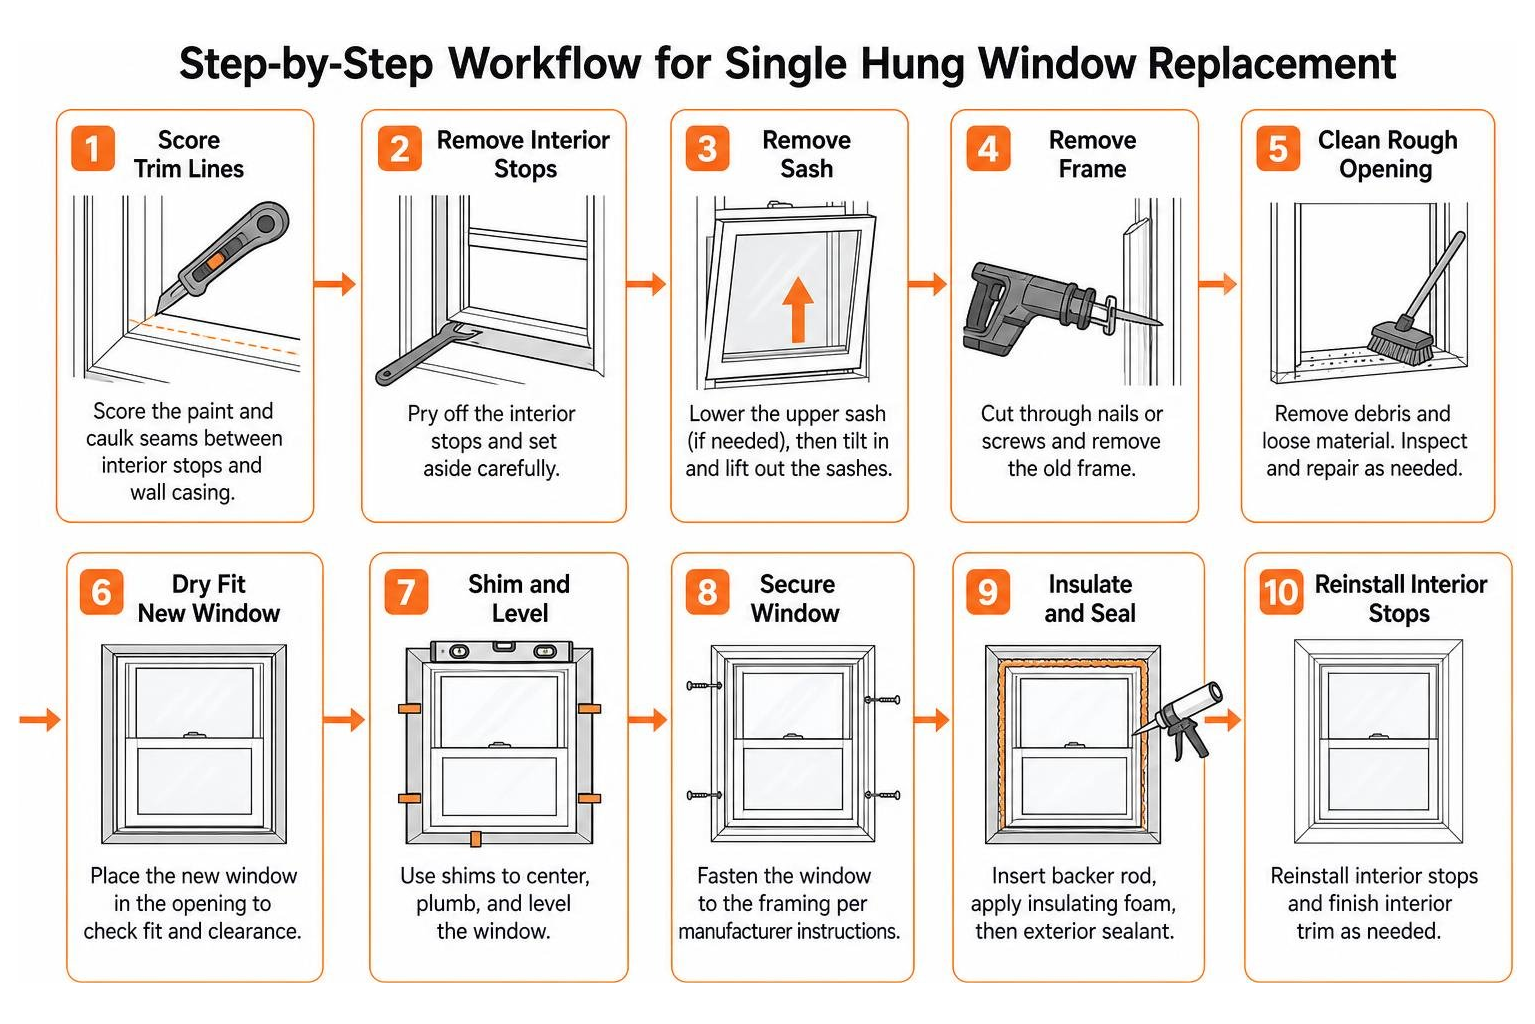
Phase 1: Removing the Old Sash and Frame Unit
A professional replacement begins with careful deconstruction to avoid damaging surrounding walls:
- Score Trim Lines: Using a sharp utility knife, the installer scores the paint and caulk seams between the interior stops and wall casing to avoid tearing drywall or plaster.
- Remove Sashes and Hardware: The interior stop moulding is removed. The lower sash is lifted, its tilt latches disengaged, and the balance cords or tension springs disconnected. For full-frame replacements, the fixed upper sash and parting stops are also extracted.
- Clear the Opening: Fasteners securing the old frame to the framing studs are backed out or cut with a reciprocating blade. The old frame is lifted out, and the rough opening is thoroughly cleaned of old insulation, deteriorated sealant, and loose fasteners.
Phase 2: Setting, Shimming, and Securing the New Window
With the rough opening prepped and inspected for framing rot, the new unit is integrated into the wall structure:
- Prep the Sill: A sloped sill pan or waterproof flashing membrane is applied to guide any incidental water safely outward.
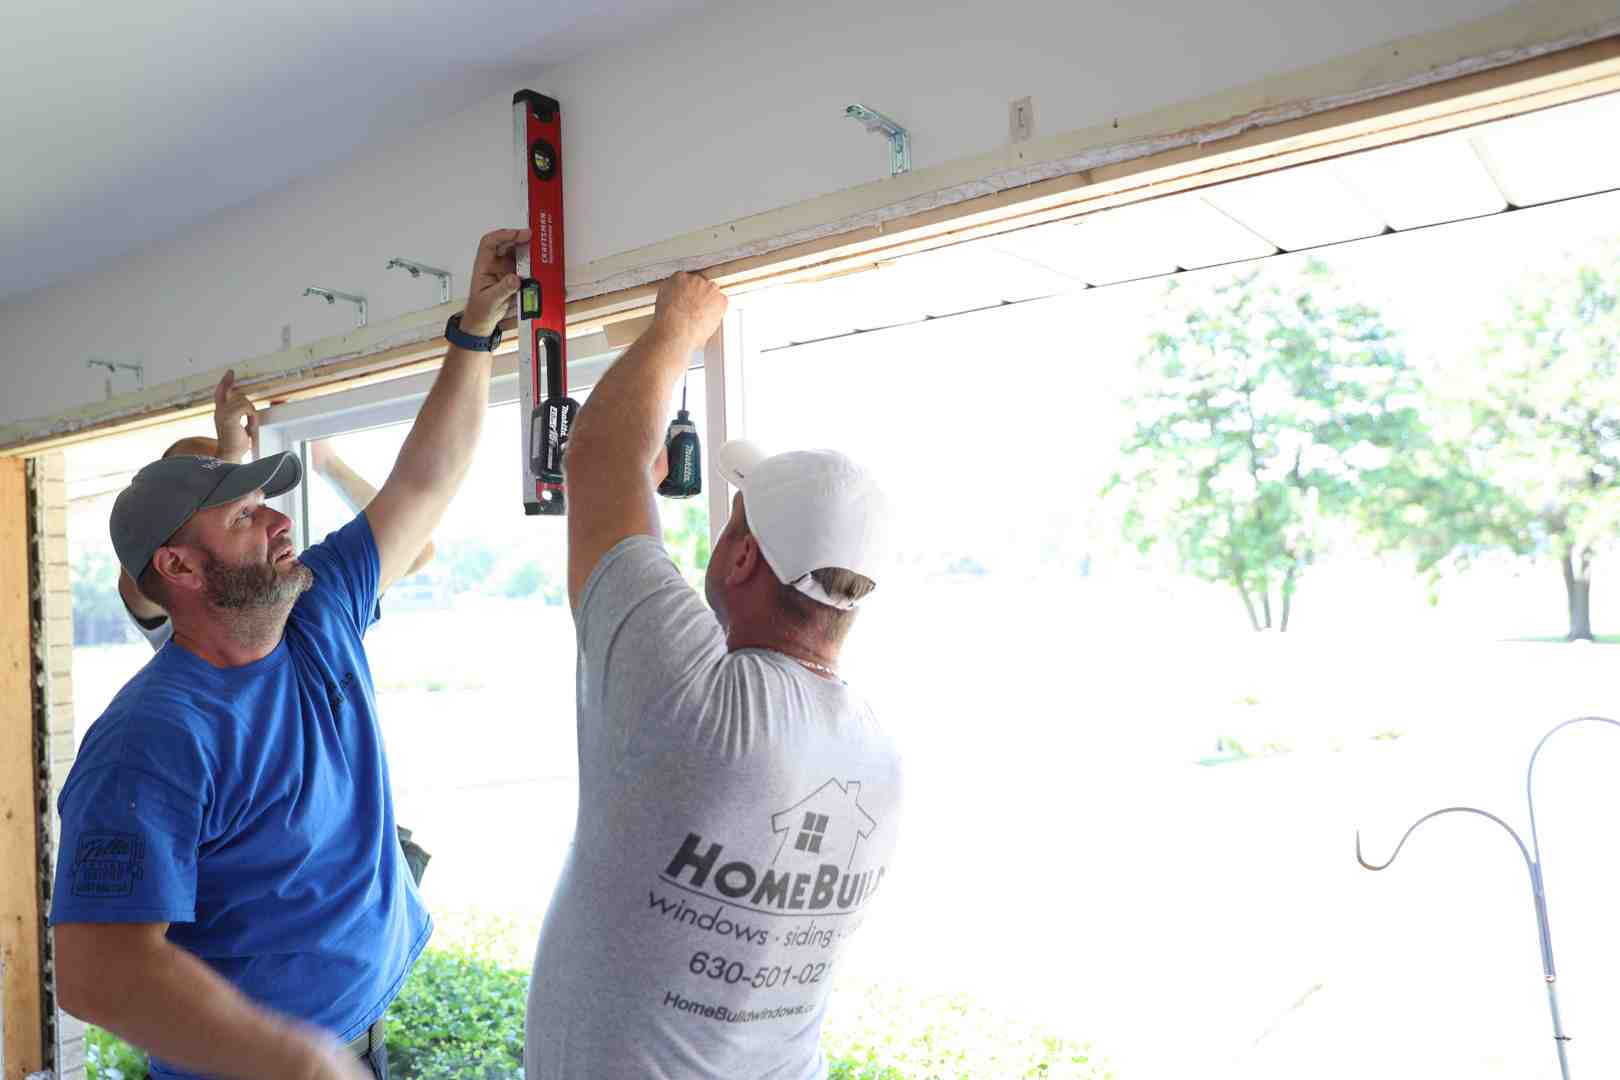
- Dry-Fit and Shim: The new window unit is set into place to confirm clearances. Installers slide composite shims beneath the sill and behind the side jambs near fastener locations, continuously checking with a level to guarantee the unit is plumb, level, and square.
- Fasten Securely: Corrosion-resistant installation screws are driven through the pre-drilled jamb holes or nailing flange into the framing lumber. Fasteners are placed approximately 12 inches apart, taking care not to over-drive screws, which could bow the window frame and cause sash binding.
Phase 3: Sealing, Insulating, and Finishing Trim
The final step establishes the thermal and air barrier:
- Insulate the Cavity: Low-expansion spray foam formulated specifically for windows and doors is applied into the gap between the window frame and rough opening. Standard high-expansion foam must never be used, as its expansion pressure can warp vinyl or wood jambs.
- Exterior Weatherproofing: On the outside, weatherproofing sealant is applied around the perimeter where the window meets the exterior casing or masonry. A backer rod is inserted into deeper joints before applying silicone to maintain a flexible, watertight joint that accommodates building movement.
- Interior Reassembly: Interior stops and trim casings are reinstalled or replaced with fresh millwork, caulked neatly, and touched up with paint.
Pro Installation Standards: How to Replace a Single Hung Window Seamlessly
A window is only as good as its installation and thermal engineering. In northern climates, energy efficiency is paramount. Modern single hung units installed by licensed professionals rely on National Fenestration Rating Council (NFRC) certified glass assemblies.
Look for double- or triple-pane units treated with multi-layer Low-E (low-emissivity) coatings that reflect radiant interior heat back indoors during winter while blocking solar heat gain during hot Chicago summers. Argon gas fills between glass panes provide superior thermal resistance compared to standard air.
At HomeBuild Windows, Doors & Siding, we partner with industry-leading manufacturers known for exceptional craftsmanship and durability:
- Pella: Renowned for precision-engineered wood, fiberglass, and vinyl windows that blend architectural elegance with top-tier energy performance.
- Andersen: Celebrated for durable composite materials and classic designs that withstand extreme weather swings without warping or peeling.
- ProVia: Engineered for superior energy efficiency and structural strength, offering custom-crafted vinyl window lines built to the highest residential standards.
Ensuring your window features a low U-factor (measuring heat loss rate) and an appropriate Solar Heat Gain Coefficient (SHGC) keeps your interior comfortable year-round. For comprehensive guidance on selecting materials, explore our replacement window buying guide.
Frequently Asked Questions About Single Hung Window Installation
What is the main difference between single hung and double hung windows?
The primary difference is sash mobility. In a single hung window, only the bottom sash moves up and down while the top sash remains permanently fixed in the frame. In a double hung window, both the top and bottom sashes slide vertically and tilt inward. Because single hung units have a stationary upper sash, they offer slightly higher structural rigidity and fewer joint gaps where drafts can enter.
Can I replace a single hung window without removing the interior casing?
Yes. If your existing window frame and surrounding wall studs are structurally sound, without rot, and square, an insert (pocket) replacement can be performed. The installer removes only the old sashes and balance components, placing the new replacement unit into the existing jambs. This technique leaves the interior casing, drywall, and exterior siding undisturbed.
How long should I wait after installation before operating the window sash?
You should wait at least 24 hours before opening, closing, or cleaning the new window sash. This cure window allows the exterior caulking, perimeter silicone seals, and low-expansion insulating foam to fully set. Operating the sash prematurely can shift the frame out of alignment, break the adhesive weather seal, or compromise the airtight barrier.
Why choose professional installation over DIY window replacement?
While DIY window replacement may seem tempting, improper leveling, incorrect shimming, or missing flashing membranes can lead to hidden water leaks, wood rot inside wall cavities, and drafts. Professional installation ensures code compliance, manufacturer warranty protection, and an airtight thermal envelope customized for local climate demands.
Conclusion
Upgrading your home’s windows is one of the most effective ways to improve energy efficiency, eliminate cold drafts, and elevate curb appeal. While understanding the mechanics helps you make informed remodeling choices, flawless installation requires specialized equipment, building code expertise, and precise weatherproofing techniques.
HomeBuild Windows, Doors & Siding has proudly served homeowners across Chicago and the surrounding suburbs since 2004. As an Elite Platinum Pella Certified Contractor and Andersen Certified Contractor, our company delivers master-level craftsmanship on every project. Every installation is personally owner-supervised by Steve Mlynek, earning our team the Angi Super Service Award 2025, the 2025 Nextdoor Neighborhood Faves Winner recognition, and over 200+ five-star reviews with a 4.9-star rating.
Protect your home against the elements with precision-installed windows from Pella, Andersen, and ProVia. Contact us today at our Chicago office (1830 N Winchester Ave, Chicago, IL 60622) to schedule your free estimate and consultation!