Why Pre-Hung Door Replacement Makes Sense for Your Home
Pre-hung door replacement involves removing your old door and frame and installing a new, complete unit with the door, jambs, hinges, and threshold pre-assembled. Here’s what you need to know:
Quick Answer: The Pre-Hung Door Replacement Process
- Measure accurately – Width, height, and jamb depth of your rough opening
- Remove the old unit – Take out both the door and existing frame
- Prepare the opening – Check for level, plumb, and square
- Install the new unit – Set, shim, and secure the pre-hung door
- Finish and test – Add trim, hardware, and caulk; verify smooth operation
Time: 4-6 hours | Cost: $300-$1,000 | Skill Level: Intermediate
Pre-hung doors offer key advantages over slab-only replacements. They ensure a better fit since they are factory-assembled, save significant time as hinges are pre-mortised, and provide a consistent, professional look.
Choose a pre-hung door if your existing door frame is damaged, rotting, or out of square. It’s also the right choice for new construction or when upgrading to a different door size or style. While they cost slightly more upfront, pre-hung doors eliminate the tedious work of mortising hinges and fitting a door to an old frame.
I’m Steve Mlynek, founder of HomeBuild. With over 20 years of experience installing doors and windows in the Chicago area, I’ve guided hundreds of homeowners through pre-hung door replacement projects, helping them achieve professional results.
, removing old door and frame with pry bar, checking opening for plumb and square with level, installing new pre-hung unit with shims behind hinge jamb, securing with finish nails, setting reveal gap to 1/8 inch, and finishing with trim and hardware installation - pre-hung door replacement infographic")
Before You Begin: Planning Your Project
A successful pre-hung door replacement starts with careful planning. This means understanding your existing setup, what you need, and how to measure with precision.
A pre-hung door is a complete package: the door slab, hinges, and frame (jambs and header) come pre-assembled. This factory assembly ensures a precise fit and smoother operation, saving considerable installation time. In contrast, a slab door is just the door panel, requiring more work to fit into an existing frame.
When should you opt for a pre-hung door?
- Damaged Frame: If your existing frame is rotted, cracked, or warped, a pre-hung unit replaces the entire assembly.
- New Construction: For new builds with only a rough opening, a pre-hung door is the most straightforward option.
- Upgrading: When changing the style, material, or swing direction of your door, a pre-hung unit simplifies the process.
Here’s a quick comparison:
| Feature | Pre-Hung Door Replacement | Slab Door Replacement |
|---|---|---|
| Components | Door, frame, hinges, threshold (all pre-assembled) | Door slab only |
| Installation | Faster, simpler, ideal for damaged frames or new openings | More complex, requires fitting to existing frame and hardware |
| Precision | Factory-assembled for a precise fit | Relies on installer’s skill to fit to existing frame |
| Cost | Higher upfront for the complete unit | Lower upfront for the door slab, but higher labor/time cost |
| Best For | Damaged frames, new construction, full upgrades | Undamaged, plumb, and square existing frames |
How to Measure for a Pre-Hung Door
Accurate measurements are the bedrock of a successful pre-hung door replacement. Remember to measure three times and order once!

Here’s how to measure for a pre-hung door:
-
Measuring Rough Opening Width:
- Gently remove the interior trim to expose the rough opening.
- Measure the width at the top, middle, and bottom. Record the smallest measurement.
- The rough opening should be 2 to 2 1/2 inches wider than the door itself. We recommend adding 2-1/2 inches to the door width for your rough opening.
-
Measuring Rough Opening Height:
- Measure the height on the left and right sides, from the subfloor to the header. Record the smallest measurement.
- For a single door, add 2-1/4 inches to the door height for your rough opening (or 1-1/2 inches for an outswing door).
-
Measuring Jamb Width (Wall Thickness):
- Measure your wall’s total thickness (stud, drywall, sheathing) to ensure the jamb sits flush.
-
Determining Door Handing and Swing:
- Handing: Stand with your back to the hinge side of the frame. Extend an arm in the direction the door will open. A left arm means a LEFT-HANDED door; a right arm means a RIGHT-HANDED door.
- Swing: Most exterior doors in the Chicago area are inswing for security and weather protection. Specify inswing or outswing when ordering.
For a more comprehensive guide, see this Exterior door measuring guide. Understanding these measurements also helps clarify your More on entry door replacement costs.
Common Mistakes to Avoid When Ordering
In our two decades of experience, we’ve seen how ordering mistakes can be costly. For a pre-hung door replacement, an error during ordering can render the unit useless.
Here are the most common pitfalls:
- Incorrect Measurements: This is the biggest culprit. Measure the rough opening width, height, and jamb depth carefully, always using the smallest measurement from multiple points.
- Wrong Door Handing: A left-hand door won’t work if you need a right-hand one. Double-check your handing and swing direction before ordering.
- Wrong Jamb Width: If the jamb width doesn’t match your wall thickness, the trim won’t sit flush. Measure the entire wall thickness.
- Forgetting Swing Direction: Forgetting to specify “inswing” or “outswing” can make a door unusable, especially for exterior applications.
- Not Accounting for Floor Height: New flooring can change the effective height of your rough opening. Always measure from the finished floor level or account for its future thickness.
These details make a huge difference. If you’re unsure, it’s always best to consult with a professional. You can Learn more about entry doors and their specifications on our site.
Gearing Up: Tools and Materials You’ll Need
With planning and measurements complete, it’s time to gather your supplies. Having the right gear is essential for a smooth installation.

A pre-hung door replacement is an intermediate-level DIY project. For many homeowners in Chicago, it takes 4 to 6 hours. The cost can range from $150 to over $600 for an interior door and $300 to $1000 for an exterior door, depending on the style.
Essential Tools
Having these tools on hand will make your pre-hung door replacement much smoother:
- 4-foot level: Critical for ensuring your door is plumb and square.
- Hammer: For driving nails and tapping shims.
- Utility knife: For scoring caulk and cutting shims.
- Pry bar: Essential for removing old trim and the existing frame.
- Screwdrivers (flathead and Phillips): For hardware.
- Drill with bits: For pilot holes and screws.
- Chisel: For fine-tuning mortises or strike plate recesses.
- Plumb bob: A reliable way to check vertical alignment.
- Tape measure: For all measurements.
- Pencil: For marking.
- Safety glasses and gloves: Prioritize your safety!
Required Materials
Don’t forget these finishing items:
- Shims (cedar or composite): For adjusting and plumbing the door frame.
- 8d finish nails: For securing the door frame.
- 3-inch screws: For anchoring the hinge-side jamb to the framing.
- Wood filler: To patch small holes.
- Caulk (paintable latex or silicone): For sealing gaps.
- Sandpaper: For smoothing surfaces.
- New doorknob and deadbolt (if applicable): To upgrade security and aesthetics.
- Paint or stain: To finish your new door.
The Step-by-Step Pre-Hung Door Replacement Process
With your tools and materials ready, it’s time to tackle the pre-hung door replacement. Patience and precision are key. Always wear safety glasses and gloves throughout the process.
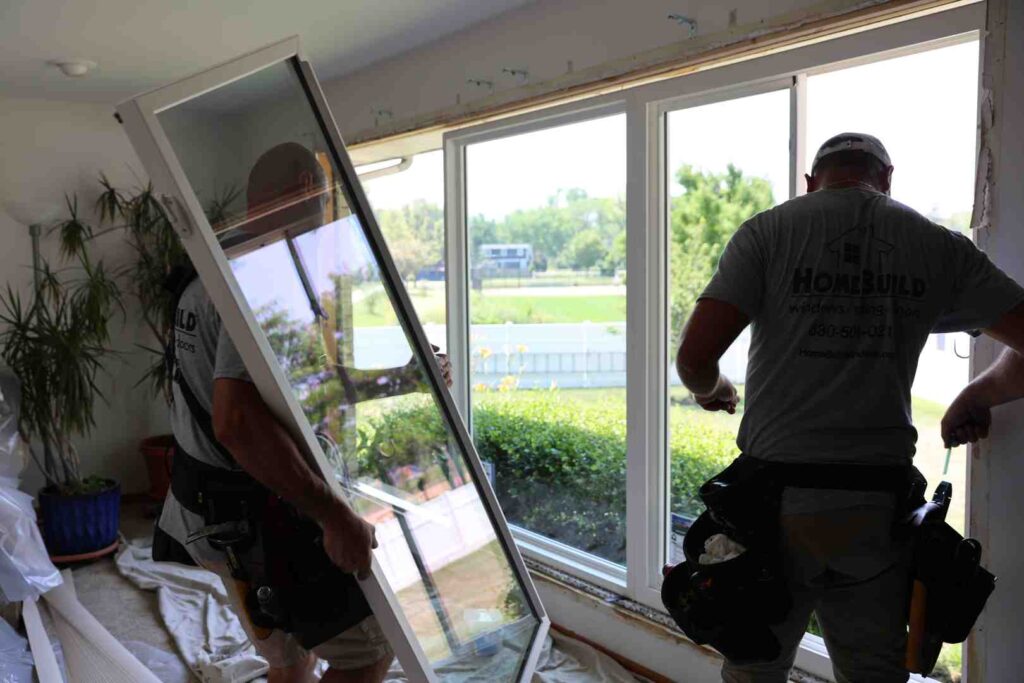
Step 1: Remove the Old Door and Frame
First, carefully remove the old door and frame. Lay down drop cloths to protect your floors.
- Remove Interior Trim: Score any paint or caulk lines with a utility knife, then use a pry bar to gently remove the interior trim, being careful not to damage the drywall.
- Remove the Old Door Slab: With a helper supporting the door, unscrew the hinges from the door slab and set it aside.
- Remove the Old Frame: Use a pry bar to carefully remove the jambs and header from the rough opening. You may need a reciprocating saw to cut through a stubborn threshold.
- Clean the Rough Opening: Clear out any debris, old insulation, or loose wood to create a clean space for the new door. This is a critical step for a successful Guide to changing an exterior door.
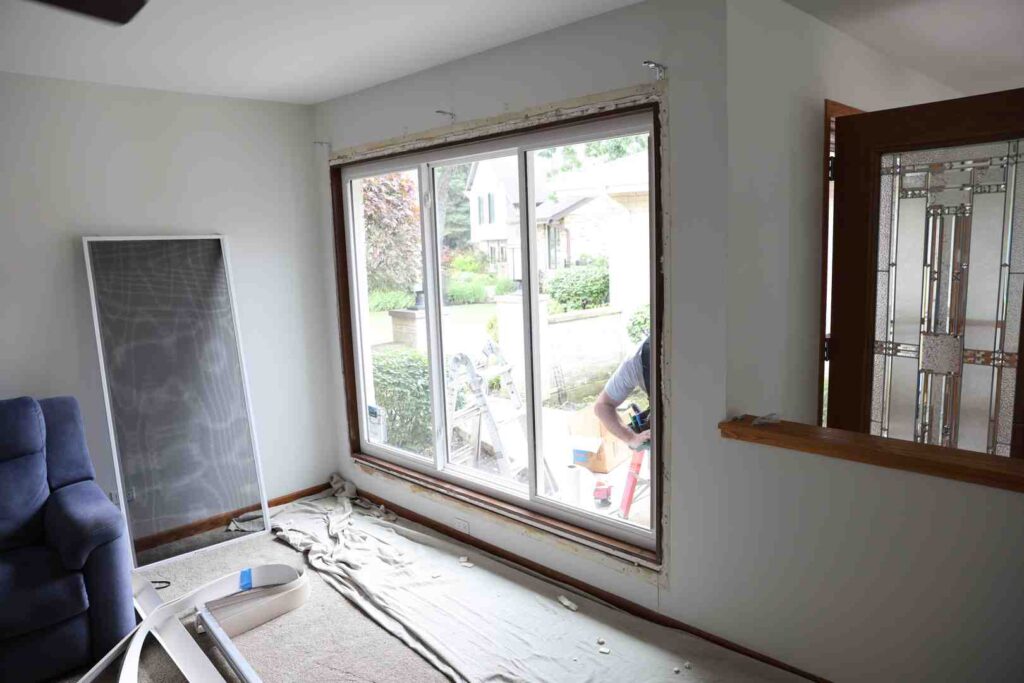
Step 2: Prepare the Rough Opening
A well-prepared rough opening is critical for a perfectly operating door. Ensure it is level, plumb, and square.
- Check for Plumb and Square: Use a 4-foot level to check that the side studs are plumb and the header is level. Check that the corners are square.
- Leveling the Sill: Ensure the bottom of the rough opening is perfectly level, using shims or a planer to correct it if necessary.
- Inspect for Rot or Damage: Check the wood under the old threshold for any rot or damage. Make any necessary repairs before proceeding. For more on creating an opening, see this This Old House guide on creating an opening.
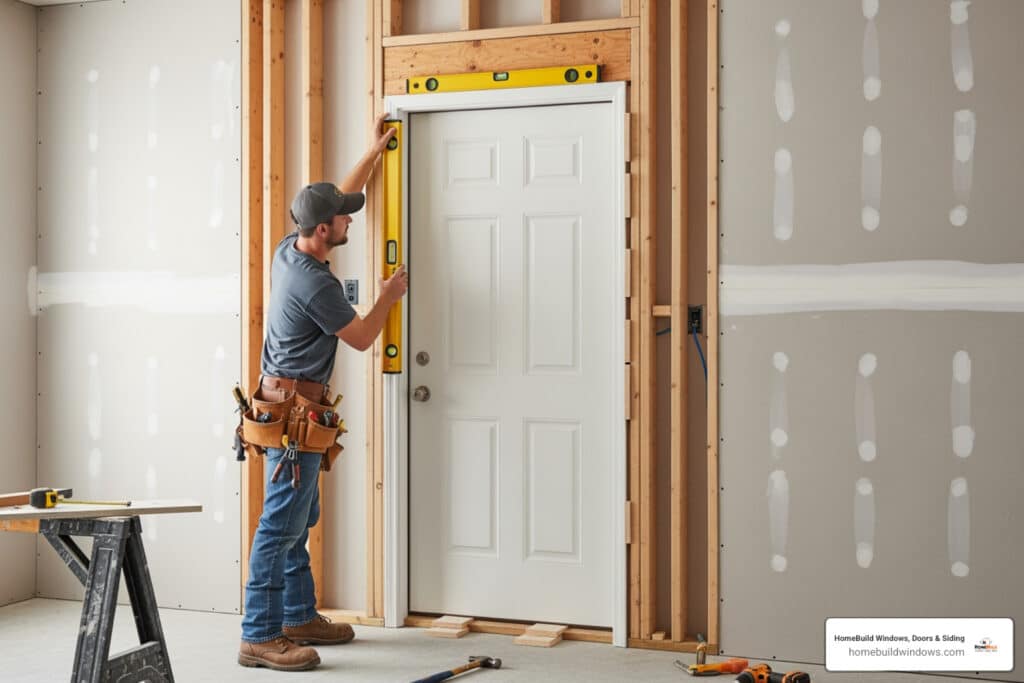
Step 3: Install the New Pre-Hung Door
- Test Fit the Unit: Carefully lift the new pre-hung unit into the rough opening to ensure it fits. Make minor adjustments to the opening if needed.
- Apply Caulk (Exterior Doors): For exterior doors, apply a continuous bead of caulk to the subfloor where the threshold will sit to create a moisture barrier.
- Place the Door Unit: With the door closed, tilt and slide the unit into the rough opening, bottom first, and center it.
- Shim the Hinge Side: Place shims between the hinge-side jamb and the studs, aligning them with each hinge. Use your level to ensure the jamb is perfectly plumb.
- Nail the Hinge-Side Jamb: Once plumb, secure the jamb with 8d finish nails driven through the shims. Leave the nail heads slightly proud for potential adjustments.
- Check for Plumb: Recheck the hinge-side jamb with your level and adjust if necessary.
Step 4: Secure the Frame and Align the Door
This step focuses on fine-tuning for flawless operation.
- Shim the Top and Latch-Side Jambs: Place shims behind the header and latch-side jamb to ensure the frame is square.
- Set the Reveal: Adjust shims to create a consistent 1/8- to 3/16-inch gap (the “reveal”) between the door and the frame on all sides.
- Nail the Latch-Side Jamb: Once the reveal is perfect and the jamb is plumb, drive 8d finish nails through the jamb and shims, leaving the heads proud.
- Check the Door Swing: Open and close the door several times to ensure it swings freely and latches easily. Adjust the frame with a hammer and shims if needed.
- Install a Long Screw in the Top Hinge: To prevent sagging, replace a short screw in the top hinge with a 3-inch screw, driving it into the wall framing for extra support.
- Final Nailing: When satisfied with the alignment, drive all nails flush and use a nail set to sink them below the surface.
- Attach Split Jamb (if applicable): If your door has a split jamb, slide it into place and nail it to the studs to complete the frame.
For more detailed guidance, especially for exterior doors, our team at HomeBuild has a dedicated guide on Details on installing a prehung exterior door.
The Finishing Touches: Alignment, Troubleshooting, and Maintenance
With the door securely in place, it’s time for the final details that will integrate it beautifully into your home.
Finishing Touches
- Install Hardware: Mount your new doorknob and deadbolt. Ensure the strike plate on the jamb aligns with the latch. Adjust the plate or chisel a new recess if needed.
- Install Trim and Casing: Reinstall your old trim or install new casing around the door frame using finishing nails.
- Caulking Gaps: For exterior doors, caulk all gaps around the exterior trim for weatherproofing. For interior doors, caulk between the trim and the wall for a seamless look.
- Painting or Staining: Once caulk and wood filler are dry, sand any rough areas, then paint or stain your new door and trim. For exterior doors, paint or stain all six sides to prevent warping.
Common Troubleshooting for Pre-Hung Door Replacement
Even with good planning, issues can arise. Here’s how to resolve them:
- Door Binding or Sticking:
- Cause: The frame is not plumb or square.
- Resolution: Recheck the frame with a level and adjust shims. If the frame is plumb and the door still rubs, you may need to plane a small amount of wood from the door’s edge.
- Uneven Gaps (Reveal):
- Cause: Inconsistent shimming.
- Resolution: Loosen the nails on the affected jamb, adjust the shims to create a consistent 1/8-inch to 3/16-inch gap, then re-nail.
- Latch Not Engaging:
- Cause: The strike plate is misaligned with the latch.
- Resolution: Check the alignment. You may need to enlarge the strike plate opening with a chisel or reposition the plate entirely.
- Out-of-Plumb Walls:
- Cause: Existing wall framing is not straight.
- Resolution: Split jambs can accommodate walls up to 1/2 inch out of plumb. For more severe cases, use shims to make the door frame plumb, even if the wall isn’t.
Long-Term Maintenance Tips
A little routine maintenance will keep your door functioning smoothly for years.
- Check Hinge Screws: Periodically check and tighten all hinge screws to prevent sagging.
- Lubricate Hardware: Annually lubricate hinges and the latch mechanism with a silicone-based spray.
- Inspect Weatherstripping: For exterior doors, check weatherstripping seasonally and replace it if it’s cracked or compressed to maintain energy efficiency. This is part of Energy efficient home upgrades.
- Clean the Door: Clean your door regularly based on its material.
- Repaint or Restain: Inspect the finish every few years and reapply as needed to protect the door.
Frequently Asked Questions about Pre-Hung Doors
Here are some of the most common inquiries we receive regarding pre-hung door replacement:
What is the difference between a pre-hung door and a slab door?
A pre-hung door is a complete, pre-assembled unit including the door, frame, and hinges, ready for installation. A slab door is just the door panel, requiring you to fit it to an existing frame and install hardware. Pre-hung doors simplify installation and offer factory precision.
How long does it take to complete a pre-hung door replacement?
A pre-hung door replacement typically takes an experienced DIYer 4 to 6 hours. A professional installer can often complete the job more quickly due to specialized experience and tools.
Can I replace just the door without replacing the frame?
Yes, you can replace just the door slab if your existing frame is in excellent condition—plumb, square, and free of rot or damage. If the frame is worn, damaged, or out of alignment, a pre-hung door is the recommended, more durable solution.
Conclusion: Enjoy Your New Door
Congratulations on learning the ins and outs of pre-hung door replacement. A perfectly installed door is a rewarding accomplishment that improves your home’s curb appeal, security, and energy efficiency—especially important in the Chicago climate. This project adds lasting value to your property.
While pre-hung door replacement can be a manageable DIY project, calling a professional is wise for complex installations, if you lack time or tools, or if you find structural issues in the rough opening. Don’t hesitate to seek expert help in these situations.
For expert door installation and replacement in Chicago and the surrounding Chicagoland area, trust the certified professionals at HomeBuild Windows. Our team provides top-quality products, expert installation, and exceptional customer service. We’re here to help you choose and install the perfect door for your home. Explore our selection of high-quality Entry Doors and let us help you transform your home.