




Preparing for DIY Window Replacement: Measurements and Tools
Learning how to replace vinyl windows yourself starts with a clear sequence: measure the existing opening at three points, remove the interior stops and old sashes, dry-fit the new insert window, apply a continuous bedding sealant, secure the unit with shims and corrosion-resistant screws, and seal the perimeter with low-expansion foam. Before ordering your materials or reaching for a pry bar, however, the first step is evaluating your existing window frame. A successful vinyl replacement depends entirely on whether your current jambs and sill are structurally sound, square, and level. If the frame has settled significantly or suffered hidden water damage, inserting a new insert window will only trap moisture and cause operational failure down the road.
To evaluate whether your window is ready for a replacement unit, take three horizontal width measurements and three vertical height measurements:
- Width: Measure horizontally across the jambs at the top, the middle, and the bottom of the opening. Record all three numbers.
- Height: Measure vertically from the high point of the sill to the top head jamb on the far left, the center, and the far right. Record all three numbers.
- Squareness: Measure diagonally from the top-left corner to the bottom-right corner, and then from the top-right corner to the bottom-left corner.
For the opening to accept a standard pocket unit, the diagonal difference must be no more than 1/8 of an inch out of square. If the diagonals differ by more than 1/4 of an inch, the rough opening must be reframed or corrected before you proceed.
| Feature | Pocket Replacement (Insert) | Full-Frame Replacement |
|---|---|---|
| Existing Frame | Kept intact; stops and sashes removed | Completely removed down to rough studs |
| Interior / Exterior Trim | Preserved with minimal disruption | Fully removed and replaced or reinstalled |
| Glass Surface Area | Slightly reduced due to double-frame profile | Maximized to original rough opening dimensions |
| Best Used For | Structurally sound, square frames without rot | Rotted frames, severe settling, or water damage |
| DIY Complexity | Moderate; accessible for experienced DIYers | Advanced; involves siding, trim, and structural flashing |
Essential Tools Before Learning How to Replace Vinyl Windows Yourself
Having the right tools within arm’s reach ensures your rough opening does not remain exposed to unpredictable Midwest weather longer than necessary.
Gather these essential tools and materials before getting started:
- Safety Gear: Heavy work gloves, impact-resistant safety glasses, and a dust mask. If your home was built before 1978, make sure to follow EPA lead-safe work practices when disturbing painted trim.
- Hand Tools: Flat pry bar, stiff putty knife, utility knife with fresh blades, hammer, and a 2-foot or 4-foot precision level.
- Power Tools: Cordless drill/driver with driver bits and countersink drill bits.
- Fasteners: Manufacturer-specified corrosion-resistant screws (typically #8 pan-head stainless or coated screws).
- Shims & Insulation: High-density, non-compressible composite shims and low-pressure, low-expansion polyurethane foam formulated specifically for windows and doors.
- Sealants: 100% exterior-grade silicone sealant or advanced elastomeric polymer caulk, along with closed-cell backer rod.
Sizing and Ordering Your Vinyl Replacement Unit
When ordering your new vinyl window, use the smallest of your three width and height measurements. The replacement unit should be approximately 1/4 inch narrower and shorter than the existing pocket opening. This provides a 1/8-inch to 1/4-inch clearance around the perimeter, allowing room for leveling shims, thermal expansion of the PVC material, and a continuous thermal insulation seal.
Modern vinyl windows built with polyvinyl chloride (PVC) chambers, multi-pane low-E glass, and reinforced sash rails deliver exceptional thermal performance during harsh Chicago winters. Always verify that your unit includes pre-drilled installation holes in the side jambs and review the manufacturer’s official INSTALLATION INSTRUCTIONS before breaking the seal on your old frame. Store all vinyl windows upright in a temperature-controlled area below 85°F prior to installation to avoid heat warping.
Step-by-Step Guide: How to Replace Vinyl Windows Yourself
Replacing a window requires methodical execution. Rushing through the teardown or skipping alignment checks will lead to air infiltration, sticking sashes, and poor weather protection.
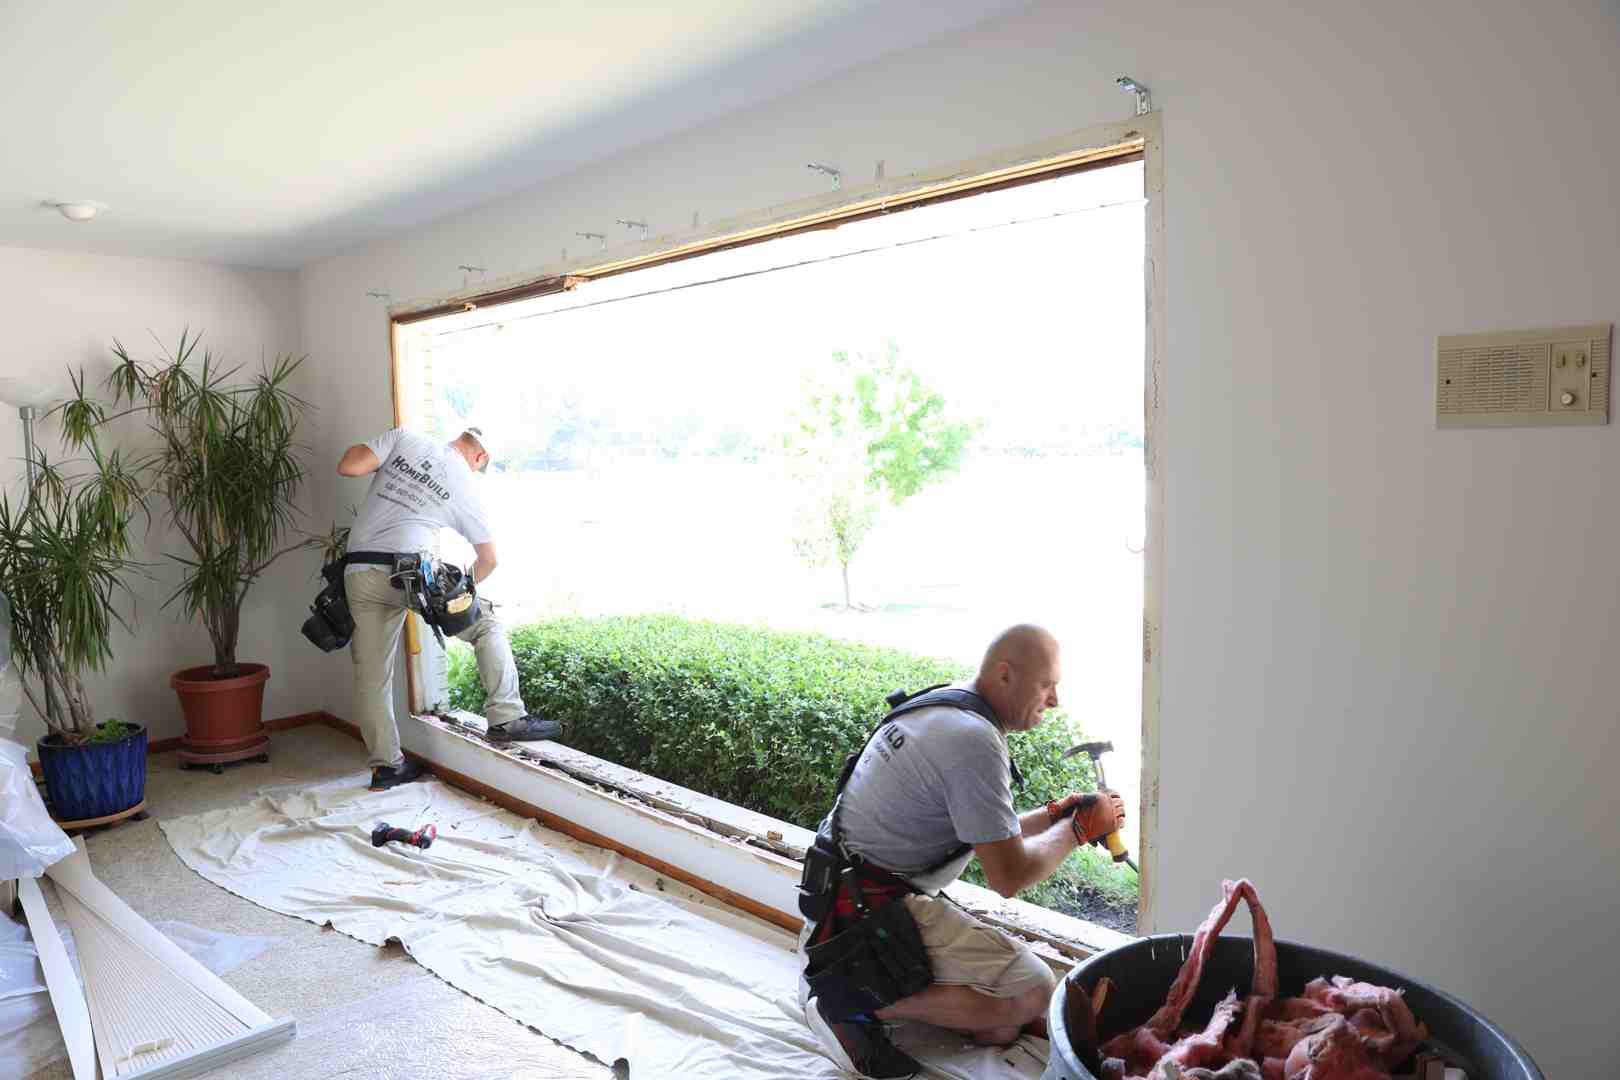
Start by carefully preparing the opening:
- Remove Interior Stops: Score the paint seam between the interior window stop and the frame with a utility knife to prevent tearing the drywall or wood. Slide a stiff putty knife behind the stop, gently lever it forward, and work along the length with a pry bar to pull the trim away intact.
- Remove the Lower Sash: Detach the lower sash from the frame. If dealing with older double-hung wood windows, disconnect the sash weights, cut the balance cords, or unhook the spiral balance hardware.
- Remove Parting Stops and Upper Sash: Pry out the parting stop strips along the top and sides, then pull out the upper sash.
- Clean and Inspect: Scrape away old caulk, loose paint, and debris down to bare wood. Vacuum the opening thoroughly. Inspect the sill and framing studs for soft spots or water stains; replace any degraded framing before moving forward.
Step-by-Step: How to Replace Vinyl Windows Yourself Like a Pro
With the opening clean and sound, follow this sequence to set your new window:
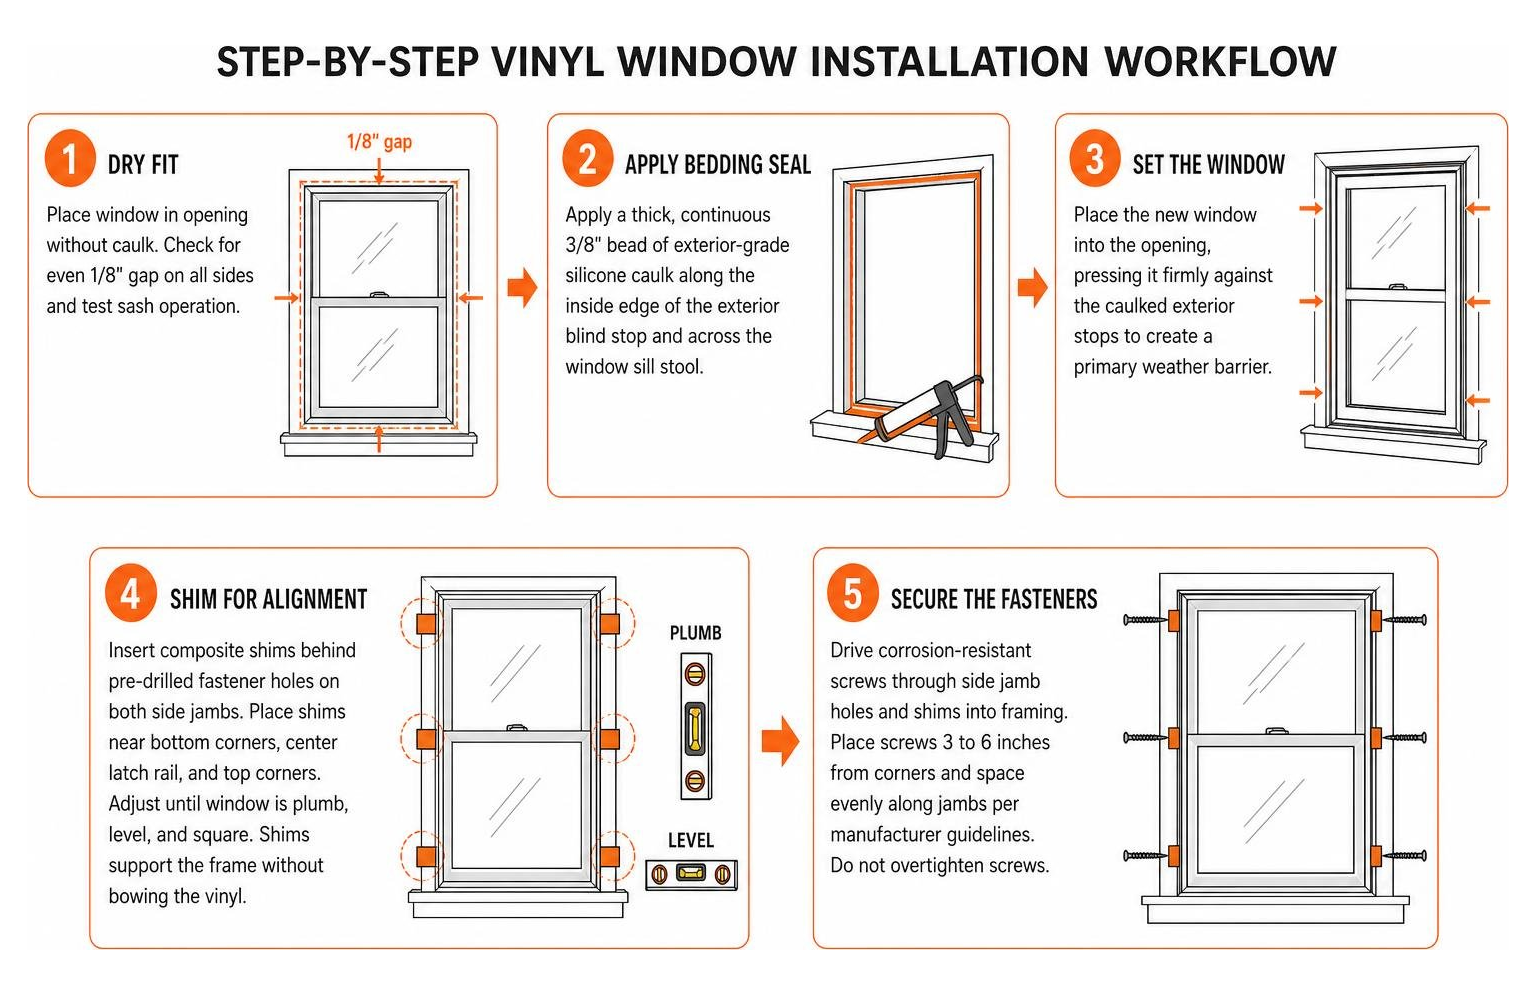
- Perform a Dry Fit: Lift the new vinyl window into the pocket opening without any caulk. Check that the unit sits evenly on the sill and that you maintain an even 1/8-inch gap on all sides. Test the sash operation to ensure it opens, closes, and locks smoothly. Remove the window and set it aside.
- Apply the Bedding Seal: Apply a thick, continuous 3/8-inch bead of exterior-grade silicone caulk along the inside edge of the exterior blind stop and across the window sill stool.
- Set the Window: Place the new replacement unit into the opening, pressing it firmly against the caulked exterior stops to create a primary weather barrier.
- Shim for Alignment: Insert composite shims behind the pre-drilled fastener holes on both side jambs. Place shims near the bottom corners, near the center latch meeting rail, and near the top corners. Adjust shims until the window is completely plumb, level, and square. Ensure shims support the frame without bowing the vinyl inward.
- Secure the Fasteners: Drive corrosion-resistant screws through the side jamb holes and shims into the structural framing. Place fasteners 3 to 6 inches from the corners and space them evenly along the jambs according to manufacturer guidelines. Do not overtighten screws, as this will distort the vinyl profile.
- Verify Operation: Check the diagonal measurements again to ensure squareness. Open and close both sashes; the reveal (gap) between the sash and jamb must remain perfectly uniform from top to bottom.
Sealing, Insulating, and Finishing the Window
A window is only as good as the seal around it. Without an airtight barrier, drafts will penetrate the wall cavity during windy conditions.
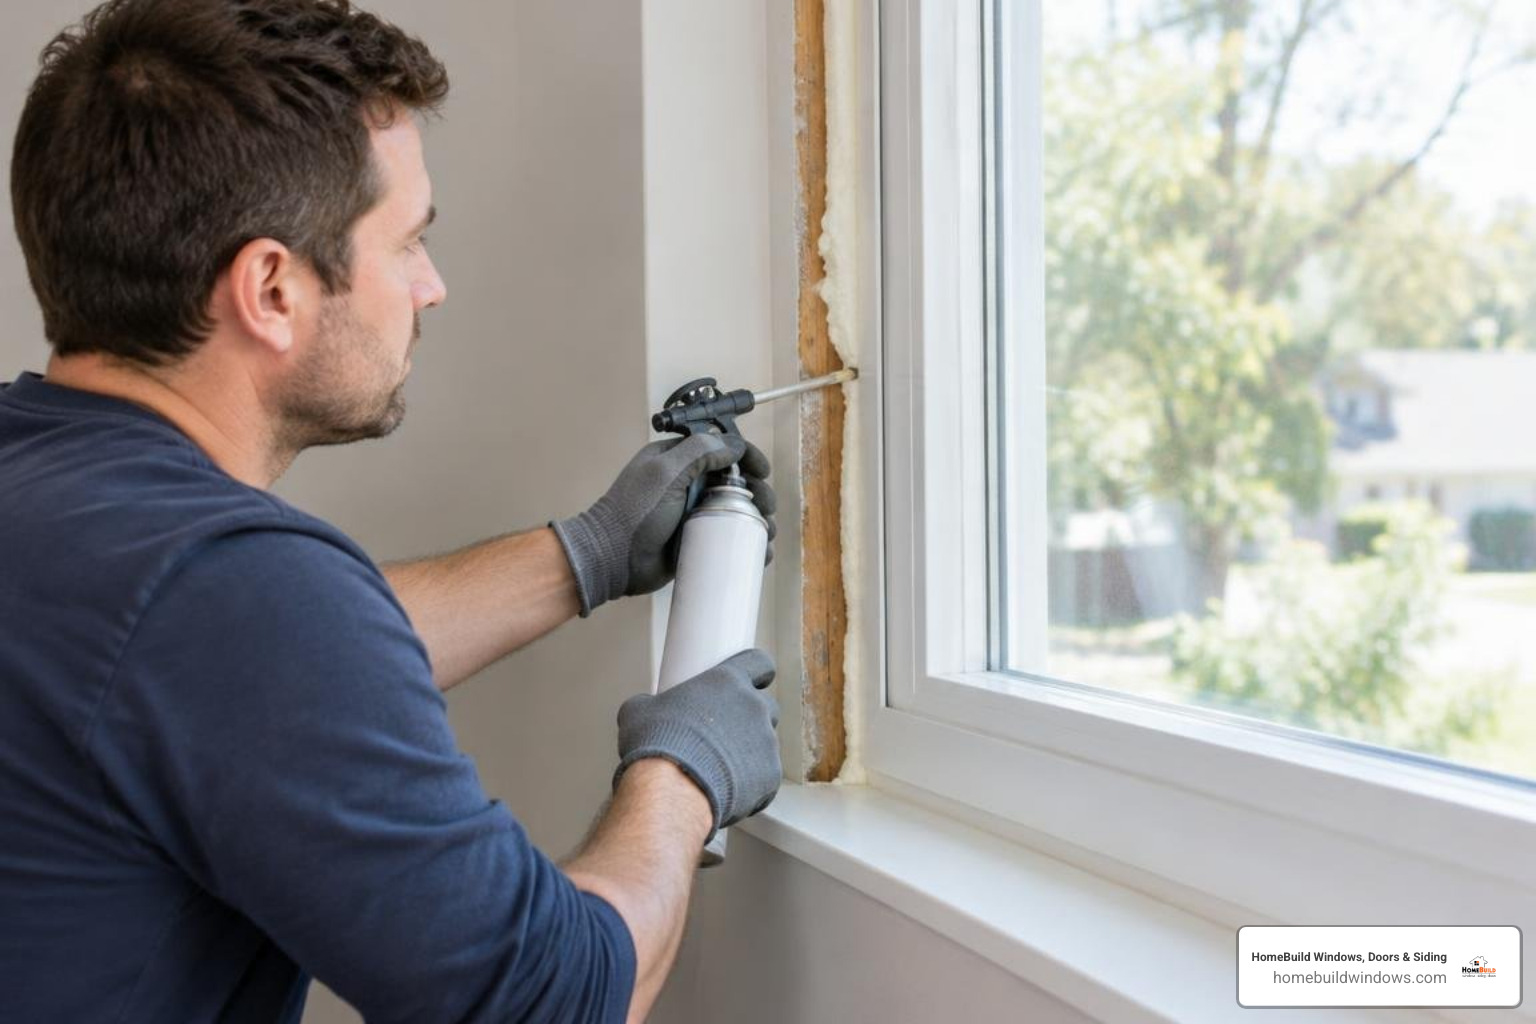
- Insulate the Perimeter: From the interior, gently insert closed-cell backer rod into wider gaps, then apply a continuous bead of low-expansion window and door foam between the vinyl frame and the wood buck. Never use high-expansion foam, as the expansion pressure will bow the vinyl jambs and prevent the sashes from moving.
- Seal the Exterior: Apply an exterior bead of silicone caulk around the top and side perimeters where the vinyl meets the exterior casing. Ensure the exterior bottom weep holes remain open and completely unobstructed so moisture can drain out naturally.
- Reinstall Trim: Reattach the interior stops using finish nails, set the nail heads, and seal the trim joint with paintable caulk for a clean interior finish.
Common DIY Mistakes That Lead to Drafts and Water Leaks
Even minor errors during replacement can undermine your window’s energy efficiency and structural performance. Review these frequent pitfalls outlined in professional guides like this resource on Installing Vinyl Replacement Windows: Easy DIY Steps to keep your project on track:
- Overtightening Fasteners: Driving screws too deep draws the vinyl jamb outward or bends it inward, creating an hourglass shape. This ruins the weatherstripping contact and makes the sashes bind during operation.
- Ignoring Frame Squareness: Forcing a replacement unit into a racked or out-of-square frame results in permanent air gaps at the corners where the lock mechanism cannot pull the sashes tight.
- Blocking Exterior Weep Holes: Caulking across the entire bottom edge of the exterior sill traps wind-driven rain inside the frame profile, leading to hidden rot inside the wall assembly.
- Skipping the Dry-Fit Stage: Applying sealant before verifying fit risks having caulk cure prematurely while you struggle with an uneven opening or improper shimming.
- Using Incorrect Insulation: Packing fiberglass insulation too tightly into perimeter gaps reduces its R-value, while using standard high-expansion foam can warp the frame beyond repair.
Frequently Asked Questions About Replacing Vinyl Windows
Can I install vinyl windows myself without professional experience?
Yes, handy homeowners with foundational carpentry skills can successfully tackle pocket window replacements. If the existing frame is plumb, square, and structurally sound, a typical DIY installation takes approximately 3 to 4 hours per window. However, large picture windows, multi-story installations, or full-frame tear-outs involving structural modifications or exterior siding adjustments are best handled by an experienced contractor.
How do I properly measure an existing window for replacement?
Measure the width between the side jambs at three points: the top, the middle, and the bottom. Next, measure the vertical height from the highest point of the sill to the head jamb at the left, center, and right. Always use the smallest width and height measurement when ordering your window, and verify that the two diagonal corner-to-corner measurements match within 1/8 of an inch.
What is the difference between pocket and full-frame replacement?
A pocket replacement installs a fully assembled insert window directly into the existing wood or vinyl frame after removing the old sashes and stops. This preserves existing interior and exterior trim. A full-frame replacement removes the entire window assembly down to the rough framing studs, which is required if the original frame has rot, structural decay, or severe out-of-square settling.
Conclusion
Upgrading your home with durable vinyl replacement windows enhances everyday indoor comfort, lowers heating and cooling demand, and protects your home against seasonal weather extremes. While learning how to replace vinyl windows yourself can be a rewarding project for a handy homeowner, achieving a flawless, draft-free seal requires careful measurement, patience, and meticulous attention to detail.
If you encounter rotted framing, out-of-square openings, or simply prefer the peace of mind that comes with dedicated craftsmanship, professional installation is a dependable choice. HomeBuild Windows, Doors & Siding is a trusted, locally owned exterior remodeling contractor serving Chicago and the surrounding northwest suburbs for over 20 years. Every project is owner-supervised to guarantee lasting quality and complete customer satisfaction.
As an Elite Platinum Pella® Certified Contractor, Andersen Certified Contractor, and recipient of the Angi Super Service Award with over 200 positive Google reviews, our licensed and insured team installs industry-leading products from trusted brands including Pella, Marvin, Alside, Therma-Tru, Simpson, and James Hardie. Whether you need expert window replacement, new entry doors, fiber cement siding, or residential roofing, we deliver dependable weather protection tailored to Midwest homes.
To explore product styles, glass packages, and structural options for your next home improvement project, explore our comprehensive replacement window buying guide or contact our team today to schedule your consultation.


