Is DIY Home Window Installation Actually Worth It?
Can you install your own windows? Here’s the short answer:
- Yes, technically — a handy homeowner can replace a standard window, especially a pocket/insert replacement in good condition
- But the risks are real — improper installation can reduce energy efficiency by up to 50% and void your window warranty
- Full-frame replacements are significantly more complex and almost always warrant a professional
- Pocket replacements in sound, square frames are the most DIY-friendly option
- Chicago-area homes face harsh Midwest winters — a poorly sealed window costs you every single month in heating bills
The bottom line: knowing what you’re getting into before you start makes all the difference.
Home window installation is one of those projects that looks straightforward on paper — pull out the old window, slide in the new one, done. But as anyone who has dealt with a drafty Chicago winter knows, even a small gap or missed flashing step can turn a weekend project into a recurring headache of leaks, drafts, and high energy bills.
Water is the biggest threat to any window installation. In fact, over 90% of windows installed in American homes have no sill pan underneath them — one of the most common reasons windows fail long before they should.
I’m Steve Mlynek, founder of HomeBuild Windows, Doors & Siding, and with over 20 years overseeing home window installation projects across Chicago and the northwest suburbs, I’ve seen what separates a long-lasting installation from one that fails in the first season. This guide will walk you through exactly what DIY window installation involves — so you can decide with confidence whether to grab your tools or call a pro.

Essential home window installation terms:
The Realities of DIY vs. Professional Home Window Installation

Taking on a DIY home improvement project can be highly rewarding, but window replacement demands a high level of precision. When you install a window yourself, you are entirely responsible for structural integrity, water management, and insulation.
According to the U.S. Department of Energy, heat gain and heat loss through windows are responsible for 25%–30% of residential heating and cooling energy use. If a window is installed improperly, air leakage and thermal bridging can reduce its overall energy efficiency by up to 50%. A professional installation, by contrast, ensures that the window performs exactly as rated and typically extends the useful life of the window by 5 to 10 years.
Before committing to a weekend of carpentry, it is vital to understand the two primary methods of replacement and evaluate which one fits your home’s needs. You can explore our comprehensive Window Replacement Options to learn more about selecting the right replacement style for your property.
Full-Frame vs. Pocket Installation Methods
Choosing the correct installation method depends heavily on the condition of your existing window frames and wall structure.
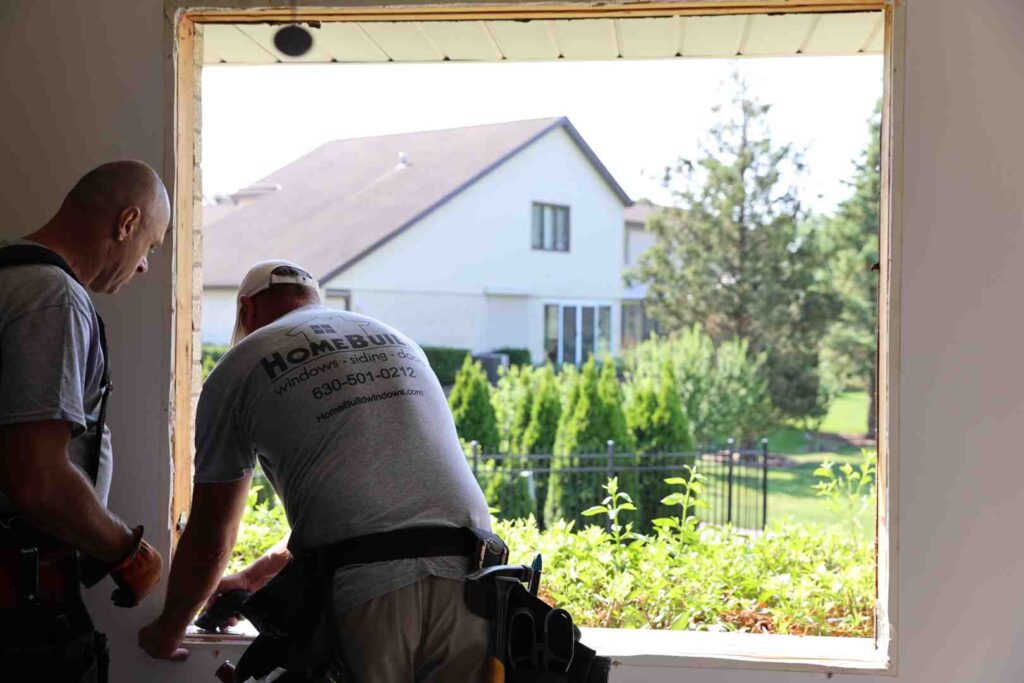
- Full-Frame Installation: This method involves removing the entire existing window, including the frame, sill, exterior trim, and interior trim, down to the rough opening. It is absolutely necessary if you have rot in the wood frame, if you want to change the window’s shape or size, or if you are upgrading a historically old home. While it provides the best opportunity to seal and insulate the wall cavity, it is highly labor-intensive and requires advanced carpentry skills.
- Pocket (Insert) Installation: Also known as pocket replacement, this method allows you to slide a new retrofit window directly into the existing wood frame. You only remove the old sashes and the parting stops, leaving the exterior trim and interior plaster or drywall completely undisturbed. This is a much faster, cleaner DIY option, but it only works if the existing frame is completely structurally sound, square, and free of moisture damage.
| Feature | Full-Frame Installation | Pocket (Insert) Installation |
|---|---|---|
| What is removed? | Sashes, frame, sill, interior/exterior trim | Sashes, balance systems, and parting stops only |
| When to use it? | Frame rot, structural damage, changing window size | Structurally sound, square, and level existing frames |
| Difficulty Level | Advanced / Professional | Moderate DIY |
| Glass Area | Preserves or increases original glass area | Slightly reduces total glass area |
| Insulation Quality | Maximized (allows sealing the entire rough opening) | Limited to the quality of the pre-existing frame insulation |
Essential Tools, Materials, and Preparation
Before starting, gather all necessary tools and prepare your workspace. Having everything on hand prevents mid-project delays that leave your home exposed to the unpredictable Chicago weather.
Required Tools:
- Pry bar and hammer (for trim and stop removal)
- 6-foot level and tape measure
- Power drill and driver bits
- Utility knife and caulking gun
- Putty knife
Required Materials:
- 100% polyurethane sealant (such as OSI QUAD Max)
- High-impact plastic horseshoe shims
- Self-adhering flashing tape (flexible membrane)
- Low-expansion polyurethane window and door foam
- Backer rod (sized 1/8 inch larger than the widest gap)
Preparation and Safety Precautions
If your home in Chicago or the surrounding suburbs was built before 1978, it is highly likely to contain lead-based paint. Disturbing this paint during window removal can release hazardous dust. Always use lead-safe work practices, wear protective gear (including safety glasses, gloves, and a respirator), and lay down heavy plastic sheeting to capture debris.
Clear a six-foot perimeter around each window inside and outside, remove all window treatments, and temporarily disable any window security sensors. To ensure a smooth transition on the day of the project, read our guide on How to prepare your home.
How to Measure a Rough Opening for Home Window Installation
Accurate measurements are the single most critical step in the ordering process. If your measurements are off by even a quarter of an inch, your new window will either not fit into the opening or fail to seal properly.

To measure for a replacement window, follow this strict protocol:
- Measure the Width: Measure the distance between the inside of the jambs at three distinct points: the bottom, the middle, and the top of the opening. Record all three measurements.
- Measure the Height: Measure the distance from the high point of the sill to the top header at three points: the left side, the middle, and the right side. Record these measurements.
- Check for Squareness: Measure diagonally from the top-left corner to the bottom-right corner, and then from the top-right corner to the bottom-left corner. If the two diagonal measurements differ by more than 1/4 inch, the opening is out of square and will require careful shimming.
- The Smallest Dimension Rule: When ordering your replacement window, always use the smallest of your three width and height measurements. Subtract 1/2 inch from both the smallest width and smallest height to establish a 1/4-inch expansion gap around the perimeter of the new window frame.
For a deeper dive into this technical step, read our Detailed guide on measuring rough openings.
Step-by-Step Guide to Installing a New Window
Once your old window sashes and stops are carefully removed and the opening is cleaned down to the bare wood, you are ready to begin the installation process. Managing water intrusion is your absolute highest priority.
Preparing the Rough Opening for Home Window Installation
A window is only as weather-proof as the rough opening surrounding it. To prevent water from rotting your wall framing, follow these industry-best practices:
- Inspect and Clean: Sweep away all old dust, plaster, and loose wood. Repair any minor wood damage on the framing.
- Install a Sloped Sill Pan: Water will eventually find a way past exterior seals. A sloped sill pan ensures that any water entering the system drains harmlessly back outside. Apply a high-quality flexible flashing tape (such as DuPont FlexWrap) across the entire sill plate, extending it at least 6 inches up each side jamb to create a continuous waterproof basin.
- Integrate the Weather-Resistant Barrier (WRB): For new construction or full-frame replacement, cut the house wrap at a 45-degree angle at the top corners of the opening to create a temporary head flap. Fold this flap up and tape it out of the way. This allows you to install the window directly against the framing and tuck the head flashing under the house wrap later.
- Install Corner Guards: Apply pre-formed corner guards or extra pieces of flashing tape to reinforce the bottom corners of the rough opening, which are the most vulnerable points for leaks.
For detailed technical drawings on water-barrier integration, you can refer to the JELD-WEN installation specifications.
Securing, Flashing, and Insulating the Window
With the rough opening prepared, it is time to dry-fit and secure the new window unit.
- Dry-Fit the Unit: Place the window in the opening to verify fit. Ensure there is an even gap around the entire perimeter. Remove the window.
- Apply Sealant: Apply a continuous 3/8-inch bead of 100% polyurethane sealant to the interior side of the window’s nailing flange (for new construction) or along the interior wood stops (for pocket installation). Crucial step: Leave a 2-inch gap in the sealant bead at the bottom sill flange on both ends. These gaps act as weep paths, allowing any trapped water to escape.
- Shim and Level: Place the window back into the opening. Insert high-impact plastic shims at the bottom corners and every 12 inches across the sill to level the unit. Place additional shims at the side jambs near the screw holes to keep the window perfectly plumb and square.
- Secure the Window: Drive corrosion-resistant #8 pan-head screws through the pre-drilled installation holes in the window frame or through the nailing flange. Ensure the screws achieve at least 1 1/4 inches of embedment into the structural wall studs. Do not over-tighten, as this can bow the vinyl or fiberglass frame.
- Apply Exterior Flashing Tape: For flanged windows, apply flashing tape over the side flanges first, overlapping the sill pan flashing. Then, apply flashing tape over the top head flange. Finally, fold down the temporary WRB head flap and tape the diagonal seams to ensure a shingle-lap effect that sheds water.
- Insulate the Cavity: From the interior, fill the gap between the window frame and the rough opening with low-expansion polyurethane window and door foam. Do not use standard high-expansion foam, as it will expand with enough force to bow the window frame and prevent the sashes from operating.
- Exterior Perimeter Seal: Once the foam cures, insert a foam backer rod into the exterior gap and apply a clean bead of color-matched polyurethane sealant to create a durable, wind-resistant barrier.
For visual reference and advanced fastening schedules, review the YKK AP installation guidelines.
Material Differences: Vinyl, Wood, Fiberglass, and Aluminum
The material of your replacement window dictates not only its performance but also how it behaves during installation.
- Vinyl Windows: Serving as 36% of all window sales in America, vinyl is highly popular due to its low-maintenance properties and excellent thermal insulation. However, vinyl has a high rate of thermal expansion and contraction. Installers must leave adequate expansion gaps (typically 1/4 inch) and avoid fastening the screws too tightly to allow the frame to slide slightly as temperatures shift between hot Chicago summers and freezing winters.
- Wood Windows: Wood frames offer unmatched classic beauty and high natural thermal resistance. However, they are susceptible to moisture damage. Wood windows require careful sealing of all raw wood edges before installation and must be painted or clad on the exterior to prevent rot.
- Fiberglass Windows: Fiberglass is incredibly strong, durable, and has virtually the same rate of thermal expansion as glass. This means seals remain intact much longer. Fiberglass frames are rigid and highly forgiving during installation, making them an excellent choice for premium performance in the Midwest climate.
- Aluminum Windows: While strong and lightweight, aluminum has high thermal conductivity, making it prone to heat loss and condensation in cold climates unless equipped with a high-quality thermal break.
At HomeBuild, we partner with industry-leading manufacturers like Pella, Marvin, Alside, and Andersen to offer our clients the highest-performing materials tailored to our local climate.
Common DIY Mistakes and Why Professional Installation Matters
While DIY window installation is possible for highly skilled homeowners, the margin for error is incredibly slim. A single mistake can lead to long-term structural issues that are difficult and expensive to remediate.
- Improper Shimming: If shims are not placed directly behind the installation screw locations, the frame will bow when the screws are tightened. This leads to sticky sashes, drafty gaps, and locked windows that refuse to open.
- Sealing the Weep Holes: Many DIYers mistakenly caulk the entire bottom edge of the window frame. This traps water inside the sill, leading to hidden rot inside your walls.
- Skipping the Sill Pan: Omitting a sloped sill pan means any water that gets past the exterior caulk has direct access to your home’s structural framing.
- Using the Wrong Foam: Utilizing standard expanding gap foam will warp the window frame, rendering the unit inoperable.
- Voided Warranties: Most major manufacturers state that installation errors will void the product warranty. If your window leaks or cracks due to improper installation, you will be responsible for the replacement.
In the Chicago area, our homes experience extreme seasonal temperature swings. A minor draft in October becomes a freezing wind by January, driving up utility bills and making your living space uncomfortable.
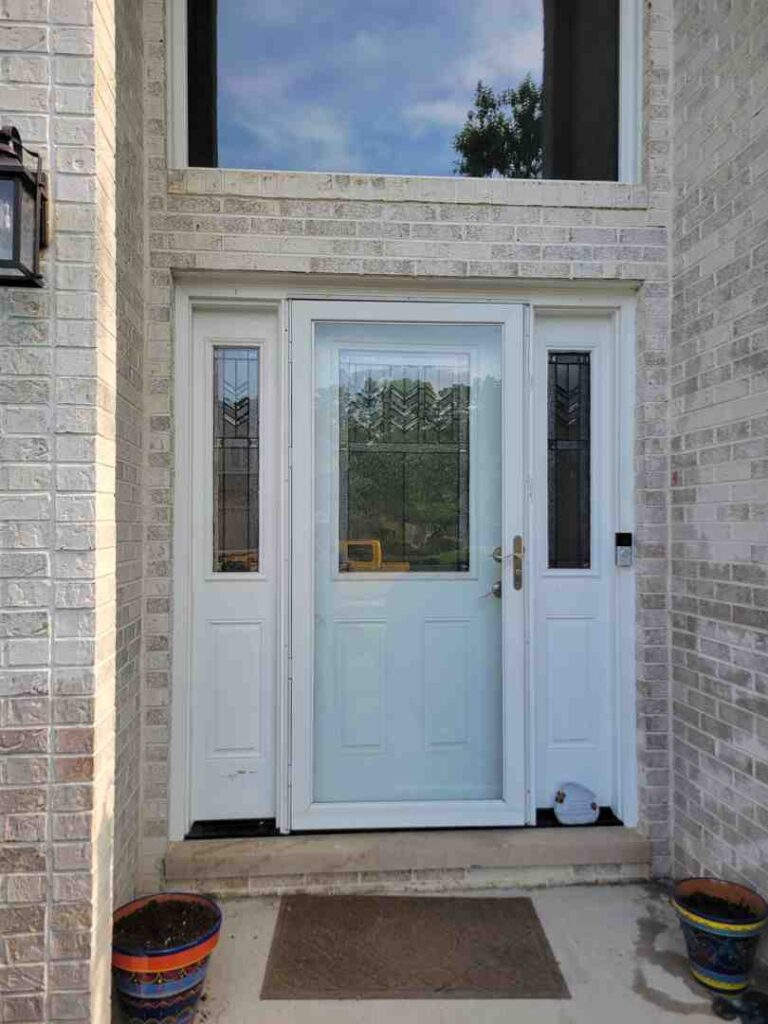
Professional installation by a certified team ensures that your home remains fully protected against the elements. If you prefer to leave this precise work to experienced professionals, we invite you to explore our Professional window services in Chicago or learn more about our complete range of Window Installation Services.
Frequently Asked Questions about Window Installation
How long does it take to install a replacement window?
For an experienced professional crew, a standard pocket window installation takes about 30 to 60 minutes per window. A full-frame replacement takes slightly longer due to trim and frame removal. A complete home replacement (10 to 15 windows) is typically completed in 1 to 2 days. For a DIYer, the learning curve is much steeper; expect the first window to take 3 to 4 hours as you navigate the instructions, leveling, and sealing steps.
Do I need a permit for home window installation?
Yes, most municipalities in Chicago and the surrounding northwest suburbs (including Arlington Heights, IL, and Des Plaines, IL) require a building permit for window replacements. This is especially true if you are modifying the size of the window opening, which alters the structural header of your home. Always check with your local building department before starting any work to ensure full code compliance.
Can improper installation void my window warranty?
Absolutely. Manufacturers like Pella, Marvin, and Andersen have strict installation guidelines that align with ASTM E2112 industry standards. If a window fails, leaks, or cracks, and the manufacturer’s representative determines that the issue was caused by improper shimming, lack of flashing, or incorrect fastening, your warranty claim will be denied. Hiring certified installers is the best way to protect your investment.
Conclusion
Deciding whether to tackle a home window installation yourself or hire a professional comes down to your comfort level with structural carpentry and your desire for long-term peace of mind. While a pocket replacement in a square, healthy frame is a manageable weekend project for a dedicated DIYer, full-frame replacements and complex weatherproofing are best left to the experts.
At HomeBuild Windows, Doors & Siding, we have spent over 20 years helping homeowners in Chicago and the northwest suburbs protect their homes from the harsh Midwest elements. As a trusted, locally owned contractor, we ensure that every project is owner-supervised to guarantee the highest standard of craftsmanship.
We are proud of our industry certifications and local reputation, which include:
- Elite Platinum Pella® Certified Contractor
- Andersen Certified Contractor
- Angi Super Service Award winner
- Nextdoor Neighborhood Faves honoree
- 200+ positive Google reviews
- Fully licensed and insured
Whether you are looking to replace drafty windows, upgrade your siding, or install a beautiful new entry door, our team is here to help you improve your home’s energy efficiency, comfort, and curb appeal.
Ready to upgrade your home with beautiful, energy-efficient windows installed to the highest professional standards? Schedule a professional window replacement and installation with HomeBuild today for a free consultation.