Understanding When Your Awning Window Needs a New Pane
How to replace awning window pane is a common concern for homeowners with cracked, foggy, or broken glass. Awning windows are popular in Chicago homes because they open outward from the bottom, allowing ventilation even during light rain. However, their hinged design means glass replacement requires specific steps.
Key steps for replacement include:
- Remove the sash by detaching the operator arm and hinge bars.
- Remove old glass by taping the damaged pane and removing glazing beads.
- Clean and measure the frame for the new glass.
- Install new pane by applying sealant, setting the glass, and securing it.
- Seal and finish with a final sealant layer and allow it to cure.
The most common reasons for pane replacement are impact damage, stress cracks from temperature changes, and seal failure in double-pane units, which causes condensation between glass layers. According to industry data, DIY glass replacement costs between $100-$300 per pane, while professional full window replacement ranges from $500-$1,000.
Benefits of replacing just the pane include:
- Cost savings compared to full window replacement.
- Improved energy efficiency with modern glass options.
- Better home aesthetics by removing cracks or fog.
- Maintaining historic charm in older homes.
For simple single-pane windows in wood frames, this is a manageable DIY project. However, modern double-pane units often require professional expertise due to their sealed construction. Proper pane replacement can restore both function and energy efficiency to these versatile windows.

Preparing for Your DIY Window Project
Before you start your project on how to replace awning window pane, it’s crucial to gather the right tools and materials. This section covers the necessary equipment, glass options for your Chicago home, and essential safety precautions.

Essential Tools and Materials
Having the right equipment is key to a successful project. Here’s what you’ll need:
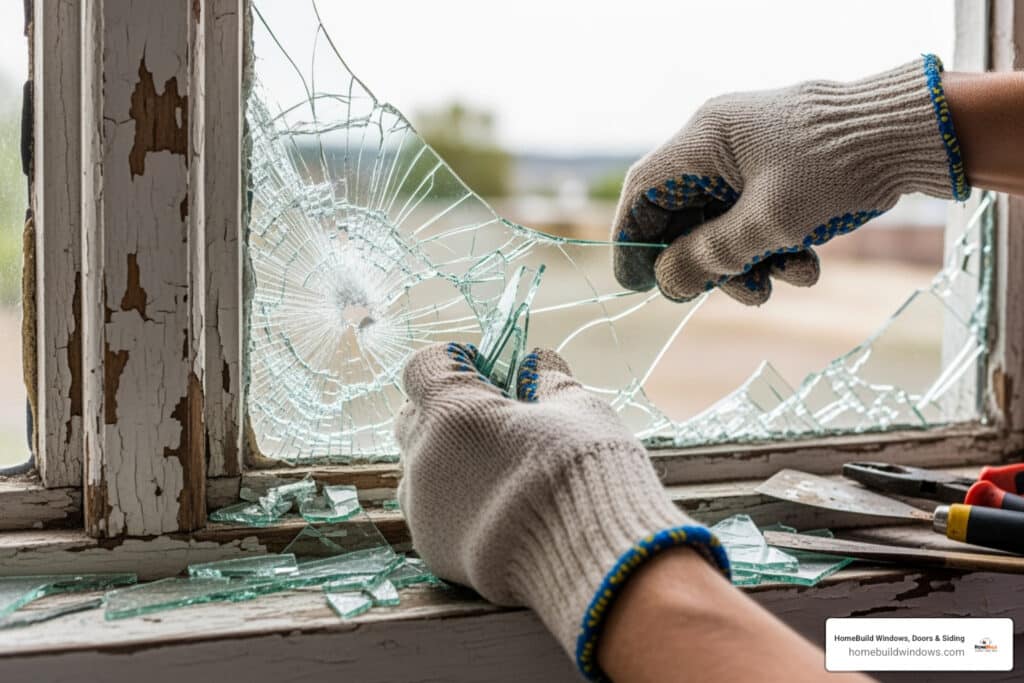
- Safety Gear: Thick, cut-resistant gloves and safety goggles or a face shield are non-negotiable to protect against glass shards.
- Measuring & Removal Tools: A tape measure, putty knife or chisel, and a heat gun or hairdryer for softening old putty.
- Installation Tools: A caulking gun, glazier’s points to hold the glass, and pliers.
- Materials: The replacement glass pane, and glazing putty (for wood frames) or silicone sealant (for vinyl/aluminum frames).
- Cleanup Supplies: Drop cloths, duct tape to stabilize cracked glass, a utility knife, sandpaper, and cleaning supplies. For wood frames, have wood filler and primer on hand.
Choosing the Right Replacement Glass
Picking the right glass affects your home’s energy efficiency, comfort, and safety.
- Single-pane glass is the most budget-friendly option and is common in older Chicago homes. It’s simple to replace but offers minimal insulation.
- Double-pane glass units feature two panes separated by an insulating gas like argon, significantly improving comfort and reducing energy costs. If the seal fails, the entire unit must be replaced.
- Tempered glass is heat-treated for strength and shatters into small, harmless pieces, making it a safe choice. It’s often required by building codes in specific locations.
- Low-E glass has an invisible coating that reflects heat, keeping your home cooler in summer and warmer in winter. It’s a smart investment for Chicago’s climate, and the Energy Efficiency Improved benefits often justify the cost.
For more details, see our Window Replacement Guide: Double Pane vs. Triple Pane Windows and learn about Energy Efficient Replacement Windows: Everything You Need to Know.
Safety First: Potential Risks and Precautions
Working with glass requires careful attention to safety. Understanding the risks is the first step to avoiding them.
- Glass Handling: Always wear cut-resistant gloves and safety goggles. Stabilize cracked glass with duct tape before removal. Dispose of shards in a sturdy, labeled container.
- Working at Heights: Use a stable ladder and have a spotter if your window is on an upper floor. Never overreach.
- Tool Safety: Use tools like heat guns and chisels carefully. Always cut away from your body and work slowly.
- Frame Damage: Be gentle when prying off old glazing, especially with older wood frames, to avoid costly damage.
- Poor Sealing: An improper seal can lead to drafts, energy loss, and water leaks. Take your time with the sealing process to ensure a durable, weatherproof finish.
A successful DIY project is one where everyone stays safe. For visual references, How to Replace a Window Pane (with Pictures) – wikiHow offers helpful guidance.
Step-by-Step Guide: How to Replace Awning Window Pane
With your tools and materials ready, it’s time to tackle how to replace awning window pane. This guide details how to safely remove the old glass and install the new pane for a durable, weatherproof finish.

Safely Removing the Old Glass: A Guide on How to Replace Awning Window Pane
- Remove the Screen: If present, turn the interior screen clips and remove the screen.
- Remove the Sash: For easier and safer work, remove the entire sash (the movable window part). Open the window fully, detach the sash hook from the operator arm, pry the hinge bars off the hinge posts on both sides (with a helper supporting the sash), and slide out the hinge guide. Lift the sash out and place it on a stable, padded surface.
- Prepare Damaged Glass: If the glass is cracked, apply duct tape in an “X” pattern on both sides to hold it together.
- Remove Glazing: The method depends on your frame type.
- Wood Frames: Use a putty knife and heat gun to carefully chip away old, hardened glazing putty. Then, remove the small metal glazier’s points holding the glass.
- Vinyl/Aluminum Frames: Carefully pry out the removable glazing beads (strips) with a thin putty knife. Start with the side beads, then the bottom, and finally the top. Mark their positions for reinstallation. This video demonstrates a similar process.
- Silicone-Glazed Products: Use a utility knife to cut the silicone sealant around the perimeter between the frame and the glass.
- Remove Old Glass: Wearing protective gear, carefully lift or push the old pane out of the frame. Dispose of all shards safely.
- Clean the Frame: Scrape away all remaining putty, silicone, and debris from the rabbet (the groove where the glass sits). The surface must be clean, dry, and smooth.
Measuring for the New Pane
Accurate measurement is critical. Measure the width and height of the frame opening in three places (top, middle, bottom and left, middle, right). Use the smallest measurement for each dimension. To allow for thermal expansion, subtract 1/8 inch (0.32 cm) from both the final width and height. Also, measure the thickness of the old glass to ensure the new pane fits correctly. Double-check all measurements before ordering.
Installing the New Glass: Best Practices for How to Replace Awning Window Pane
With your new pane ready, it’s time for installation.

- Apply Sealant: Apply a continuous bead of glazing putty or silicone sealant into the clean, dry rabbet. This cushions the glass and creates a weatherproof seal.
- Use Setting Blocks (for double-pane units): Place small plastic or rubber setting blocks at the bottom of the frame to support the weight of heavier double-pane units.
- Set the New Pane: Carefully lower the new glass into the frame, pressing it gently but firmly into the sealant. Ensure it is centered.
- Secure the Glass:
- Wood Frames: Insert glazier’s points every few inches, pushing them into the wood to hold the glass in place.
- Vinyl/Aluminum Frames: Snap the glazing beads back into place, starting with the top piece, then the bottom, and finally the sides.
- Reinstall the Sash: If you removed the sash, reattach it to the frame and test its operation. Replace the screen.
Sealing and Finishing for Weatherproofing
- Apply Final Sealant: For wood frames, apply and smooth a final layer of glazing putty over the glazier’s points. For vinyl/aluminum frames, apply a thin bead of silicone along the seam where the glass meets the frame.
- Smooth the Sealant: Use a putty knife at a 45-degree angle to create a neat, beveled edge that sheds water. Remove any excess.
- Allow Curing Time: This is vital. Glazing putty needs 7-10 days (or more) to cure before painting. Silicone typically cures in 24-48 hours. Always follow the manufacturer’s instructions.
- Paint (for wood frames): Once the putty is fully cured, prime and paint the frame. Overlap the paint slightly onto the glass (about 1/16 inch) to create an extra seal.
For more general tips, see resources like How to Replace a Window Pane.
DIY vs. Professional Replacement: Making the Right Choice
Deciding whether to tackle how to replace awning window pane yourself or call a professional involves weighing cost, complexity, and your own skills. Being honest about your project’s demands is key to a successful outcome.

When to DIY
A DIY approach can be rewarding and cost-effective under the right circumstances. Consider doing it yourself if you have:
- Single-pane windows: These are simpler and don’t involve complex sealed units, making them more forgiving for a first-timer.
- Wood frames: These use traditional glazing putty, and the replacement technique is well-documented and learnable.
- A manageable scope: Replacing one or two easily accessible panes is a reasonable project for a handy homeowner.
- Budget constraints: DIY materials typically cost $100-$300, far less than professional services. Just remember to factor in the value of your time.
- Comfort with tools: If you are patient, detail-oriented, and enjoy hands-on work, you will likely find this project manageable.
When to Call a Professional
Some situations require professional expertise to avoid costly mistakes, frustration, or safety hazards. It’s best to call a pro for:
- Double-pane and triple-pane units: When a sealed insulated glass unit (IGU) fails (indicated by fogging), the entire unit must be replaced. This requires specialized handling and installation.
- Modern frame materials: Vinyl and fiberglass frames often have proprietary glazing systems that are not designed for easy DIY repair. Forcing it can damage the entire frame.
- Large or inaccessible windows: Handling heavy glass panes, especially on upper floors, is dangerous without proper equipment and experience.
- Frame damage: If you see rot, warping, or other structural issues, replacing the glass won’t fix the root problem. A professional can assess if a repair is possible or if a full replacement is needed.
- Time or tool constraints: A first-time replacement can take 3-6 hours per window, plus curing time. If you lack the time or tools, hiring a pro is more efficient.
- Warranty needs: Professional installations come with warranties on materials and labor, a safety net that DIY work doesn’t offer.
Sometimes, a full window replacement offers better long-term value, especially for improving energy efficiency. Our Window Replacement and Installation guide and article on 4 Reasons Your Home Needs Window Replacement can help you decide.
Frequently Asked Questions about Awning Window Repair
Homeowners often have similar questions about awning window issues. Here are answers to the most common queries about how to replace awning window pane and related repairs.
Why is my double-pane awning window foggy?
Fog or condensation trapped between the two panes of glass means the window’s hermetic seal has failed. This allows moisture-laden air to enter the space, causing the cloudy appearance you can’t wipe away. The insulating gas has also escaped, reducing the window’s energy efficiency.
The only solution is to replace the entire sealed glass unit, known as an IGU. The seal itself cannot be repaired. This is a job for professionals due to the precise manufacturing and handling required.
Can I use any type of sealant for my window?
No, you must use a sealant specifically designed for exterior window glazing. Standard caulks will fail quickly when exposed to weather and temperature changes. For wood frames, use traditional glazing putty. For vinyl or aluminum frames, use a high-quality silicone sealant rated for window and glass applications. Using the correct product is crucial for a durable, waterproof seal.
How long does a DIY window pane replacement take?
For a first-time DIYer, expect the hands-on work to take 3 to 6 hours for a single pane. However, the most important factor is the curing time. Traditional oil-based glazing putty needs 7-10 days (sometimes longer in cool or humid weather) to harden before it can be painted. Silicone sealants cure much faster, typically within 24-48 hours. Rushing this step will compromise the repair, so always follow the manufacturer’s instructions.
Conclusion
Learning how to replace awning window pane can be a rewarding DIY project, saving you money while you gain valuable home repair skills. For straightforward, single-pane windows in wood frames, this task is well within reach for a careful homeowner.
However, not all window repairs are suitable for DIY. Modern double-pane units, complex frame materials, and hard-to-reach windows often require professional expertise to ensure a proper, lasting repair. Sometimes, replacing only the glass is a temporary fix for an aging window.
DIY pane replacement is ideal for accessible, single-pane windows when you have the time and patience. In contrast, professional full window replacement offers comprehensive warranties, superior energy efficiency, and the peace of mind that comes with expert installation. If your frames are old or your energy bills are high, a full replacement may be the smarter long-term investment.
When you’re ready for expert guidance or flawless installation, the team at HomeBuild Windows is here to help Chicago homeowners. We provide top-quality products, expert installation, and exceptional customer service.
Whether you choose DIY or a professional upgrade, making the right choice for your home is what matters most. For professional Awning Windows Replacement, we’re ready to secure your home’s comfort and efficiency.