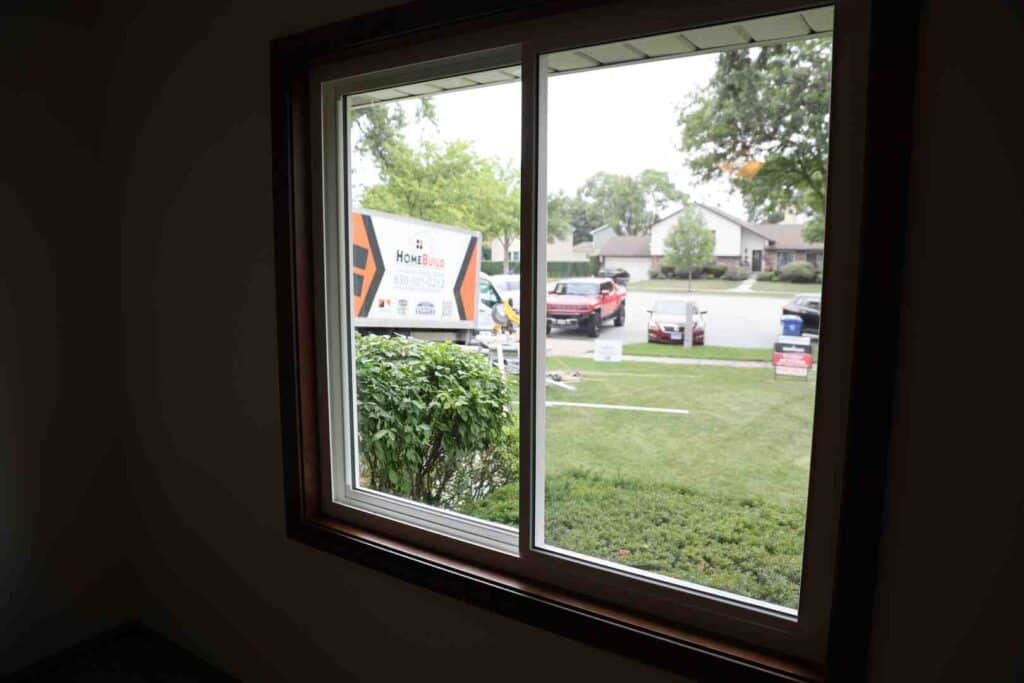
Why Sliding Patio Door Installation Matters for Your Home
A professional sliding patio door installation transforms your home by connecting it to the outdoors, flooding your space with natural light, and potentially lowering your energy bills. Whether you’re replacing an old door or creating a new opening, understanding the process is key.
Key Installation Steps:
- Measure the rough opening (height, width, and diagonal).
- Prepare and waterproof the opening with a sill pan and flashing tape.
- Set and secure the frame, ensuring it’s plumb, level, and square.
- Install the sliding panels and adjust for smooth operation.
- Seal, insulate, and finish with foam, caulk, and trim.
Homeowners typically pay around $2,500 for a full replacement, including materials and labor. Costs can range from $600 for basic vinyl doors to over $5,000 for premium materials like fiberglass or wood-clad. Labor often makes up 20% to 60% of the total price.
Proper installation is critical to prevent drafts and water damage, especially in the harsh Chicago climate. Common mistakes like incorrect measurements or improper flashing can lead to costly repairs.
As the founder of HomeBuild Windows, Doors & Siding, I’m Steve Mlynek. With over 20 years of experience in sliding patio door installations across Chicagoland, I know what it takes to install a door that stands up to our weather. This guide will walk you through the process and help you decide when to call in certified professionals.
. Step 2 - Prepare opening by removing old door, installing sill pan, and applying flashing tape for waterproofing. Step 3 - Set frame by tilting into opening, shimming to ensure plumb and level, then secure with screws. Step 4 - Install panels by hanging fixed and sliding panels, adjusting rollers for smooth operation. Step 5 - Finish by applying low-expansion foam insulation, trimming excess, installing interior/exterior trim, and caulking. - sliding patio door installation infographic")
Step 1: Pre-Installation Planning and Preparation
Successful sliding patio door installation starts with good planning. Getting organized first will save you frustration later.

Types and Materials of Sliding Patio Doors
Choosing the right door involves balancing aesthetics, durability, and budget. Sliding doors are space-efficient, making them ideal for tight spaces. Most homes use a two-panel configuration (one fixed, one sliding), while wider openings may feature three-panel doors. For a classic look without the swing space, French-style sliders are an excellent option.
Your choice of material impacts cost, maintenance, and energy efficiency.
| Material | Cost Range (Door Only) | Maintenance | Durability | Energy Efficiency |
|---|---|---|---|---|
| Vinyl | $600 – $1,200 | Low | Good | Good |
| Aluminum | $600 – $2,000 | Low | Very Good | Moderate |
| Wood-Clad | $1,500 – $3,500+ | Moderate (exterior) | Excellent | Excellent |
| Fiberglass | $1,000 – $3,000+ | Low | Excellent | Very Good |
- Vinyl: Affordable, low-maintenance, and energy-efficient. A reliable, budget-friendly choice.
- Aluminum: Sleek, strong, and modern. Look for thermally broken frames to improve insulation.
- Wood-Clad: Offers the beauty of interior wood with a durable, low-maintenance exterior cladding. A premium option with excellent insulation.
- Fiberglass: Extremely durable, weather-resistant, and energy-efficient. An ideal choice for Chicago’s extreme temperatures.
Explore more options in our guide on door types.
How to Measure for Your New Sliding Patio Door
Precision is everything. Measure the rough opening—the structural frame in the wall—after removing the interior trim.
- Measure Width: Measure the distance between the side jambs at the top, middle, and bottom. Use the smallest of the three measurements.
- Measure Height: Measure from the subfloor to the bottom of the header on the left, middle, and right. Use the smallest measurement.
- Check for Square: Measure diagonally from top-left to bottom-right, then top-right to bottom-left. The two numbers should be within 1/8 inch of each other. If not, the opening is out of square, which can be corrected with shims during installation.
Your new prehung door frame should be about 1/2 to 3/4 inch smaller than the rough opening to allow for adjustments. For more details, see our front door installation guide.
Tools and Materials Needed
Gather everything before you begin to ensure a smooth workflow.
Tools:
- Tape measure (25-foot)
- Levels (4-foot and 2-foot)
- Drill/driver
- Pry bar and hammer
- Utility knife and putty knife
- Caulk gun
- Screwdrivers
- Circular or reciprocating saw (for removal)
- Safety glasses and work gloves
- Sawhorses
Materials:
- Prehung sliding door unit
- Wood shims
- Sill pan
- Self-adhering flashing tape
- Exterior-grade silicone caulk
- Low-expansion spray foam (for windows/doors)
- Finishing nails and trim head screws
- Spackle or wood filler
- House wrap and drip edge (if needed)
Step 2: Preparing and Waterproofing the Rough Opening
This step is about creating a clean, sound, and waterproof opening for your new door. Doing this right prevents costly water damage later.

Preparing the Opening for Installation
If you’re replacing a door, start by carefully removing the old one.
- Remove Trim: Score the caulk and paint lines around the interior and exterior trim with a utility knife. Gently pry off the trim.
- Remove Old Door: Lift the sliding panels off their tracks. Use a pry bar or reciprocating saw to cut fasteners and remove the old frame.
- Clean and Inspect: Clear all debris, old caulk, and insulation from the opening. Thoroughly inspect the sill plate and studs for any signs of rot or water damage. In Chicago’s climate, moisture issues are common.
- Repair Damage: Before proceeding, you must replace any rotted or damaged wood. Installing a new door over a compromised frame will lead to failure.
- Verify Dimensions: Double-check that your rough opening measurements provide the necessary 1/2 to 3/4 inch clearance for the new door frame.
For more tips, see our guide on changing an exterior door.
How to Properly Seal and Flash the Opening
Waterproofing is what separates a professional sliding patio door installation from a future problem.
- Install Sill Pan: This is your primary defense against water. Apply a continuous bead of exterior-grade silicone caulk on the sub-sill, then press the sill pan firmly into place. Ensure it is level and slopes slightly to the exterior.
- Apply Flashing Tape: To create a weather-tight seal, apply self-adhering flashing tape. Work from the bottom up, following the “shingle principle” to shed water.
- Start by taping the jambs, overlapping the sill pan flashing.
- Next, apply tape across the head, overlapping the jamb flashing.
- Press the tape down firmly with a J-roller to eliminate air bubbles.
- Apply Caulk: Before setting the door, apply generous beads of silicone caulk along the bottom of the opening where the threshold will sit and up the sides where the frame will make contact.
Need a refresher on caulking? This DIY Basics video on How Do I Use Caulk? can help.
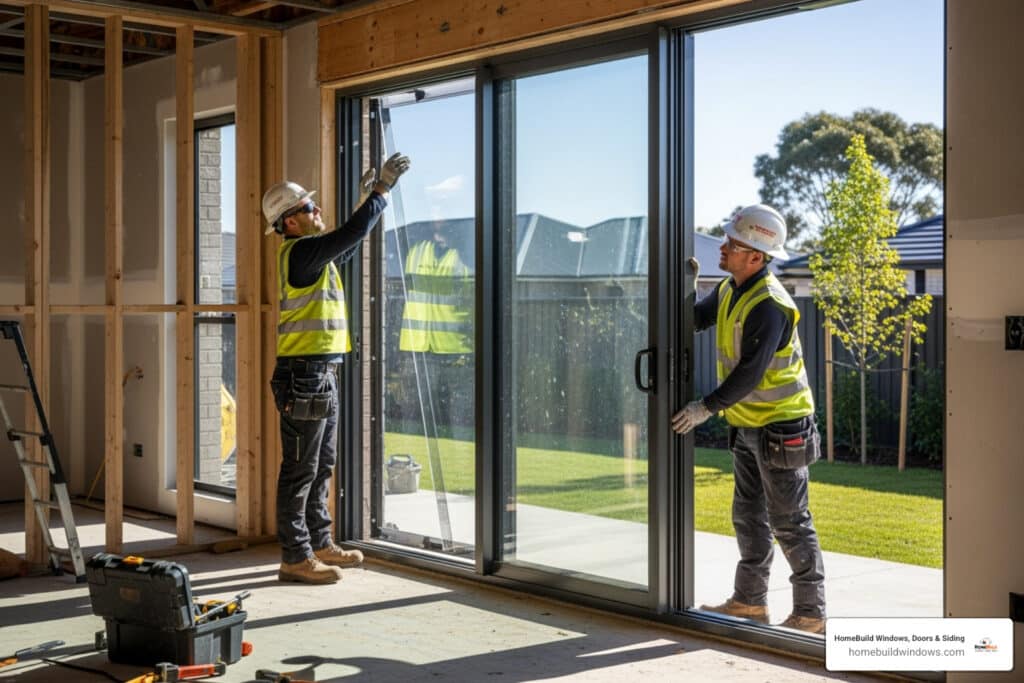
Step 3: The Core Sliding Patio Door Installation Process
Now it’s time to set the new door in place. This step requires precision and is much easier with a helper.

Setting and Securing the Door Frame
Getting the frame perfectly positioned is critical for smooth, long-term operation.
- Set the Door: With a helper, lift the door unit and center the bottom in the opening, pressing it into the beads of caulk. Gently tilt the frame upright into place. Avoid sliding it, which can disrupt the sealant.
- Shim the Frame: Insert shims around the frame (every 12-18 inches) to create a snug fit. Don’t force them in, as this can distort the frame.
- Check for Plumb, Level, and Square: Use a 4-foot level to ensure the sill is perfectly level and the jambs are plumb (perfectly vertical). Adjust the shims as needed. Re-check the diagonal measurements to confirm the frame is square. An out-of-square frame will cause the panels to bind. If you’re unsure what these terms mean, this video explains What Do Level and Plumb Mean?.
Anchoring the Frame and Installing the Panels
Once the frame is perfectly positioned, secure it to the house.
- Fasten the Frame: Drive trim head screws through the pre-drilled holes in the frame, making sure they go through the shims and into the wall studs. This prevents the frame from bowing when tightened. If the door has a nailing fin, secure it to the sheathing with roofing nails.
- Re-Check and Trim: As you fasten, continuously re-check that the frame remains plumb, level, and square. Once secured, score and snap off the excess shim material flush with the frame.
- Install Panels: Carefully lift the fixed panel and set it into its track. Then, install the sliding panel, ensuring its rollers are seated correctly on the bottom track.
- Adjust Rollers: Slide the door back and forth. If it doesn’t glide smoothly, use the adjustment screws on the bottom edge of the panel to raise or lower it. A few minutes of fine-tuning here ensures effortless operation for years.
- Install Hardware: Attach any panel retainers or bumpers according to the manufacturer’s instructions to complete the core sliding patio door installation.
Step 4: Final Sealing, Insulation, and Finishing
This final phase turns a functional door into an energy-efficient, polished part of your home. These details are crucial for performance, especially in Chicago’s climate.

Insulating and Sealing Gaps
Proper insulation prevents drafts and lowers energy bills. The gap between the door frame and the rough opening is a major source of air leakage if not sealed correctly.
Use a low-expansion polyurethane foam specifically designed for windows and doors. Standard high-expansion foam can warp the door frame as it cures, causing it to bind.
- Apply the foam into the gap around the perimeter. Don’t overfill it; a one-inch deep bead is usually sufficient.
- Allow the foam to cure completely according to the product instructions.
- Use a utility knife to carefully trim any excess foam so it’s flush with the wall and frame.
For a visual guide, check out this DIY Basics video on How Do I Use Spray Foam?.
Finishing the Interior and Exterior
Finishing work provides a clean, professional look and adds a final layer of weather protection.
- Interior: Reinstall the original trim or install new casing. Secure it with finishing nails, then fill the nail holes with wood filler and sand smooth. Caulk the seam where the trim meets the wall, then paint or stain as desired.
- Exterior: Ensure all siding is properly fitted around the new door. Apply a continuous bead of high-quality, exterior-grade silicone caulk where the door casing meets the siding. This is your final defense against water infiltration. Seal any other exterior seams to protect your home from Chicago’s driving rain and freeze-thaw cycles.
With these final touches, your sliding patio door installation is complete. Should you ever need Information on replacing glass in the future, we have resources to help.
Common Questions About Sliding Door Projects
Even with a guide, questions can arise. Here are answers to common inquiries about sliding patio door installation.
What are the typical costs for a sliding patio door replacement?
On average, homeowners can expect to pay around $2,500 for a full replacement, including the door, labor, and disposal of the old unit. The total cost can range widely from $600 to over $5,000.
Key factors influencing the price include:
- Door Material: Vinyl is the most affordable, while wood-clad and premium fiberglass are at the higher end.
- Size and Configuration: Standard two-panel doors are less expensive than larger or custom-sized units.
- Energy Efficiency: Features like low-E glass and argon gas fills add to the initial cost but provide long-term savings on energy bills.
- Labor Costs: Labor typically accounts for 20% to 60% of the total price. Complex jobs, such as resizing an opening or working on upper floors, will increase labor costs.
Always get a detailed, written estimate before work begins to understand all associated costs.
What are common mistakes in sliding patio door installation?
Avoiding these common pitfalls is key to a successful installation:
- Incorrect Measurements: An improperly sized door will lead to drafts, binding, or structural issues. Measure multiple times and use the smallest dimension.
- Uneven Sill: A sill that isn’t perfectly level will throw the entire frame out of alignment, preventing the door from sliding smoothly.
- Improper Flashing: Skipping or incorrectly installing the sill pan and flashing tape is a direct invitation for water damage, rot, and mold.
- Over-Shimming: Forcing shims too tightly can bow or twist the frame, causing the door to bind and locks to misalign.
- Using High-Expansion Foam: This type of foam can exert enough pressure to warp the door frame. Always use low-expansion foam made for windows and doors.
- Not Adjusting Rollers: Failing to fine-tune the rollers after installation results in a door that drags or sticks instead of gliding effortlessly.
- Forgetting to Check Plumb, Level, and Square: Constantly verifying these three alignments throughout the process is non-negotiable for a professional result.
When should I hire a professional installer?
While DIY is possible, hiring a professional is the smartest choice in several situations. At HomeBuild Windows, Doors & Siding, we provide expert installation to ensure a perfect fit and lasting performance. Consider hiring a pro if:
- You are creating a new opening. This involves structural work that requires professional expertise.
- There is significant rot or structural damage. A pro can properly assess and repair the framing to ensure your home’s integrity.
- The installation is on an upper story. Professionals have the equipment and experience to handle the safety risks and logistics.
- You lack the time, tools, or experience. A professional ensures the job is done right the first time, saving you from costly mistakes.
- You want a warranty and peace of mind. Our installations come with a labor warranty, protecting your investment.
- You live in the Chicago area. We understand local climate challenges and building codes, ensuring your door is installed to withstand our harsh weather.
For complex projects, trusting a professional team is often the best choice. You can Find professional installers and learn more about our services on our site.
Conclusion
A perfectly executed sliding patio door installation is a satisfying upgrade. Your home becomes brighter, more energy-efficient, and better connected to your outdoor living space. You’ve added real value and comfort to your property.
We’ve covered the entire process, from planning and measuring to the final finishing touches. It’s a detailed project where precision matters. A small mistake in waterproofing or shimming can lead to drafts, moisture, and frustration.
For skilled DIYers, this guide provides a solid roadmap. However, not every project is a DIY adventure. In the Chicago area, our extreme weather demands a flawless installation to prevent high energy bills and damage.
That’s where HomeBuild Windows, Doors & Siding comes in. With over 20 years of local experience, our team knows how to install your sliding patio door to perform beautifully for decades. We handle everything—from precise measurements and expert waterproofing to a flawless finish—with professionalism and care. You get the peace of mind that comes with a labor warranty and a job done right.
Ready to transform your home? Get a professional quote for your door installation with HomeBuild Windows, Doors & Siding today. Let’s bring more light and comfort into your home.