Transform Your Home’s Entrance with Confidence
New entry door installation is a powerful home improvement project that delivers immediate benefits: improved curb appeal, improved energy efficiency, and increased security. Here’s what you need to know before you start:
Key Steps for New Entry Door Installation:
- Measure your existing door opening (width, height, and jamb depth)
- Choose between a pre-hung door (easier) or slab door (requires existing frame)
- Remove your old door and frame carefully
- Prepare the rough opening with flashing and sealant
- Set and shim the new door to ensure it’s level and plumb
- Secure the frame with long screws through shims into studs
- Seal with low-expansion foam and exterior caulk
- Install hardware and apply final finishes
Project Timeline: 4-8 hours with a helper
Skill Level: Intermediate (or hire a professional)
Average Cost: $300-$1,000+ depending on materials and complexity
Replacing a front door can dramatically improve your home’s appearance and function. According to industry research, a new exterior door can dramatically improve your home’s curb appeal and energy efficiency, making it one of the fastest ways to boost your property’s value.
As Steve Mlynek, founder and CEO of HomeBuild Windows, Doors & Siding with over 20 years of experience, I’ve guided countless Chicago-area homeowners through successful new entry door installation projects. Whether you choose DIY or professional installation, the right preparation and techniques ensure your investment delivers lasting results.
 Increased home value and curb appeal with up to 75% ROI, 2) Energy savings of 10-15% through reduced air leakage and improved insulation, 3) Enhanced security with modern locking systems and durable materials like steel or fiberglass - New entry door installation infographic")
Preparing for Your Project: Measurements, Tools, and Door Selection
Before diving into the actual installation, thorough preparation is key. This phase involves everything from inspecting your new door to understanding your budget and selecting the right materials. We believe that a well-planned project is a successful project, especially when it comes to something as crucial as your home’s entry point.
Once your new door arrives, inspect it immediately for any damage or discrepancies. Most manufacturers recommend doing this within four days of delivery to ensure any issues are covered under warranty. Familiarize yourself with the warranty information and understand any installation deadlines that might apply (some require installation within 45-60 days).
Budgeting is another vital step. The cost of a new entry door installation can vary significantly based on material, size, style, hardware, and whether you opt for professional installation or tackle it yourself. Standard door sizes are generally 80 inches high and 30, 32, or 36 inches wide, with a thickness of 1 ¾ inches. However, custom sizes or high-end features like decorative glass, smart locks, or sidelights will increase the overall investment. When considering your budget, remember to factor in potential long-term maintenance or repair costs associated with different materials. Don’t be afraid to ask for a detailed estimate that clearly outlines all inclusions and exclusions. Sometimes, opting for less expensive hardware or a simpler door style can help keep costs in check, or reusing existing hardware and frames if they’re in good condition.
Choosing the right door material is paramount for both aesthetics and performance. Here are some popular options:
- Steel Doors: Known for their exceptional durability, heightened security, and often fireproof qualities. They boast excellent energy efficiency thanks to foam-filled cores and thermal adhesives.
- Fiberglass Doors: A low-maintenance and weather-resistant option, fiberglass doors are fantastic at resisting dents and scratches. They offer good insulation and can mimic the look of wood without the upkeep.
- Wood Doors: For those who prioritize natural beauty and customization, wood doors showcase unique woodgrains and offer a classic look. However, they require more maintenance and need to be sheltered from direct exposure to the elements to prevent warping.
- Vinyl Doors: A cost-effective and energy-efficient choice, vinyl entry doors provide an airtight seal and generally require minimal maintenance.
The best material for your Chicago-area home will depend on your local climate, desired maintenance level, and aesthetic preferences. We invite you to explore our wide selection of Entry Doors to find the perfect match for your home.
Essential Tools and Materials for a New Entry Door Installation
Having the right tools and materials on hand will make your new entry door installation project run smoothly. Here’s a comprehensive list of what you’ll need:
Tools:
- Hammer
- Essential Drill/driver (with masonry, spade, countersink, and socket/hex adapter bits)
- Flat pry bar
- Ladder
- 4-foot Level
- Caulk gun
- Utility knife
- Reciprocating saw (for old frame removal)
- Oscillating tool (optional, for precise cuts)
- Tape measure
- Speed square
- Wood chisels
- Door jacks or extra shims (to support the door during installation)
Materials:
- New door unit (pre-hung or slab)
- Shims (wood or composite, stock up on plenty!)
- Low-expansion foam insulation
- Exterior-grade caulk (silicone or polyurethane)
- Flashing tape (self-adhesive, flexible, waterproof)
- Sill pan (optional but highly recommended for water protection)
- Screws (3-inch deck screws, longer hinge screws)
- Weatherstripping (if not pre-installed on your new door)
- Construction adhesive (for threshold)
- Bondo (for filling old screw holes)
- Interior and exterior trim (if needed)
- Paint or stain (for finishing)
How to Measure for a Perfect Fit
Accurate measurements are the bedrock of a successful new entry door installation. “Measure twice, cut once” is the mantra here!
- Measure Width: Measure the existing door opening at three points: the top, middle, and bottom. Record the smallest of these three measurements. This is critical because openings can be slightly out of square.
- Measure Height: Measure from the subfloor or existing sill to the underside of the header at both the left and right sides. Again, record the smallest measurement.
- Measure Jamb Depth: This measurement is often overlooked but crucial. Measure the thickness of your wall from the interior finished wall surface to the exterior sheathing or siding. This ensures the new door frame will fit your wall thickness perfectly.
- Rough Opening vs. New Door Size: Your new door unit should generally be slightly smaller than your rough opening. For example, a new door might need to be 1/2″ to 3/4″ smaller in width and 1/2″ smaller in height than the rough opening to allow for shimming and proper installation.
- Door Swing Direction: Determine if your door swings in or out and if the hinges are on the left or right when viewed from the exterior. This is vital for ordering the correct door.
- Exterior Opening Dimensions: If you’re replacing a door with existing exterior trim (like brickmould), measure the width from the outside of the brickmould and the height from the bottom of the sill to the top of the exterior trim. This helps ensure your new unit integrates seamlessly with your home’s exterior finish.
Always use the smallest measurement taken for each dimension. If your measurements are, say, 35-3/4 inches wide and 79-1/2 inches tall, you’ll typically round up to order a 36-inch by 80-inch door, allowing for necessary clearance.
Pre-Hung vs. Slab Doors: Which is Right for You?
Understanding the difference between pre-hung and slab doors is crucial when planning your new entry door installation. Each has its advantages and is suited for different scenarios.
| Feature | Pre-Hung Door | Slab Door |
|---|---|---|
| Components | Door slab, frame (jambs), hinges, threshold | Door slab only |
| Installation | Generally easier, as frame is pre-assembled | More challenging, requires precise carpentry skills |
| Best For | Damaged existing frame, new construction, full renovation | Existing frame is perfectly plumb, square, and undamaged |
| DIY Difficulty | Intermediate | Advanced |
| Cost | Higher initial cost, potentially lower installation labor | Lower initial cost, potentially higher installation labor |
| Hardware | Pre-drilled for hardware | Requires mortising for hinges and boring for hardware |
A pre-hung door comes as a complete unit: the door slab is already mounted in its frame (jambs) with hinges attached, and often includes a threshold. This makes installation significantly simpler because the door and frame are perfectly aligned from the start. We typically recommend pre-hung doors if your existing door frame is damaged, warped, or if you’re undertaking new construction or a major renovation.
A slab door, on the other hand, is just the door panel itself, without a frame, hinges, or pre-drilled hardware holes. You would choose a slab door if your existing door frame is in excellent condition – perfectly plumb, square, and undamaged. While the upfront cost of a slab door might be lower, the installation can be more challenging. It requires precise measurements to mortise hinges into the existing frame and bore holes for new hardware, demanding a higher level of carpentry skill to ensure a perfect fit and smooth operation.
For most DIY enthusiasts in the Chicago area, a pre-hung door is the more manageable option for a new entry door installation. If you’re wondering about the financial implications, our Entry Door Replacement Cost guide provides further insights.
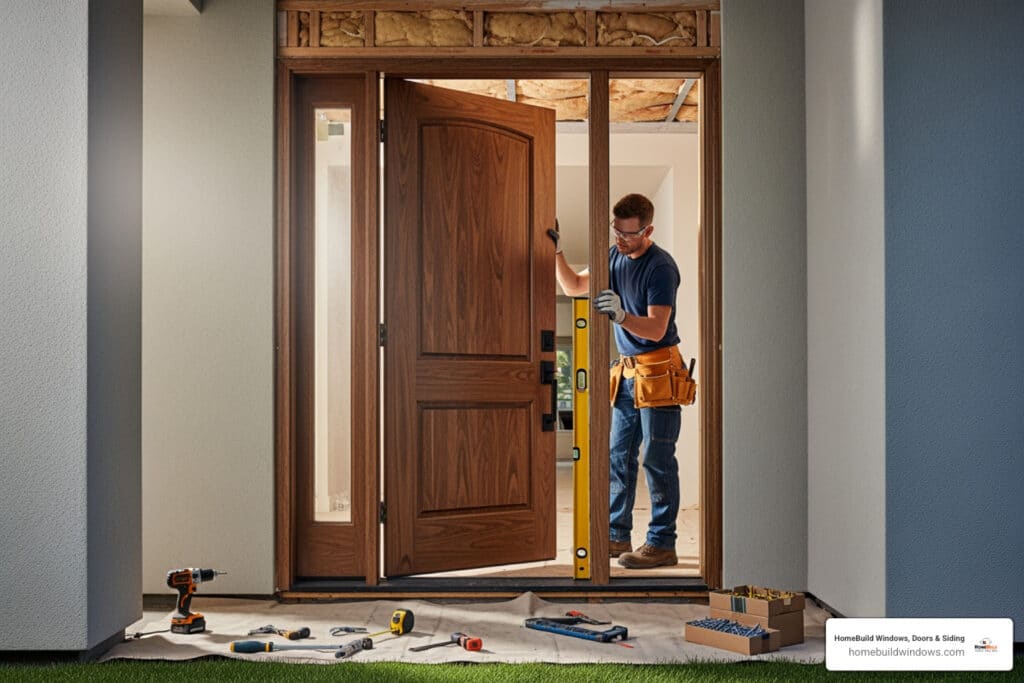
Your Step-by-Step Guide to New Entry Door Installation

Now that you’ve prepared, measured, and chosen your new door, it’s time for the hands-on work! This part of the new entry door installation process can be rewarding, but it requires patience and precision. Always prioritize safety: wear appropriate personal protective equipment (PPE) and be mindful of potential hazards, especially if dealing with lead-based paint in older homes. We strongly recommend having a helper for many of these steps, as exterior doors are heavy and unwieldy. And remember, always follow your door manufacturer’s specific instructions for the best results and to maintain your warranty. For more in-depth guidance, check out our resource on Installing a Prehung Exterior Door.
Step 1: Removing the Old Door and Frame
The first step in your new entry door installation is to carefully remove the old one.
- Remove Interior Trim: Use a utility knife to score any paint or caulk lines around the interior trim. Then, using a flat pry bar and a putty knife (to protect your wall from damage), carefully pry off the interior casing.
- Detach the Old Door: With a helper, tap out the hinge pins from the existing door hinges using a hammer and a nail or screwdriver. Once the pins are removed, lift the old door slab off its hinges and set it aside.
- Cut Nails/Screws: The old door frame is likely secured to the rough opening with nails or screws. Use a reciprocating saw or an oscillating tool to cut through these fasteners. This is often the trickiest part, but a good reciprocating saw can make quick work of stubborn nails.
- Pry Out the Old Frame: Carefully pry the old jambs and head jamb from the rough opening. Be gentle to avoid damaging the rough opening studs.
- Remove the Old Threshold: Unscrew and pry up the old threshold. Inspect the subfloor underneath for any signs of water damage or rot.
Step 2: Preparing the Rough Opening
With the old door and frame out, it’s time to prepare the canvas for your new entry door installation.
- Clean Debris: Thoroughly clean the rough opening, removing any old caulk, insulation, nails, splinters, or debris. A clean surface ensures better adhesion for flashing and caulk.
- Inspect for Rot or Damage: Carefully inspect the rough opening studs and the subfloor for any signs of water damage, rot, or structural issues. Repair any damaged wood or framing before proceeding.
- Check Sub-Sill for Level: The subfloor or sill of your rough opening must be perfectly level and should not slope. Use your 4-foot level to check this. If it’s not level, use shims to create a level surface for the new door’s threshold.
- Apply Self-Adhesive Flashing Tape: This is a crucial step for preventing water intrusion. Apply self-adhesive, flexible, waterproof flashing tape to the sill first, ensuring it covers the building paper and extends onto the inside. Then, apply it up the jambs, usually about 6 inches on each side, overlapping the corners.
- Install a Sill Pan: We highly recommend installing a sill pan, especially for doors exposed to the elements in Chicago’s unpredictable weather. A sill pan creates an additional waterproof barrier, directing any moisture away from your home’s interior.
- Apply Exterior-Grade Caulk: Apply a continuous, generous bead of exterior-grade silicone or polyurethane caulk along the bottom of the rough opening and up the sides where the new frame will meet the studs or sheathing. This creates a seal when the new door is set.
Step 3: Setting, Shimming, and Securing the New Door
This is the moment of truth for your new entry door installation! Precision here ensures your door operates smoothly and seals effectively.
- Tilt the New Door into the Opening: If your new door has brickmould, apply a bead of caulk to its back (the side that will meet the exterior wall). With your helper, carefully lift the new door unit. Center the bottom of the door frame on the prepared sill, then tilt the entire unit into the rough opening.
- Center the Unit: Ensure the door unit is centered in the rough opening, leaving even gaps on both sides.
- Shim the Hinge Side First: This is the most critical step in the entire process. Begin by placing shims tightly at the bottom corners of the frame. Then, focus on the hinge side. Place shims directly behind each hinge location, between the door jamb and the rough opening studs.
- Use a Level to Check for Plumb: Hold your 4-foot level against the hinge-side jamb to ensure it is perfectly plumb (vertically straight). Adjust the shims as needed until the jamb is perfectly straight.
- Tack the Frame in Place: Once the hinge side is plumb, temporarily secure the frame by driving a few nails through the shims and jamb into the rough opening studs. Leave the nail heads slightly out so you can still make adjustments.
- Shim the Latch Side and Top: Move to the latch side and the top jamb. Place shims to ensure an even gap around the entire door slab.
- Check for an Even 1/8″ Gap: Close the door and visually inspect the gap between the door slab and the frame on all sides. It should be consistent, ideally around 1/8 inch. This even gap is crucial for smooth operation and proper weatherstripping contact. Adjust shims as necessary until this gap is uniform.
Step 4: Fastening, Insulating, and Sealing
The final steps in securing and weatherproofing your new entry door installation.
- Driving 3-inch Screws Through Shims into Studs: Once the door is perfectly plumb, level, and the gaps are even, drive 3-inch long screws through the jambs at each shim location, directly into the wall studs. This permanently secures the frame without warping it.
- Replacing One Hinge Screw with a Long Screw: For improved security, remove one of the short screws from each hinge on the hinge side of the door. Replace it with a 3-inch long screw, driving it through the jamb and into the wall stud. This significantly strengthens the door’s connection to the house frame.
- Testing Door Operation: Open and close the door several times, testing the latch. Ensure it swings freely, latches properly, and doesn’t rub anywhere. Make any final minor shim adjustments if needed.
- Applying Low-Expansion Foam Insulation: Carefully fill the gaps between the door frame and the rough opening with low-expansion, low-pressure polyurethane foam insulation. This improves energy efficiency. Be cautious not to over-apply, as too much expanding foam can warp the door frame.
- Caulking the Exterior Perimeter: Apply a continuous, neat bead of exterior-grade silicone or polyurethane caulk around the entire exterior perimeter of the door frame where it meets your siding or brickmould. This is a critical step for weatherproofing and preventing water intrusion.
- Installing the Drip Cap: If your door unit didn’t come with an integrated drip cap, install a metal drip cap or Z-flashing above the door opening. This diverts rainwater away from the top of your door, protecting the frame and seals.
Finishing Touches and Long-Term Care
Step 5: Installing Hardware and Finishing
With your new entry door installation secured, it’s time for the details that make it functional and beautiful.
- Installing Lockset and Deadbolt: Follow the manufacturer’s instructions to install your new lockset and deadbolt. Ensure they operate smoothly and engage securely.
- Aligning the Strike Plate: The strike plate on the door frame must align perfectly with the latch and deadbolt. If necessary, adjust its position slightly to ensure a smooth, secure lock.
- Installing Interior Trim: Cut and install the interior casing (trim) around the door frame. This covers the shims and insulation, providing a finished look.
- Painting or Staining the Door and Trim: Finish the door and trim according to the manufacturer’s recommendations. If you have a woodgrain fiberglass door, specific staining techniques will bring out its beauty. For wood doors, ensure you apply a suitable exterior-grade paint or stain.
- Sealing All Six Sides of the Door: For maximum protection, especially with wood doors, ensure all six sides of the door panel (top, bottom, and all four edges) are sealed with paint or sealant. This prevents moisture absorption and helps maintain the door’s integrity over time.
Maintenance and Troubleshooting
Proper maintenance ensures the longevity and optimal performance of your new entry door installation.
- Annual Inspection: We recommend an annual inspection of your door. Check the weatherstripping, caulk, and overall operation. Look for any cracks, gaps, or signs of wear.
- Cleaning Tips: Clean the door surface as per the manufacturer’s guidelines, typically with mild soap and water. For glass panels, use a gentle glass cleaner.
- Checking Weatherstripping and Caulk: Over time, weatherstripping can compress or crack, and caulk can deteriorate. If you notice drafts, check these areas. Replace weatherstripping or re-caulk exterior seams as needed to maintain energy efficiency and prevent water intrusion. You can use the “paper test” for your sill cap: place a piece of paper on the sill, close the door, and try to pull it out. If it pulls out too easily, your seal might be too loose.
- Lubricating Hinges: If your door starts to squeak, a little silicone spray on the hinges usually does the trick.
- Adjusting a Sticking Door: If the door sticks, it could be due to humidity causing expansion, or minor settling of your home’s foundation. Re-check the door’s plumb and square. For slab doors, hinges may need adjustment, or the door edges might require planing.
- Refinishing: Depending on weather exposure in the Chicagoland area, many doors require refinishing (paint or stain) every 1 to 7 years to protect the finish and maintain the warranty.
Frequently Asked Questions about Entry Door Installation
How long does a new entry door installation take?
A typical new entry door installation for a pre-hung door can take between 4 to 8 hours to complete with a helper. However, several factors can influence this timeline:
- Door Type: Installing a pre-hung door is generally faster than a slab door, which requires more detailed carpentry work like mortising hinges and boring for hardware.
- Existing Frame Condition: If the old frame is severely damaged, rotten, or requires extensive repairs, this will significantly add to the project duration.
- Custom Fitting: Non-standard door sizes or units with sidelights and transoms may require more precise adjustments and take longer.
- Installer Experience: An experienced installer, like our team at HomeBuild, can often complete the job efficiently while ensuring meticulous attention to detail.
- Cleanup: Don’t forget to factor in time for post-installation cleanup!
Can I replace an exterior door myself?
Yes, a new entry door installation, especially for a pre-hung unit, is often within the scope of most DIYers. Many homeowners in our service areas like Arlington Heights, Barrington, and Crystal Lake successfully tackle this project themselves. It requires an intermediate skill level, a good understanding of measurements, careful shimming, and proper sealing techniques, along with the essential tools we listed earlier.
However, there are significant benefits to professional installation:
- Expertise: Our certified installers ensure the door is perfectly plumb, level, and properly sealed, preventing common issues like drafts and water leaks.
- Speed and Efficiency: We can complete the job quickly and effectively, minimizing disruption to your home.
- Quality Assurance: With our professionalism and attention to detail, you get a flawless, long-lasting installation.
- Warranty Protection: Our work is backed by a Lifetime Labor Warranty, giving you peace of mind that your investment is protected.
If your existing frame is severely damaged, structural changes are needed, or if you’re simply uncomfortable with the complexity of the project, hiring a professional is always the best choice.
What are common issues after a new entry door installation?
Even with careful installation, some issues can occasionally arise. Here’s how to identify and address them:
- Drafts (Improper Sealing):
- Cause: This is typically due to gaps in the weatherstripping, insufficient exterior caulk, or improperly applied low-expansion foam insulation. Old doors often become drafty, but a new one shouldn’t!
- Address: Check the weatherstripping for gaps or damage and replace if necessary. Inspect and re-caulk exterior seams. Ensure the foam insulation fills all gaps between the frame and the rough opening. The “paper test” on the sill can help pinpoint air leaks.
- Sticking Door (Improper Shimming):
- Cause: The door frame may not be perfectly plumb and square, or shims were improperly placed or removed during installation. Warping due to temperature changes can also be a factor.
- Address: Re-check the door for plumb and square. Minor adjustments to shims can often resolve this. For slab doors, hinges may need adjustment, or the door edges might require planing.
- Water Leaks (Improper Flashing):
- Cause: This serious issue can stem from inadequate sill pan installation, missing flashing tape, or poor exterior caulking, allowing water to penetrate the wall system.
- Address: Inspect the sill pan, flashing, and exterior caulk thoroughly. You may need to re-seal or re-flash the affected areas, which often requires removing exterior trim. This is where professional installation truly shines, as we prioritize robust water management.
- Squeaky Hinges:
- Cause: Usually just a lack of lubrication.
- Address: Apply a silicone spray lubricant to the hinges.
Your Chicago Entry Door Experts
A new entry door installation is a significant upgrade, boosting your home’s curb appeal, security, and energy efficiency. While a rewarding DIY project, achieving a perfect, weather-tight seal requires precision and experience. For a flawless installation backed by a lifetime labor warranty, trust the experts at HomeBuild Windows, Doors & Siding. We bring top-quality products, expert installation, competitive pricing, and exceptional customer service to every project in Chicago, Chicagoland, and the North-West Suburbs, including areas like Schaumburg, Palatine, and Glenview. Our professionalism and attention to detail ensure your new door stands up to Illinois weather for years to come.
Get a professional quote for your Door Installation and Replacement in Chicago.