


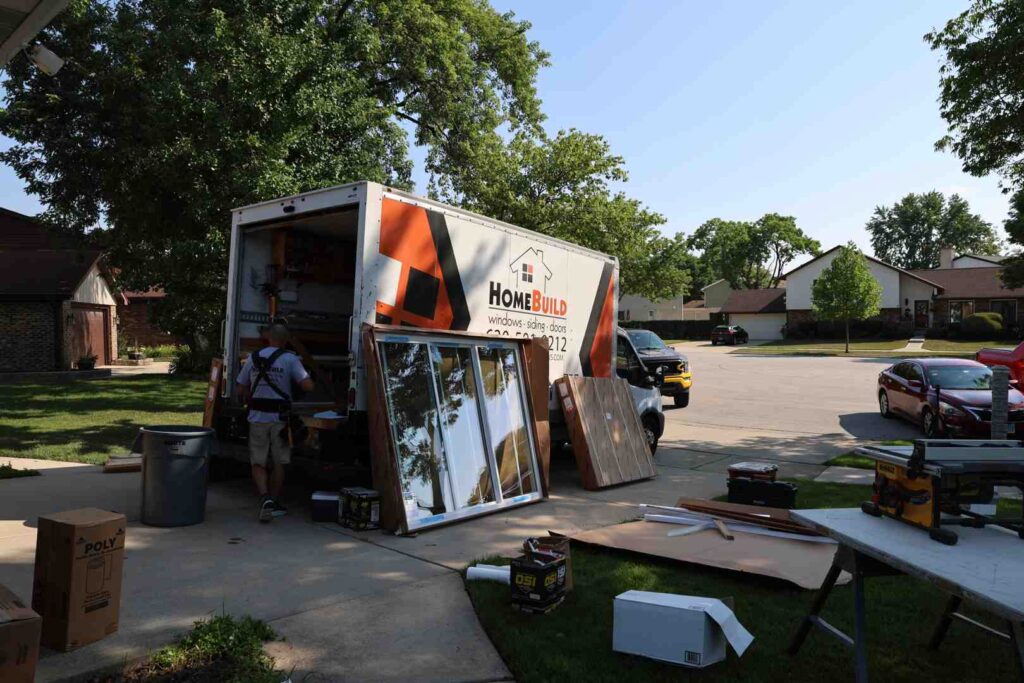
What Shapes a Vinyl Siding Installation Project?
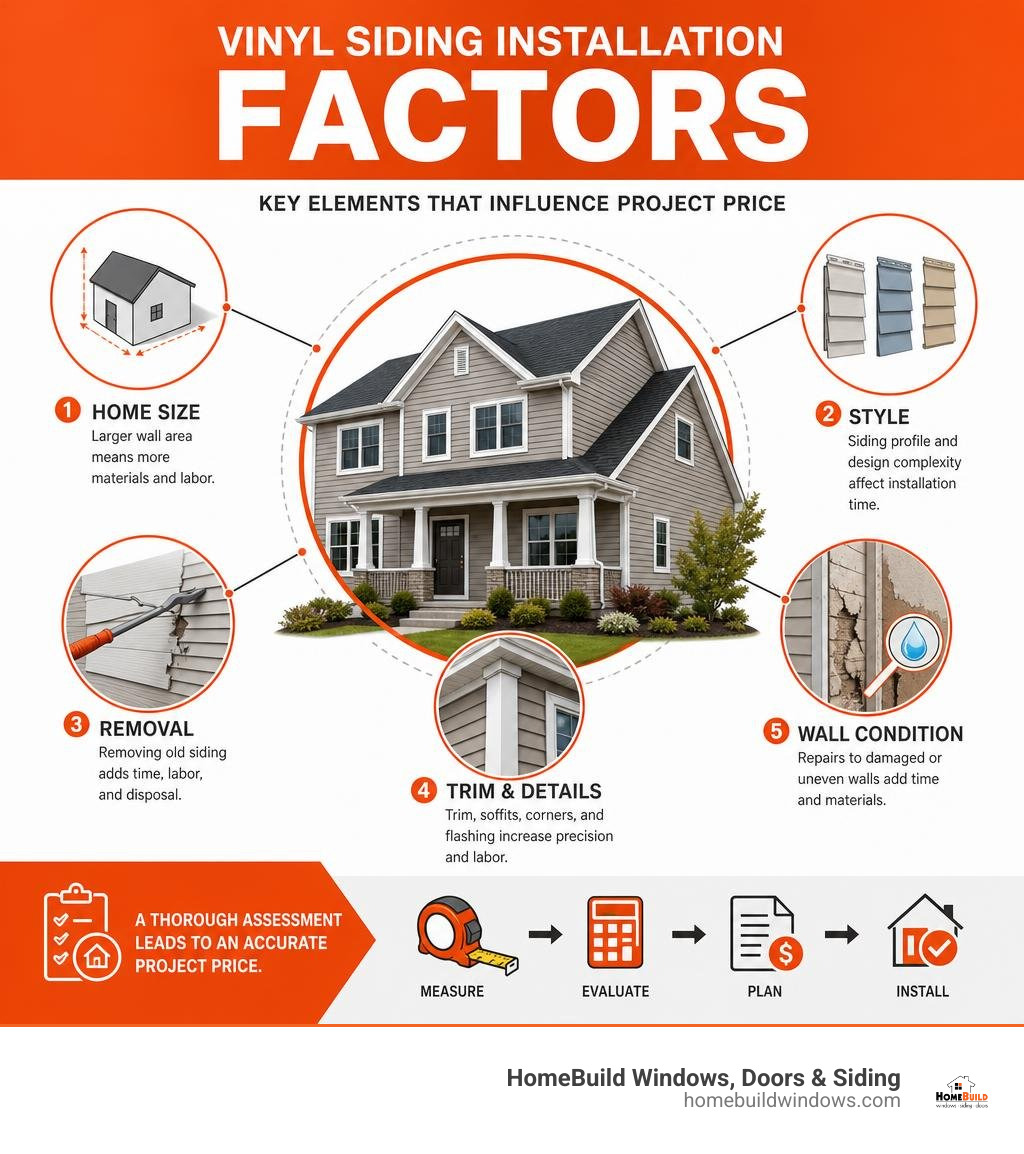
The scope of installing vinyl siding varies based on your home’s wall area, siding style, existing exterior condition, and installation complexity. A clear project assessment should account for details such as story height, trim, soffits, window and door flashing, insulation, and any siding that must be removed before new panels go up.
Professional installation matters as much as the siding itself. Properly installed vinyl siding helps protect Chicago-area homes from moisture and wind while supporting better curb appeal, durability, and energy performance.
At HomeBuild Windows, Doors & Siding, licensed and insured crews bring experienced exterior renovation workmanship to homes throughout Chicago and the northwest suburbs. I am Steve Mlynek, and with more than 20 years in the industry, I help homeowners understand vinyl siding installation in the context of a complete, well-installed exterior system. As a trusted, locally owned contractor, HomeBuild Windows, Doors & Siding works closely with homeowners to deliver reliable exterior remodeling solutions tailored to Midwest homes.
Key vinyl siding topics explained:
- unexpected vinyl siding factors
- guide to siding replacement options and installation
- vinyl siding energy efficiency overview
Understanding the Fundamentals of Installing Vinyl Siding
Evaluating any home exterior renovation project starts with understanding the basic physical scope of your house. Every structure presents a unique layout of exterior wall space, geometric features, structural transitions, and architectural trim that dictate the exact scope of labor and materials required. When reviewing the overall scope, wall geometry plays an essential role because flat, continuous wall runs require different handling than homes with complex bump-outs, bay windows, dormers, or sharp pitch angles.
To properly measure an exterior, contractors calculate the total exterior square footage by measuring each wall section, including gable ends and dormers, and subtracting major openings such as windows, patio doors, and garage doors. However, calculating the raw surface area is only the starting point. Every job requires an additional waste allowance factor—typically ranging between 10% and 15%—to account for custom angle cuts, board overlap, material trimming around corners, and dye-lot matching. For a full breakdown of how wall geometry impacts project scope, explore our Ultimate Guide to Siding Replacement.
In our region, Midwest climate conditions demand meticulous surface prep and accurate wall measurements. Chicago homes endure intense thermal shifts, switching from sub-zero winter blasts to hot, humid summer months. Siding materials expand and contract constantly across these extreme temperature swings. Understanding how exterior wall square footage and house architecture interact ensures your cladding handles thermal movement gracefully without buckling, warping, or tearing away from structural framing.
Factors That Influence Your Vinyl Siding Installation
When planning a siding project, several structural and material variables come into play that influence overall labor time, product performance, and installation detail. By recognizing these factors upfront, homeowners can make informed design and material choices tailored to their specific property.
- Panel Thickness and Quality Grades: Standard builder-grade vinyl panels generally range around 0.040 inches in thickness, whereas premium architectural grades reach 0.046 inches to 0.052 inches or thicker. Thicker panels offer superior rigidity, improved impact resistance against hail, cleaner sightlines, and stronger performance against high wind uplift.
- Story Height and Multi-Level Access: Multi-story homes, elevated ranches, and structures with high gables require specialized scaffolding, pump jacks, and elevated safety rigging. Working at heights increases labor hours and requires strict safety protocols compared to straightforward single-story ranch homes.
- Tear-Off and Sheathing Inspection: Stripping away old, deteriorated wood, aluminum, or existing vinyl siding takes dedicated labor and proper disposal protocols. Crucially, removing old cladding allows our installation teams to inspect underlying wood sheathing for hidden rot, water damage, or structural defects caused by prior water intrusion.
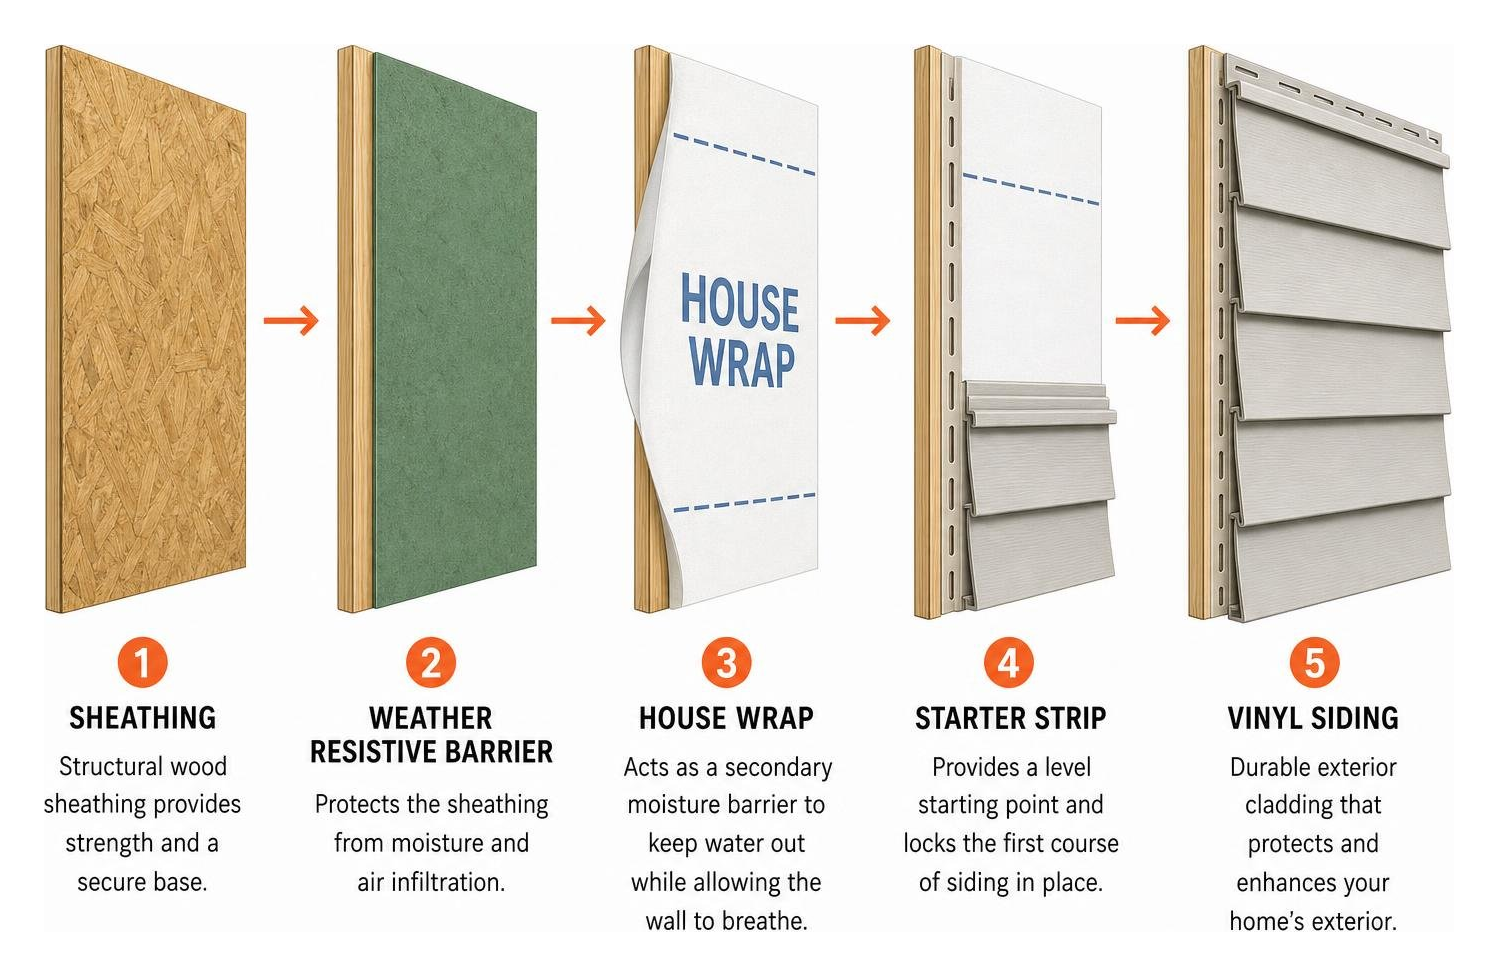
- Site Preparation and Substrate Readiness: Before new panels are mounted, the underlying house surface must be prepared with proper weather-resistive barriers, rigid foam board insulation, house wrap, starter strips, and flashing around windows and doors.
- Trim, Soffits, and Fascia Integration: Upgrading window casings, corner posts, J-channels, soffits, and fascia capping creates a unified, weather-tight exterior envelope.
Homeowners looking for comprehensive installation solutions in Chicago and nearby communities like Park Ridge, Des Plaines, and Mount Prospect can review our specialized services on our page for Chicago Siding Installation Services.
How Siding Styles Affect Overall Vinyl Siding Installation
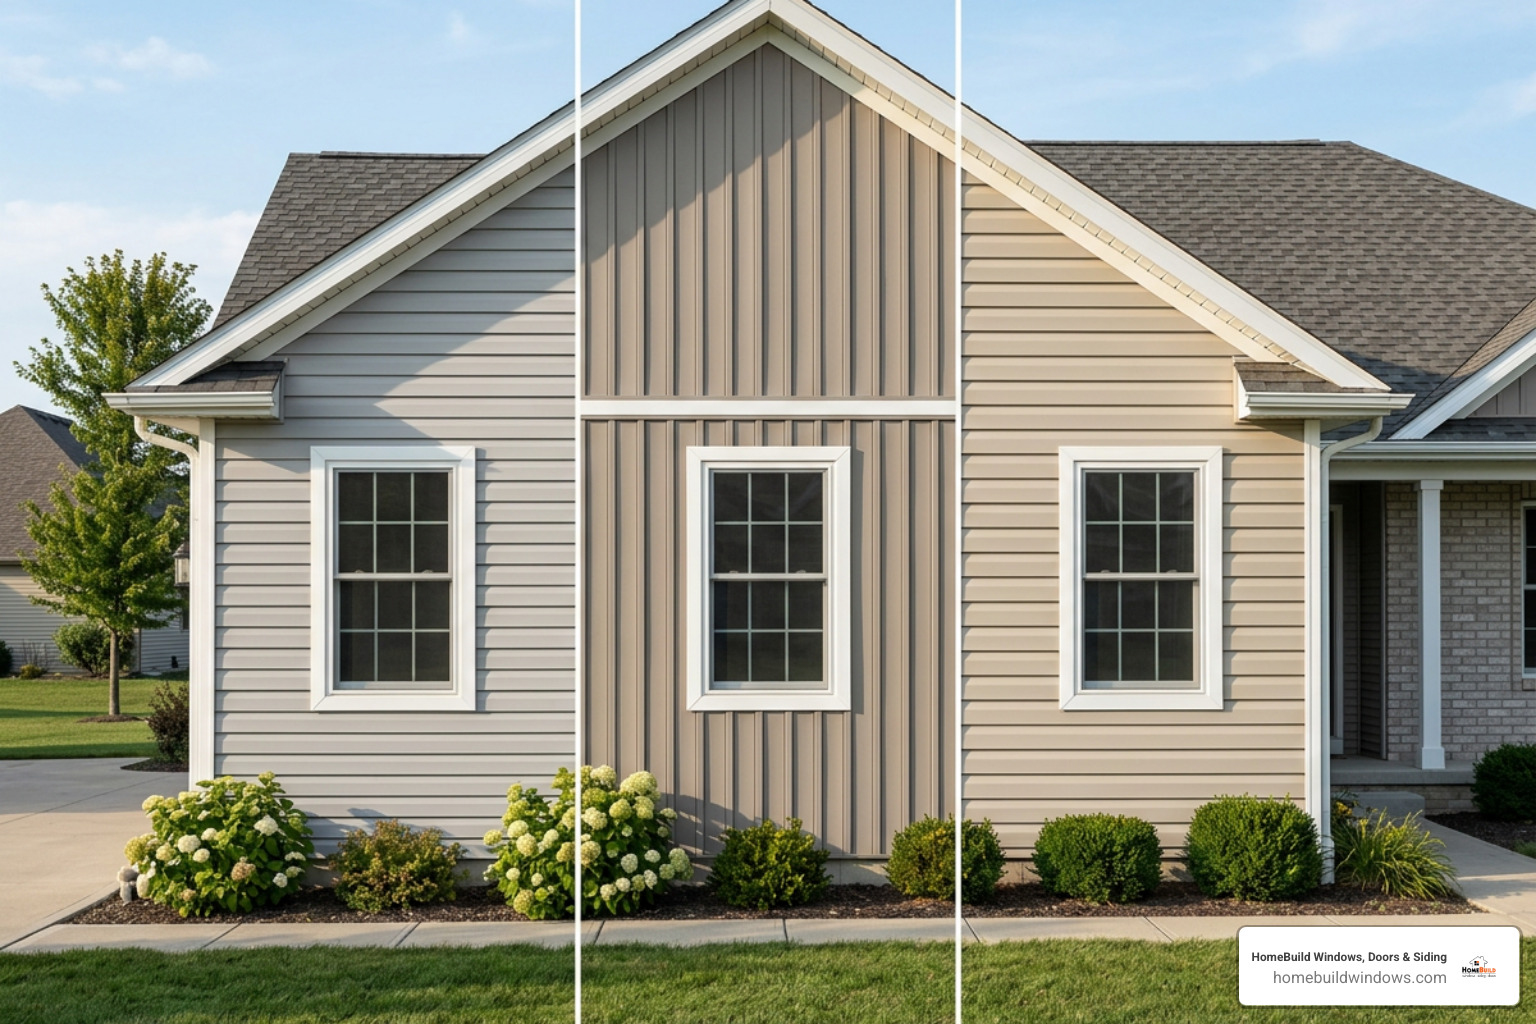
The visual profile and architectural style you select directly influence the craftsmanship, layout time, and mounting techniques involved in your home transformation. Modern vinyl siding comes in a broad selection of distinctive profiles, each offering unique aesthetics and functional advantages for residential properties:
- Traditional Horizontal Clapboard Style: The standard lap siding look features overlapping horizontal planks that shed rain naturally and match virtually any architectural home style, from classic Colonials to modern Craftsman designs.
- Dutch Lap Siding: Dutch lap features a distinctive recessed groove cut into the top edge of each horizontal plank. This creates strong shadow lines and offers enhanced visual depth, giving homes a refined, custom appearance.
- Board and Batten Vertical Siding: Combining wide vertical panels with narrow raised strips (battens), this striking visual style adds vertical height and modern farmhouse charm. Vertical installations require specialized flashing and horizontal furring strip backing to secure panels cleanly. Discover more about this profile in our comprehensive Board and Batten Siding Guide.
- Insulated Vinyl Panels: Premium vinyl siding engineered with solid EPS (expanded polystyrene) foam insulation fused directly behind the PVC shell. Insulated panels boost wall rigidity, create a firm real-wood feel under hand, and significantly enhance whole-wall thermal resistance.
- Architectural Scallops and Shakes: Accent profiles, such as vinyl cedar impression shakes, hand-split shakes, or decorative half-round scallops, add distinctive character to gables, dormers, and feature walls. These detailed profiles require intricate hand-fitting and precise spacing.
Material Comparisons and Long-Term Value
Selecting exterior cladding requires weighing performance, ongoing maintenance demands, structural protection, and visual aesthetic. While alternative exterior materials such as natural cedar, fiber cement, engineered wood, or brick veneer have their place, modern vinyl siding systems consistently remain a leading choice for homeowners in Chicagoland suburbs like Schaumburg, Naperville, and Glenview.
Natural wood siding delivers undeniable natural charm, but it requires continuous repainting, staining, and sealing every three to five years to avoid severe moisture rot, carpenter ant infestations, and surface cracking. Fiber cement siding, manufactured by premium brands like James Hardie, provides exceptional fire resistance and structural density, but its extreme weight demands specialized diamond-blade cutting tools, safety gear, heavy labor handling, and ongoing joint caulking over time.
By contrast, high-grade vinyl siding from industry-leading manufacturers such as Alside provides outstanding impact resistance, colorfast technology, and minimal ongoing maintenance. Modern manufacturing infuses UV inhibitors directly into solid PVC panels, preventing fading, chalking, or cracking under harsh sunlight. Vinyl never requires painting, scraping, or chemical staining—saving homeowners significant maintenance labor and effort over the 20 to 40-year lifespan of the material.
To better understand material performance across various home styles, refer back to our comprehensive resource, the Ultimate Guide to Siding Replacement.
Return on Investment and Energy Efficiency
Exterior siding serves as your home’s primary protective shield against weather elements while defining its exterior curb appeal. Upgrading aging, drafty cladding with modern vinyl siding yields a substantial return on investment when selling your home, regularly recovering a large percentage of its installation value in improved property evaluation and buyer appeal.
From an energy efficiency standpoint, standard exterior walls contain structural studs that act as thermal bridges. Thermal bridging occurs when heat transfers directly through solid wood framing studs, bypassing the insulation stuffed between wall cavities. Uninsulated exterior walls allow up to 15% to 20% of home heating and cooling energy to leak right out through the structure.
Installing insulated vinyl siding or pairing high-grade vinyl cladding with solid foam board insulation breaks this thermal bridge:
- Thermal Insulation Layering: Adding continuous foam insulation behind vinyl panels raises total exterior wall R-value, helping keep indoor temperatures consistent during harsh Midwest winters and humid summer spells.
- Vapor Barrier and Weather-Resistive Protection: Installing premium breathable house wrap creates an essential drainage plane beneath vinyl panels, allowing interior wall moisture to escape while blocking wind-driven rain and snow infiltration.
- HVAC Strain Reduction: By stabilizing interior wall temperatures and sealing drafty wall gaps, energy-efficient siding lowers operational wear on heating and cooling equipment.
- Resale Value and Curb Appeal: Crisp, uniform lap lines, clean trim wraps, and high-performance color profiles immediately elevate a property’s exterior presence, making homes stand out in local real estate listings.
Learn how exterior upgrades optimize thermal efficiency by reading our detailed guide on Vinyl Siding Energy Efficiency Guide.
Professional Installation vs DIY and Key Project Pitfalls
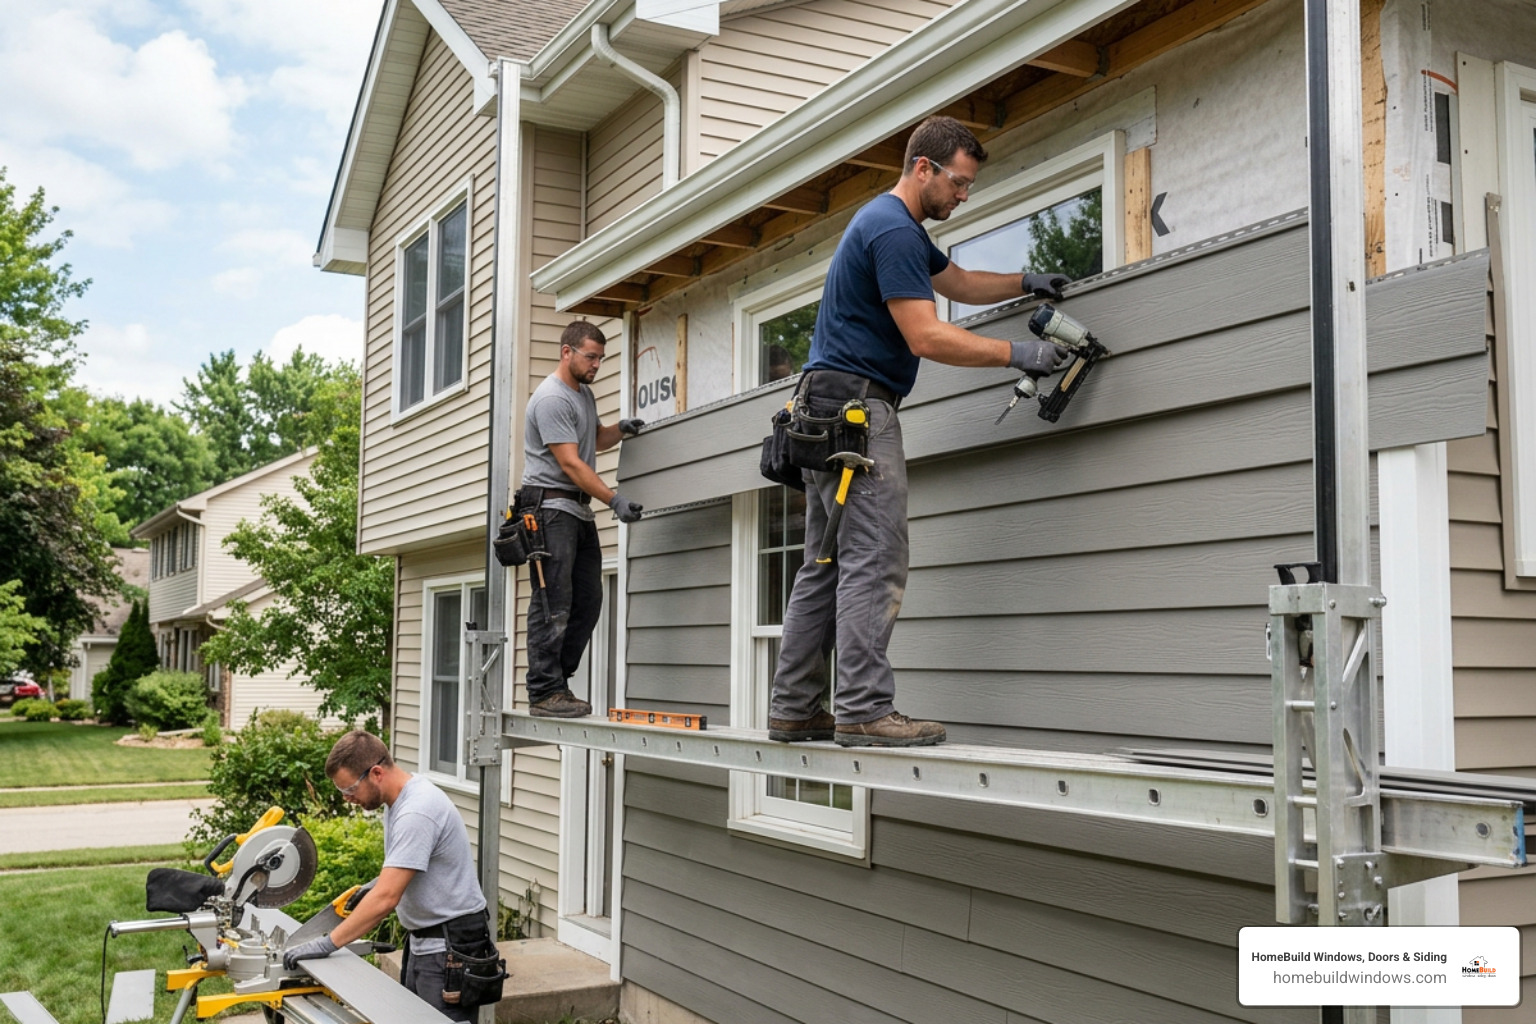
While vinyl siding panels might appear straightforward to snap together, vinyl siding installation is a specialized trade that demands precision, technical skill, and deep familiarity with structural mechanics. DIY installation attempts frequently lead to panel warping, moisture entrapment, voided manufacturer warranties, and premature wall failure.
Vinyl siding is uniquely designed as a floating exterior system. Because PVC expands and contracts significantly as outdoor temperatures fluctuate throughout the year, panels must never be pinned tightly to exterior walls. Professional installers use precision fasteners driven straight into the exact center of pre-punched nail slots, leaving a precise 1/16-inch gap beneath the nail head. This allows each plank to expand and contract smoothly along its horizontal axis without buckling, rippling, or cracking.
Furthermore, proper weatherproofing requires flawless flashing sequences. Professional contractors meticulously layer window cap flashings, J-channels, corner posts, and drip edges so that water flows downward and outward over lower layers—never getting trapped behind the siding surface where it could rot wood sheathing.
Homeowners can review the essential sequences involved in proper wall preparation in our helpful primer, 5 Simple Steps to Install Home Siding.
Common Errors to Avoid During Siding Replacement
Improper mounting techniques and inexperienced installation work can quickly undermine high-quality materials. Here is a breakdown of frequent installation mistakes and their resulting structural consequences:
| Installation Mistake | Technical Root Cause | Long-Term Structural Impact |
|---|---|---|
| Overdriven Fasteners | Nails driven flush or tight against the panel hem, locking vinyl rigidly in place. | Panels buckle, ripple, and crack during hot weather expansion; panels snap off in cold winter freezes. |
| Off-Center Nailing | Nails hammered through the edges of nail slots or directly through solid vinyl panel faces. | Restricts natural thermal movement, causing severe surface distorting and face-cracking. |
| Reversed Flashing Sequence | Installing window flashing or paper layers under lower courses rather than overlapping over top flaps. | Traps wind-driven rainwater behind wall cladding, leading to hidden rot, mold growth, and sheathing decay. |
| Inadequate Gap Spacing | Butt joints installed flush against J-channels and corner posts without leaving expansion gaps. | Panels push hard against channel stops in summer heat, warping outward and popping loose from lock channels. |
| Insufficient Waste Allowance | Ordering exact net square footage without calculating waste allowances for gables and corners. | Causes project delays, forced dye-lot color mismatches, and improper patchwork around wall openings. |
Avoiding these serious pitfalls requires knowledgeable installers who understand local building codes and structural dynamics. Explore unexpected installation factors in our informative article on Unexpected Vinyl Siding Factors.
Frequently Asked Questions About Vinyl Siding Installation
What factors impact vinyl siding installation timing and duration?
The duration of a vinyl siding installation depends on several key variables, including overall house size, architectural complexity, story height, weather conditions, and crew size. On average, a standard single-story or two-story single-family home takes between 3 to 6 working days to complete from start to finish.
Projects requiring extensive tear-off of old wood or aluminum siding, sub-sheathing rot repairs, intricate custom window wrapping, or installation of vertical board and batten profiles take additional time. Weather conditions also play a major role—severe cold, high winds, or continuous rainfall can temporarily halt exterior work to ensure installation safety and material integrity.
How do I prepare my home exterior before installation begins?
Preparing your property ahead of time helps the installation team work efficiently and protects your surroundings. Key outdoor preparation steps include:
- Trimming back tree branches, shrubs, and bushes located within 6 to 8 feet of exterior walls to allow clear ladder and scaffolding setup.
- Clearing the driveway and perimeter yard of outdoor furniture, lawn decor, grill equipment, and children’s toys to store staging materials and waste trailers safely.
- Removing external wall fixtures, such as exterior hose reels, shutter accents, decorative lights, address plaques, and security cameras.
- Securing interior wall items, such as hanging pictures, mirrors, or delicate wall artwork, as light vibrations from exterior hammering can transmit through wall framing.
What maintenance is required to maximize vinyl siding lifespan?
One of the chief advantages of vinyl siding is its minimal upkeep requirements compared to painted wood cladding. To keep your siding looking fresh and functioning optimally over its 20 to 40-year lifespan, follow these routine maintenance practices:
- Annual Cleaning: Wash down siding panels once a year using a low-pressure garden hose, soft-bristle brush, and a mild soap mixture (such as water mixed with gentle laundry detergent or dish soap). Avoid high-pressure power washing at close range, which can force water upwards under panel lap joints or dislodge accessories.
- Mildew and Algae Removal: For shaded wall sections prone to light green algae or mildew stains, clean the affected areas using a solution of three parts water to one part white vinegar, or specialized eco-friendly siding cleaners.
- Perimeter Inspection: Perform a quick seasonal walk-around to verify that caulking around window and door trim remains intact, light fixture seals are secure, and no panel joints have unlatched following severe windstorms.
Conclusion
Upgrading your home with modern vinyl siding protects your property against Midwest weather, enhances energy efficiency, and delivers lasting curb appeal. Choosing the right material grade and siding profile is only half the battle—flawless professional installation ensures your exterior system performs reliably decade after decade.
At HomeBuild Windows, Doors & Siding, we take pride in delivering top-quality product selections, expert installation, and exceptional customer service across Chicago and surrounding northwest suburbs, including Arlington Heights, Palatine, Buffalo Grove, and Lake Zurich. As an Elite Platinum Pella® Certified Contractor, Andersen Certified Contractor, recipient of the Angi Super Service Award, Nextdoor Neighborhood Faves winner, and backed by over 200 positive Google reviews, our licensed and insured team is committed to complete homeowner satisfaction.
Contact us today to schedule your consultation and receive a free estimate from our experienced exterior remodeling specialists. Learn more about our complete exterior solutions on our page for Chicago Siding Installation Services.