




What You Need to Know Before Starting Your Porch Door Installation
Porch door installation is one of the most impactful upgrades you can make to your Chicago-area home — improving curb appeal, energy efficiency, and security all at once.
Here’s a quick overview of the core steps:
- Measure your rough opening — width, height, and diagonal
- Remove the old door — trim, hinge pins, and frame
- Prepare the frame — inspect for rot, install flashing and sill pan
- Set and shim the new door — plumb, level, and square
- Secure the unit — fasten with screws at proper intervals
- Seal and weatherproof — caulk, foam insulation, and weatherstripping
- Install hardware and test operation — locks, rollers, and seal compression
Whether you’re replacing a worn-out sliding door or upgrading to a French or bifold unit, each step matters. A single mistake — like skipping proper flashing or over-tightening screws — can lead to drafts, water damage, or a door that won’t close smoothly.
This guide walks you through the full process, from prep to final inspection.
I’m Steve Mlynek, founder and CEO of HomeBuild Windows, Doors & Siding, with over 20 years of hands-on experience overseeing porch door installation projects across Chicago and the surrounding suburbs. In that time, I’ve seen what separates a door that lasts decades from one that fails within a few years — and I’ll share all of it below.
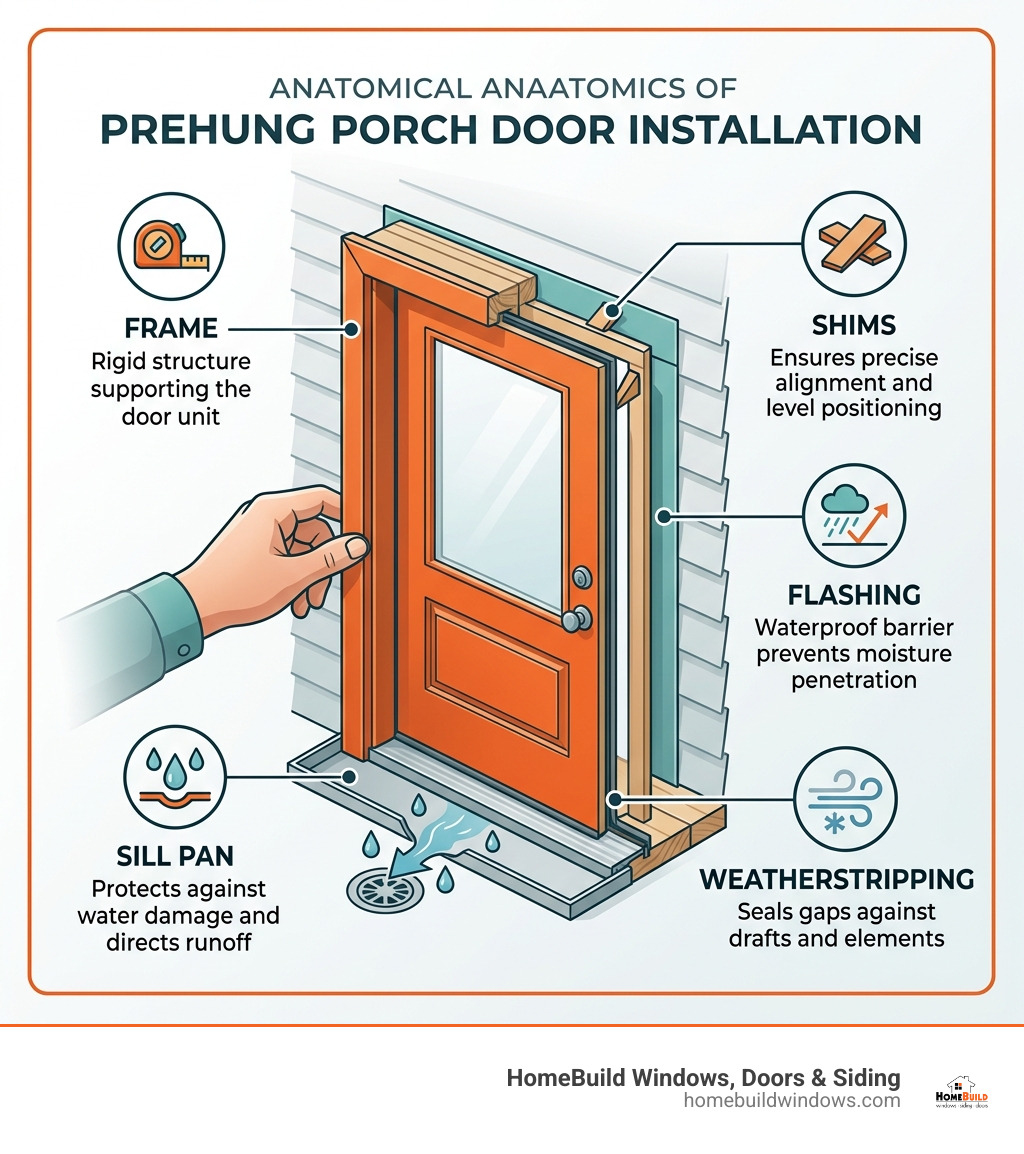
Preparation and Essential Tools for Porch Door Installation
Before we even crack a seal on a new door unit, we have to talk about preparation. In our two decades serving the North-West Suburbs, from Arlington Heights to Barrington, we’ve learned that a successful porch door installation is 70% preparation and 30% execution. If your rough opening isn’t square, plumb, and level, even the most expensive Pella or Andersen door will underperform.
For a standard DIY project, you’ll need a robust toolkit. We recommend having a 4-foot level (at minimum), a power drill with a variety of bits, a hammer, a pry bar, a utility knife, and a caulk gun. Don’t forget the cedar shims — these are the unsung heroes of door installation, allowing us to fine-tune the frame’s position within the opening.
Understanding Exterior Door Installation 101 means knowing which door style fits your porch best. Here is a quick comparison of the common types we install in the Chicagoland area:
| Door Type | Best For | Pros | Cons |
|---|---|---|---|
| Sliding Patio Door | Small spaces | Space-saving, large glass area | Limited opening width |
| French (Hinged) Door | Classic aesthetics | Wide opening, elegant look | Requires swing space |
| Bifold Door | Indoor-outdoor flow | Maximum opening width | More complex installation |
Measuring Your Space for Porch Door Installation
Accuracy is everything. When measuring for your new door, we always use the “rule of threes.” Measure the width of the rough opening at the top, middle, and bottom. Then, measure the height at the left, center, and right. Always use the smallest of these dimensions when ordering your door. This ensures the unit will actually fit into the hole, leaving just enough room (usually about 1/2 inch to 3/4 inch) for shimming and insulation.
Don’t forget the diagonal check! Measure from the top-left corner to the bottom-right, and then from the top-right to the bottom-left. If these two numbers are within 1/8 of an inch of each other, your opening is square. If they aren’t, you’ll need to spend extra time shimming to ensure the door operates correctly. For a deeper dive into sizing, check out our New Exterior Door Installation Complete Guide.
Required Materials and Safety Gear
Safety isn’t just a suggestion; it’s a requirement. Porch doors, especially large sliding glass units, are incredibly heavy and awkward. We always recommend a two-person lift to avoid injury or shattering the glass. Wear safety glasses to protect against flying debris during the removal of the old frame.
If you live in an older Chicago home (built before 1978), be mindful of lead paint. Disturbing old trim can release harmful dust. We follow strict lead-safe practices on all our jobs, and you should too. For more on the technical safety requirements, How To Install a Prehung Exterior Door – This Old House offers excellent insights into professional-grade safety protocols.
Removing the Old Door and Preparing the Frame
Now comes the “fun” part: demolition. Removing an old door requires a delicate touch; you don’t want to damage the surrounding siding or interior drywall.
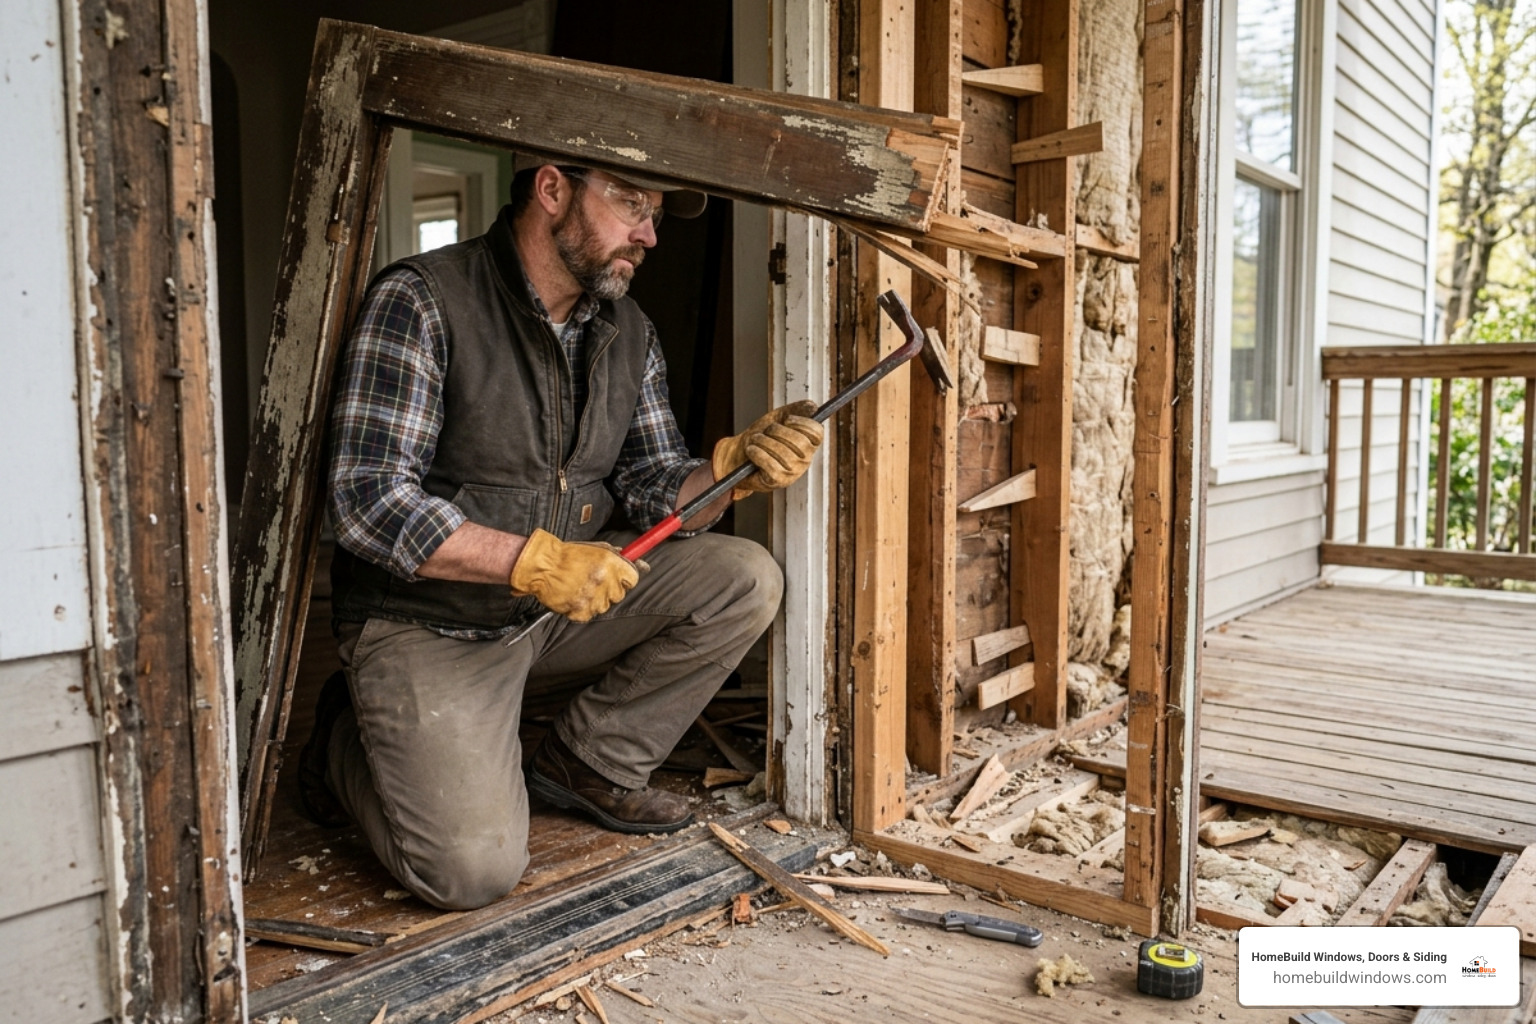
Start by removing the interior trim with a pry bar, using a small block of wood for leverage to avoid denting the wall. If it’s a hinged door, pop the hinge pins and remove the door slab first. For sliding doors, you’ll usually need to adjust the rollers to their lowest setting to lift the panels out of the track. Once the panels are gone, cut through any nails or screws holding the frame in place and pry the old jamb out. For Chicago homeowners, this is often the moment we discover hidden issues like water damage. If you’re feeling overwhelmed at this stage, our Door Installation and Replacement Chicago services are designed to handle these structural surprises.
Structural Integrity and Flashing
Once the opening is bare, we inspect the “sub-sill” or the floor beneath the door. If it’s rotted, it must be replaced before the new door goes in. To prevent future rot, we install a sill pan and Z-flashing. This directs any water that gets behind the siding back out to the exterior. Proper flashing is the difference between a door that lasts 30 years and one that causes a mold problem in three. You can find more details on flashing techniques in this guide: How To Install a Prehung Door – This Old House.
Cleaning the Rough Opening
Before the new unit arrives, the opening must be pristine. We use a shop vac to remove every bit of sawdust and old insulation. If there’s old adhesive or caulk on the subfloor, scrape it flat. A level subfloor is non-negotiable. If it’s slightly off, we use thin wooden shims or a self-leveling compound to create a perfectly flat base for the new door to sit on. Our Pre-Hung Door Replacement Guide covers these preparation steps in even greater detail.
Step-by-Step Porch Door Installation Process
With the opening prepped and the sill flashed, it’s time to move the new door into place. This is where that second person becomes your best friend.
We always perform a “dry fit” first. Lift the door into the opening without any caulk to make sure it fits and that you have enough room for shims. If everything looks good, remove the door and apply three thick beads of high-quality silicone caulk across the sill. This creates a “bed” for the door to sit in, preventing water from creeping under the threshold. For a specific look at sliding units, see our page on Sliding Patio Door Installation.
Setting the Frame and Shimming
Tilt the door into the opening, bottom first. Once it’s upright, use your level to check for plumb (vertical) and level (horizontal). This is where the shims come in. Place shims behind the hinge locations on a hinged door, or every 12 inches on a sliding door frame.
The goal is to have an even “reveal” (the gap between the door and the frame) all the way around. If the gap is wider at the top than the bottom, your frame is leaning. Adjust your shims until the bubble on your level is perfectly centered and the door opens and closes without rubbing. For more tips on getting that perfect fit, visit Installing a Prehung Exterior Door.
Securing the Unit and Hardware
Once the door is shimmed and perfectly positioned, it’s time to make it permanent. We use long masonry screws for Chicago brick homes or heavy-duty wood screws for frame homes. Always drill pilot holes first to prevent the wood from splitting.
After the frame is secured, install your handle sets and locks. If it’s a sliding door, this is the time to adjust the rollers. Most sliding doors have adjustment screws at the bottom of the panels. Turning these will raise or lower the door, ensuring it sits square in the frame and glides like butter. For more on hardware and frame types, refer to How to Install an Exterior Door, With and Without a Frame – Orchard.
Sealing and Weatherproofing for the Midwest Climate
In April 2026, we’re still dealing with the unpredictable Chicago weather — from freezing rain to humid summers. A door that isn’t sealed properly will “leak” expensive heated air in the winter and cool air in the summer.
We use low-expansion spray foam to fill the gap between the door frame and the house framing. Warning: Never use high-expansion foam here! It can expand with enough force to bow the door frame, making the door stick or jam. Once the foam is dry, we apply a perimeter bead of paintable silicone caulk to the exterior. For a complete look at how we handle the local climate, see our Door Installation Chicago Complete Guide.
Preventing Water Leaks and Drafts
To ensure a truly weather-tight seal, we often use a “backer rod” (a foam rope) in large gaps before caulking. This provides a solid base for the caulk and ensures a better bond. Don’t forget to check the weatherstripping. Modern doors come with high-quality seals, but they must be seated correctly in their tracks to work. If you have questions about specific weatherproofing for the 2024-2026 seasons, our Exterior Door Installation Near Me 2024 FAQs has you covered.
Smart Features and Electrical Connections
Many of our customers in suburbs like Glenview and Northbrook are opting for smart features. Whether it’s a smart lock that connects to your phone or integrated security sensors, these should be installed during the final stages. If your door features built-in security wiring, ensure the wires are tucked neatly into the frame before you apply the interior trim. You can find more on modern door tech in our Front Door Installation Guide 2025.
Avoiding Common Mistakes in Porch Door Installation
Even experienced DIYers can run into trouble. One of the most common mistakes we see is over-tightening the installation screws. This can pull the jamb out of alignment, causing the door to bind. Another “rookie” error is ignoring the squareness of the opening and trying to “force” the door to fit.
Always remember: the door must be installed independently of the house’s “settling.” If your house is slightly tilted (as many older Chicago homes are), your door still needs to be perfectly plumb and level. If you follow the house’s tilt, the door will swing open or shut on its own. For professional-grade results without the headache, it’s often best to call in Door Installation Professionals.
Testing for Smooth Operation and Security
Before you call the project finished, perform a rigorous test.
- Slide or swing the door: It should move with minimal effort.
- Check the latch: Does the deadbolt throw easily without you having to push or pull the door?
- The “Paper Test”: Close the door on a piece of paper. If you can pull the paper out with no resistance, your weatherstripping isn’t making a tight seal.
For French doors, ensure both “leaves” meet perfectly in the middle. You can find more on this in our guide to Patio French Door Installation.
Frequently Asked Questions about Porch Doors
Do I need a permit for porch door installation in Chicago?
In many cases, yes. If you are simply replacing an existing door with one of the same size, you might not need a permit in some suburbs. However, if you are widening the opening or making structural changes to a load-bearing wall, the City of Chicago and most suburbs (like Des Plaines or Schaumburg) will require a permit and an inspection. Always check with your local building department first. If you’re unsure who to call, we can help guide you through the process as part of our Who Installs Exterior Doors Near Me service.
How long does a typical installation take?
For a professional crew like ours at HomeBuild, a standard porch door installation typically takes 4 to 6 hours. For a DIYer tackling this for the first time, we recommend blocking off an entire Saturday. If you run into rot or framing issues, it could easily turn into a two-day project. If you’re looking for Door Installations Near Me, we pride ourselves on efficiency and getting the job done in a single day.
How do I maintain my new sliding patio door?
Maintenance is simple but vital. Keep the bottom track free of dirt and debris, as this is the #1 cause of roller failure. Once a year, lubricate the rollers and tracks with a silicone-based spray (avoid grease, as it attracts dirt). Check the caulking on the exterior every spring and fall to ensure no cracks have formed. For more maintenance tips, visit our Entry Doors page.
Conclusion
A successful porch door installation is about more than just filling a hole in the wall. It’s about protecting your home from the harsh Midwest elements while creating a beautiful, functional transition to your outdoor space.
At HomeBuild Windows, Doors & Siding, we’ve spent over 20 years perfecting this process for homeowners across Chicagoland. As an Elite Platinum Pella® Certified Contractor and an Andersen Certified Contractor, we bring a level of expertise and attention to detail that is hard to match. Every project we take on is owner-supervised, ensuring that our high standards for quality workmanship are met every single time.
Whether you’re in Crystal Lake, Naperville, or right here in the heart of Chicago, we’re here to help you choose the perfect door and install it with precision. If you’re ready to upgrade your home’s comfort and curb appeal, More info about door replacement services is just a click away. Let’s make your porch the envy of the neighborhood!


