Your Home’s Grand Entrance Awaits
Custom entry door installation is a transformative project that improves your home’s curb appeal, security, and energy efficiency while increasing property value. The process involves removing your old door and frame, preparing the rough opening, setting and shimming a new pre-hung door unit, and finishing with proper sealing and hardware installation—typically taking 1-5 hours for pre-hung doors or up to a full day for more complex installations.
Quick Overview: What Custom Entry Door Installation Includes
- Planning & Selection – Choose materials (wood, steel, fiberglass), size, style, and custom features like sidelights or decorative glass
- Removal – Take out the old door, frame, and trim
- Preparation – Clean and repair the rough opening, apply flashing and weatherproofing
- Installation – Set the new door, shim for proper alignment, and secure the frame
- Finishing – Seal gaps, install trim, add hardware, and adjust weatherstripping
- Cost – Expect $100-$1,500 for installation labor plus $300-$1,000+ for the door itself
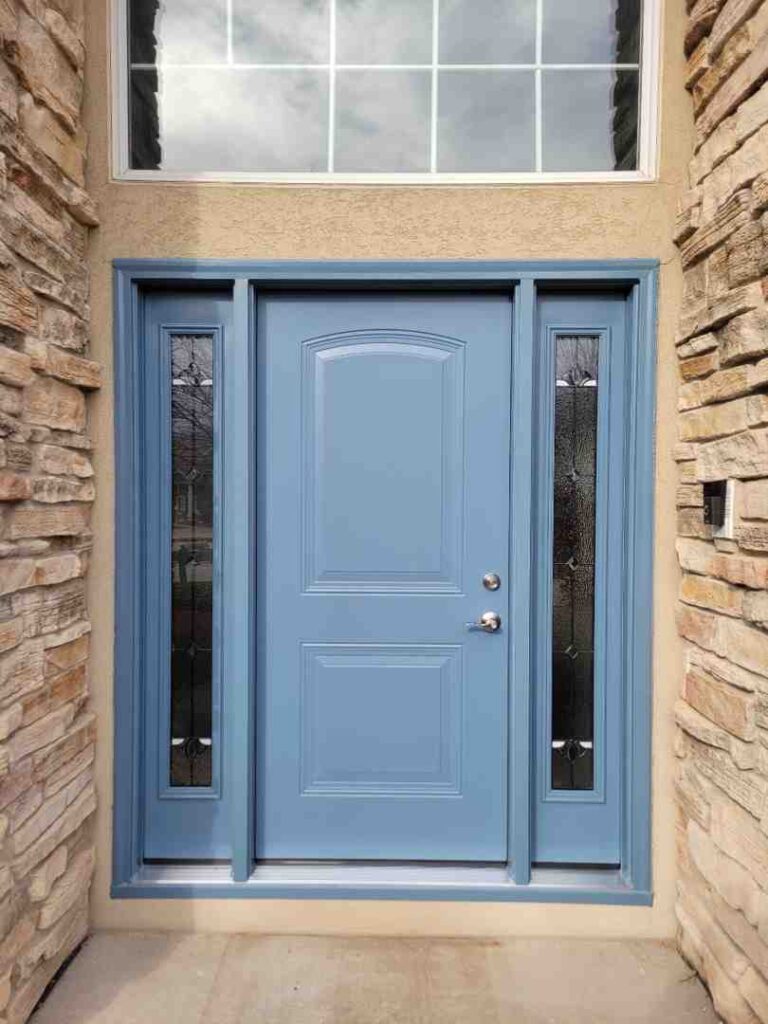
Your front door is often called the “portal to the soul” of your home—and for good reason. It’s the first thing visitors notice, and it plays a crucial role in your home’s security, energy efficiency, and overall aesthetic. A well-chosen custom entry door can instantly boost your home’s curb appeal and market value while reducing drafts and energy bills. Whether you’re replacing a worn-out door or upgrading to a more stylish option, understanding the installation process helps you make informed decisions and avoid costly mistakes.
Research shows that a well-maintained entry door can last 30 years or more, making this investment one that pays dividends for decades. Modern custom doors offer extensive options—from wood species and glass privacy ratings to smart lock integration and decorative hardware—allowing you to create an entrance that truly reflects your style while meeting Chicago’s demanding weather conditions.
I’m Steve Mlynek, founder of HomeBuild Windows, Doors & Siding, and over the past 20+ years, I’ve guided countless Chicago-area homeowners through successful custom entry door installation projects, from material selection to final hardware adjustments. Whether you’re considering a DIY approach or professional installation, this guide will walk you through every step of the process so you can achieve a flawless, long-lasting result.

Planning Your Project: Choosing the Perfect Custom Door
Choosing a custom entry door is like picking the perfect outfit for your home—it needs to fit just right, feel comfortable, and make a statement. Before we even think about installation, let’s explore the exciting world of custom doors and how to select the ideal one for your Chicago-area home.

Key Considerations for Your Custom Entry Door Installation
When starting on a custom entry door installation, several factors come into play that will shape your final choice and ensure it perfectly complements your home’s unique character and our local climate.
First and foremost is the door style and how it harmonizes with your home’s architectural match. Your front door should resonate with your home’s overall design, whether it’s a classic bungalow in Lake Zurich, a modern loft in downtown Chicago, or a traditional home in Arlington Heights. Evaluating your space and choosing a proportional door size is key. A small front porch might suit a single door without sidelights, while a grand entrance could accommodate a sweeping double-door setup.
Speaking of size, let’s talk about door size itself. Custom doors offer flexibility beyond standard dimensions. While typical doors are 80 inches high and 30, 32, or 36 inches wide, your custom door can be selected up to an impressive 12 feet tall and 6 feet wide, with a thickness of 2-1/4 inches. This allows for truly grand entrances. When measuring for a new door, we always ensure the rough opening is 1/2″ to 3/4″ larger than the door in width and 1/2″ larger in height to allow for proper shimming and movement.
You’ll also need to consider single vs. double doors. Double doors offer a majestic entrance, ideal for larger homes or those seeking a dramatic effect. For homes that need a little extra light or visual interest, adding sidelights can be a game-changer. Sidelights are sections of glass positioned on either side of the door, allowing more natural light into your entryway and enhancing views. We can also help you Replace Front Door and Sidelights to transform your entryway.
Material Matters: Wood, Steel, and Fiberglass Compared
The material you choose for your custom entry door significantly impacts its appearance, durability, maintenance, and energy efficiency. For homes across Chicagoland, we typically recommend three primary materials, each with distinct advantages:
| Feature | Wood Doors | Steel Doors | Fiberglass Doors |
|---|---|---|---|
| Pros | Timeless beauty, highly customizable, natural appeal, excellent insulation (solid core) | Superior security, fireproof, high energy efficiency (foam core), good soundproofing, low maintenance | Dent/scratch resistant, mimics wood grain, excellent insulation, resistant to moisture/pests, low maintenance, long lifespan |
| Cons | Higher maintenance, susceptible to warping/rotting if exposed, higher cost | Can dent, rust if finish is compromised, less customizable than wood | Can be less energy-efficient than other materials (some models), can crack under severe impact |
| Cost | Generally highest | Mid-range | Mid-range |
| Maintenance | Light sanding/topcoat every 2-5 years, full refinish every 10 years, monthly polish | Wax every few months for protection, minimal | Minimal, occasional cleaning |
| Lifespan | 30+ years with proper maintenance | 25+ years | 25+ years |
Wood Doors: For those who cherish classic design, wood doors offer an enviable curb appeal. Options like oak can make a grand statement, while sapele mahogany provides a durable choice with a beautiful straight grain. Many hardwood doors have an engineered core for better energy efficiency and longevity, making them suitable for homes in the North-West Suburbs. However, wood requires more maintenance, needing a new topcoat every 2-5 years and a full refinish every decade to protect its finish, especially if exposed to the elements.
Steel Doors: If security and soundproofing are top priorities for your Chicago home, steel entry doors are an excellent choice. They are known for superior security and are fireproof, offering heightened energy efficiency due to foam-filled cores and thermal adhesives. Steel doors are durable, with some models lasting 25 years or more, and require minimal maintenance.
Fiberglass Doors: Often considered the most efficient material, fiberglass doors excel in insulation, resistance to moisture, and require minimal maintenance. They are durable, resisting dents and scratches, and can mimic real wood grain without the upkeep. Many models meet or exceed ENERGY STAR requirements and have a long lifespan, often exceeding 25 years.
Customization Options: Glass, Hardware, and More
The true magic of custom entry door installation lies in the endless possibilities for personalization. Beyond the material, you can tailor nearly every aspect of your door to reflect your unique taste.
- Sidelights and Transoms: These glass elements dramatically improve an entryway. Sidelights, positioned on the sides of the door, and transoms, above the door, flood your foyer with natural light and create a more expansive feel. The installation of sidelights can take an additional 3 to 4 hours, but the effect is well worth it.
- Decorative Glass: From frosted glass for privacy to stained glass for a touch of artistry, the options are extensive. We can help you Changing Glass on Front Door to perfectly match your aesthetic. Simpson offers glass with various privacy ratings, textured, and obscure options.
- Hardware Finishes: The right hardware acts as jewelry for your door. Choose from a wide array of finishes—from rustic oil-rubbed bronze to sleek brushed nickel—for hinges, handles, and deadbolts.
- Smart Locks: For improved security and convenience, integrating smart locks allows you to control access to your home remotely, a great feature for busy Chicago families.
The Cost of Custom Entry Door Installation
Understanding the costs involved in a custom entry door installation helps us plan effectively. The installation cost for a front entry door ranges from $100 to $1,500, with contractors typically charging $70-$150 per hour. The total project cost can vary significantly.
The average cost of the entry door itself can range from a few hundred dollars up to a thousand dollars for standard models, but custom doors with specialized features will naturally be higher. When we talk about a professionally installed custom entry door in the Chicago area, the total project cost (door plus installation) can range between $5,000 and $12,000, depending on the options and materials chosen.
Several factors will influence the final price:
- Material: As discussed, wood, steel, and fiberglass have different price points.
- Size: Custom or oversized doors (wider than 3ft and taller than 7ft) will incur higher costs.
- Custom Features: Adding sidelights, transoms, decorative glass, or smart locks will increase the price.
- Labor & Hardware: The complexity of the installation and the quality of your chosen hardware (knobs, locks, hinges) are significant factors.
- Installation Type: A straightforward replacement of a pre-hung door is less labor-intensive than an intensive reframing project, which can take a day or more.
We believe in transparency, and we’ll provide a detailed estimate that includes all fees and labor. To explore options and get a better understanding of what your project might entail, check out our Entry Door Replacement Cost guide.
The Step-by-Step Guide to Custom Entry Door Installation
Now that we’ve chosen our perfect door, it’s time to get down to business. A precise installation is crucial for the door’s performance, security, and longevity. While this guide outlines the process, professional installation ensures the best results, especially for custom doors.

Tools and Materials You’ll Need
Before we begin, let’s gather our essential tools and materials. Having everything ready saves time and ensures a smooth installation process:
- Tools:
- Level (at least 4-foot)
- Tape measure
- Pry bar and putty knife (to protect walls)
- Caulk gun
- Drill/driver with various bits
- Hammer
- Reciprocating saw or hacksaw (for cutting nails/screws)
- Utility knife
- Safety glasses and gloves
- Shims (wood or plastic)
- Chisel
- Materials:
- New custom entry door unit (pre-hung is recommended for ease)
- Low-expansion, low-pressure polyurethane insulating foam sealant
- High-quality hybrid polymer, elastomeric, or polyurethane sealant/caulk
- Flashing tape or drip cap
- Exterior-grade screws (e.g., #8 x 2-1/2″ or 3″ for jambs, #10 x 2-1/2″ for top hinge)
- 16d galvanized casing nails (for exterior trim)
- Backer rod
- Plywood strips (if needed for sill adjustment)
- New interior and exterior trim (if replacing)
- Hardware (doorknob, deadbolt, hinges if not pre-installed)
Step 1: Removing the Old Door and Frame
Carefully removing the old door and frame is critical to prepare for a clean, precise custom entry door installation.
- Prying Trim: We start by carefully prying off the interior trim. Using a putty knife under the pry bar helps protect your wall paint. Next, we cut any caulk along the edges of the exterior brick molding with a utility knife.
- Removing the Old Door Slab: If it’s still attached, we remove the door from its hinges by tapping out the hinge pins with a hammer and screwdriver. Then, we unscrew the hinges from the door frame.
- Cutting Frame Fasteners: With the trim off, we can see the nails or screws securing the old door frame to the house’s rough opening. We use a reciprocating saw or hacksaw blade to cut through these fasteners, being careful not to damage the surrounding structure.
- Removing the Old Frame and Sill: Once all fasteners are cut, we carefully pry out the old door frame and sill. You can learn more about this process in our guide on Exterior Door Installation 101.
Step 2: Preparing and Repairing the Rough Opening
A perfect fit starts with a perfectly prepared opening. This step ensures our new custom door has a solid, level, and plumb foundation.
- Cleaning the Opening: We thoroughly clean and vacuum the rough opening, removing any dirt, debris, or old caulk.
- Checking for Level and Plumb: We use a level to check the rough opening’s sill for levelness. Any significant slopes or unevenness must be corrected. We also check the vertical studs for plumb. The rough opening should be plumb, level, and square.
- Repairing Rot or Damage: This is a crucial inspection point, especially in older Chicago homes. We look for any signs of wood rot, water damage, or deterioration around the sill and framing. Any damaged wood must be repaired or replaced to ensure structural integrity and prevent future issues.
- Applying Flashing and Sealant: To protect against moisture, we apply flashing tape or a drip cap to the sill and jambs, integrating it with the building’s weather-resistant barrier. We also apply a generous bead of high-quality sealant to the sill and exterior sheathing before setting the new door. This meticulous preparation is vital for long-term performance against Chicago’s diverse weather.
Step 3: Setting, Shimming, and Securing the New Door
- Placing the New Pre-Hung Unit: With assistance, we carefully lift and place the new pre-hung custom door frame into the prepared rough opening. We center it and ensure it’s sitting correctly on the sill.
- Shimming the Hinge Side: We start by shimming behind the hinge-side jamb, using pairs of shims. Our goal is to create a consistent 1/8″ gap between the hinge-side jamb and the door slab edge when the door is closed. This ensures the door swings freely and seals properly.
- Checking for Plumb and Square: As we shim, we constantly check the door frame for plumb (perfectly vertical) and square (90-degree corners) using our level and by measuring diagonally from corner to corner. If both diagonal measurements are the same, the door is square. We want the door to be straight and true.
- Fastening the Frame: Once the door is perfectly plumb, level, and square, we secure it. We drive exterior-grade screws (e.g., 3-inch screws) through the jamb at each shim location, being careful not to over-tighten and bend the jamb. For added security and to prevent sagging, we replace one short screw from each hinge with a longer, #10 x 2-1/2″ screw that bites into the structural stud. This anchors the door frame firmly. You can see more details in our guide on Installing a Prehung Exterior Door.
Step 4: Sealing, Insulating, and Finishing Touches
The final steps ensure your new custom door is energy-efficient, secure, and beautiful.
- Low-Expansion Foam Insulation: We fill the gaps between the door frame and the rough opening with a low-expansion, low-pressure polyurethane insulating foam sealant. It’s crucial to use low-expansion foam to avoid warping the door frame. This provides excellent insulation and prevents drafts, which is essential for Chicago’s changing seasons.
- Interior and Exterior Caulk: We apply high-quality sealant to the exterior perimeter of the door, around the brick molding, and any other seams to create a watertight and airtight seal. On the interior, we use backer rod and sealant where necessary.
- Installing Trim: We install new interior and exterior trim, ensuring it’s properly mitered and secured for a clean, finished look.
- Installing Hardware and Strike Plates: Finally, we install your chosen hardware—the doorknob, deadbolt, and any custom handles. We carefully adjust the strike plates on the door frame to ensure the latch and deadbolt engage smoothly and securely, creating a tight seal against the weatherstripping. For specific hardware installation, refer to our guide on Schlage Camelot Front Entry Handle Installation. We make sure all weatherstrips are properly in place and making contact with the door panel, and the threshold cap is adjusted for a snug fit.
DIY vs. Professional Installation: Making the Right Call
When it comes to custom entry door installation, homeowners often weigh the pros and cons of tackling the project themselves versus hiring a professional. While a DIY approach can be tempting, especially for those with a knack for home improvement, we often see the long-term benefits of professional expertise.
The Case for DIY
For the intrepid homeowner, the idea of a DIY installation holds several attractions:
- Cost Savings on Labor: The most obvious benefit is saving on labor costs. A basic DIY exterior door replacement project might cost between $300 and $1,000 for materials, compared to a professional installation which can range higher.
- Sense of Accomplishment: There’s undeniable satisfaction in completing a significant home improvement project with your own hands.
- Project Control: You have direct control over every decision and every step of the process.
However, keep in mind that even a “simple” door slab installation, which is cheaper upfront, requires precise measurements and the transfer of hinge and bore positions—mistakes can be costly. Intensive reframing projects, for instance, can take a full day or more for experienced DIYers.
The Advantages of Professional Installation
For a complex project like custom entry door installation, the advantages of professional service often outweigh the perceived savings of DIY.
- Expertise and Experience: Our team at HomeBuild Windows, Doors & Siding has over 20 years of experience installing doors across Chicago and the surrounding suburbs. We’ve encountered every kind of rough opening, structural issue, and weatherproofing challenge imaginable. Professional installation ensures the job is done correctly, preventing potential long-term costs from mistakes or damage. We are experts in handling the nuances of different door materials and customization options.
- Proper Tools: We come equipped with all the specialized tools required for a flawless installation, from precise measuring devices to power tools for efficient and accurate work.
- Efficiency: While a DIY project might take a full day or more, our experienced installers can typically complete a pre-hung door installation in two to three hours, with more complex door and frame installations taking six to seven hours. This means less disruption to your home life.
- Lifetime Labor Warranty: Unlike a handyman who might offer a one-year warranty, professional installers like us often provide comprehensive warranties on workmanship, giving you peace of mind for years to come. Our commitment to top-quality products, expert installation, and exceptional customer service means we stand behind our work.
- Flawless Finish: From perfectly plumb and square alignment to meticulous sealing and trim work, professionals ensure a flawless finish that maximizes your door’s aesthetic appeal, energy efficiency, and security.
When considering who to trust with your custom entry door, we invite you to explore Who Installs Exterior Doors Near Me and review manufacturer instructions for the doors we install.
Long-Term Care: Maintaining Your New Entry Door
A custom entry door is a significant investment, and with proper care, it will reward you with beauty, security, and efficiency for decades. A well-cared-for front entry door can last for several decades, with some models lasting 30 years or more. Fiberglass and steel doors, in particular, are known for their durability and long lifespan, often exceeding 25 years. Here’s how to ensure your custom door stands the test of time:
- Regular Cleaning: The simplest maintenance is often the most effective. Clean your door regularly with a gentle soap and water to remove dirt, grime, and environmental buildup. This is especially important in Chicago, where dust and changing weather can take their toll.
- Finish Maintenance: For wood doors, light sanding and reapplication of the topcoat may be necessary every 2-5 years, depending on sun exposure and weather conditions. A full refinishing is typically recommended once every ten years to maintain its protective barrier and aesthetic appeal. Steel doors benefit from waxing every couple of months for added protection.
- Hardware Lubrication: Hinges and locks work hard, especially with fluctuating temperatures. Lubricate your hinges and other moving hardware annually or as seasons change to keep them operating smoothly.
- Weatherstripping Inspection: The weatherstripping and door sweep are your first line of defense against drafts and moisture. Inspect them annually for wear and tear. If you notice light or air coming through gaps, it’s time to adjust the door sweep or replace the weatherstripping every year or two. This small step can significantly impact your home’s energy efficiency.
For more tips on keeping your door in top shape, check out our guide on Changing Exterior Door.
Frequently Asked Questions about Custom Doors
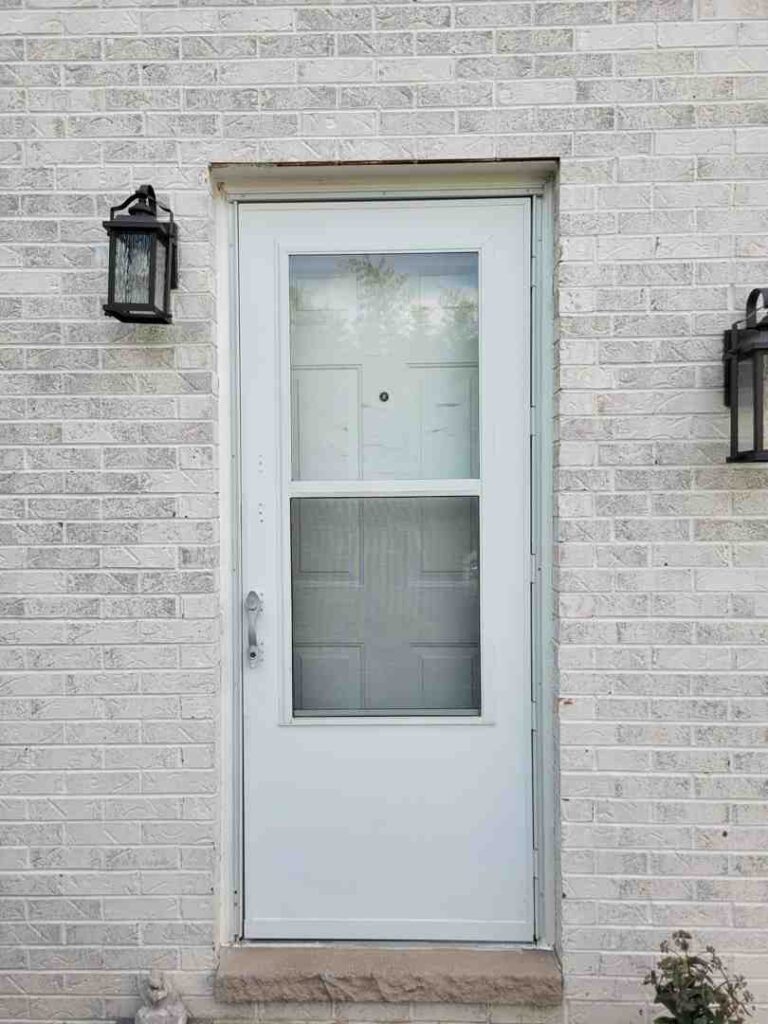
Can I replace just the door without replacing the frame?
Yes, it’s often possible to replace just the door slab without replacing the entire frame, provided the existing frame is in good, sound condition and the new door slab is a compatible size. If the frame shows any signs of damage like rot, cracks, or warping, we would strongly recommend a full frame replacement to ensure a proper fit, seal, and structural integrity. Slab doors are generally cheaper than pre-hung units, but they require precise measurements and careful transfer of hinge and borehole positions from the old door to the new.
How long does a custom entry door last?
The lifespan of a custom entry door can vary significantly based on its material, the quality of its installation, and how well it’s maintained. A well-cared-for front entry door can last for several decades, with some models lasting 30 years or more. Fiberglass and steel doors are particularly known for their durability and long lifespan, often lasting up to 25 years or more. Regular maintenance, including cleaning, finish care, and hardware lubrication, is essential to maximize your door’s longevity.
What is the most energy-efficient exterior door material?
Fiberglass is generally considered the most energy-efficient exterior door material. It offers excellent insulation capabilities, is resistant to moisture and pests, and requires minimal maintenance. However, insulated steel doors, with their foam-filled cores and thermal adhesives, also provide heightened energy efficiency. Even solid wood doors can be energy-efficient, especially those with engineered cores, but only with proper installation and meticulous weatherstripping. Regardless of the material, a professional custom entry door installation with proper sealing and insulation is paramount to achieving optimal energy efficiency in your Chicago home.
Conclusion: Open the Door to a More Beautiful Home
Investing in a custom entry door installation is more than just a home improvement project; it’s an investment in your home’s beauty, security, and long-term value. From enhancing curb appeal and energy efficiency to providing superior security, a quality custom door makes a profound impact. We’ve walked through the key considerations, material comparisons, step-by-step installation process, and the benefits of choosing professional expertise.
At HomeBuild Windows, Doors & Siding, we pride ourselves on providing Chicago-area homeowners with top-quality products, expert installation, competitive pricing, and exceptional customer service. Our professionalism and attention to detail ensure your new custom entry door is not just installed, but perfectly integrated into your home, standing strong against the unique demands of our local climate.
Don’t settle for anything less than perfection for your home’s grand entrance. Let us help you open the door to a more beautiful, secure, and energy-efficient home. Contact us for your Chicago door installation and replacement needs today!