Why Patio French Door Installation Transforms Your Home
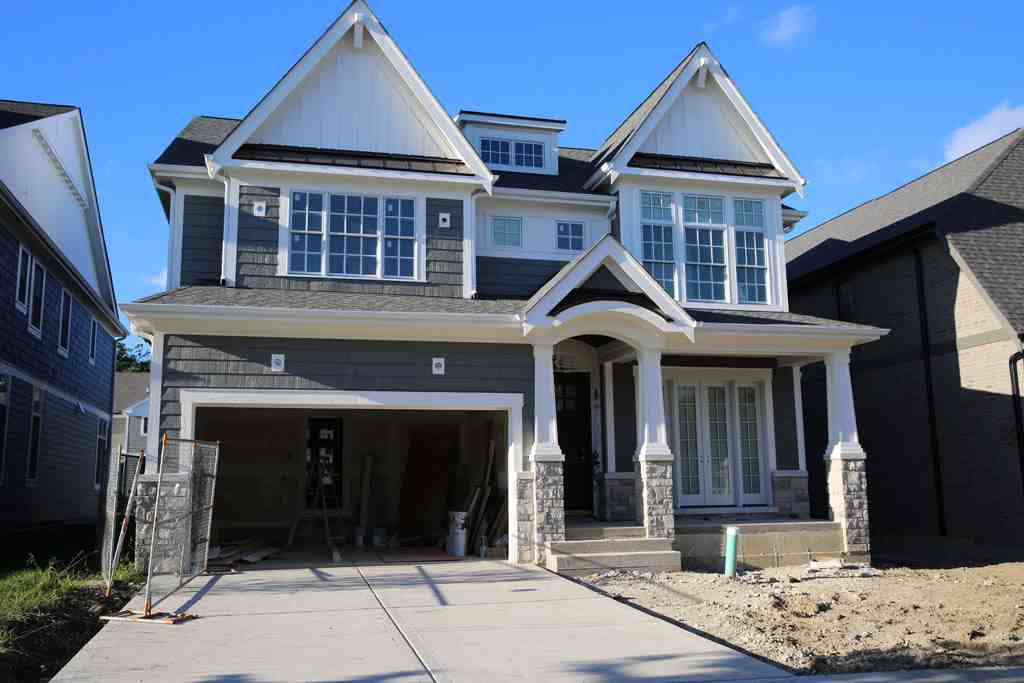
Patio french door installation is an impactful home improvement that floods your living space with natural light and creates a seamless connection to the outdoors. Upgrading to French doors can increase your home’s value and curb appeal, and it’s a manageable weekend DIY project for many homeowners.
A successful installation requires:
- Proper rough opening preparation: The opening must be square, level, and plumb.
- Watertight sealing: A sill pan and integrated flashing are essential to prevent water intrusion.
- Precise shimming and securing: Use shims to support the frame and ensure proper alignment.
- Professional weatherproofing: Use low-expansion foam and exterior-grade sealant.
- Final adjustments: Test door operation and adjust for a perfect seal.
French doors bring in more natural light than standard doors, improve ventilation, and add architectural appeal. Modern units offer excellent energy efficiency with multi-pane glass, low-E coatings, and tight weatherstripping, which is ideal for Chicago-area homes.
The DIY installation process typically takes two days. While the project demands attention to detail, it’s achievable for those comfortable with basic carpentry.
I’m Steve Mlynek, and with over 20 years at HomeBuild Windows, Doors & Siding, I’ve overseen thousands of patio french door installation projects in the Chicago area. This guide shares our professional experience to help you succeed.

Before You Begin: Planning and Preparation
Proper planning for your patio french door installation saves headaches and ensures professional results. Before you begin, choose the right materials, gather your tools, and prioritize safety.
Always wear safety glasses and gloves. This is a two-person job, especially when lifting the door unit, so find a helper. For a broader overview of door projects, see our Guide to Exterior Door Installation.

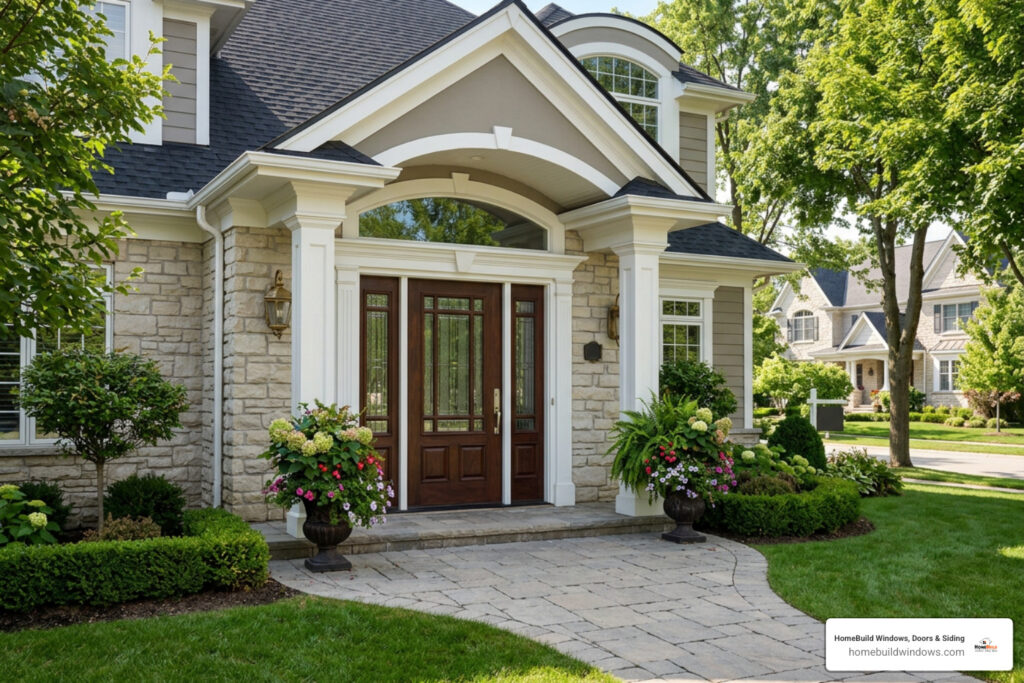
Understanding French Doors
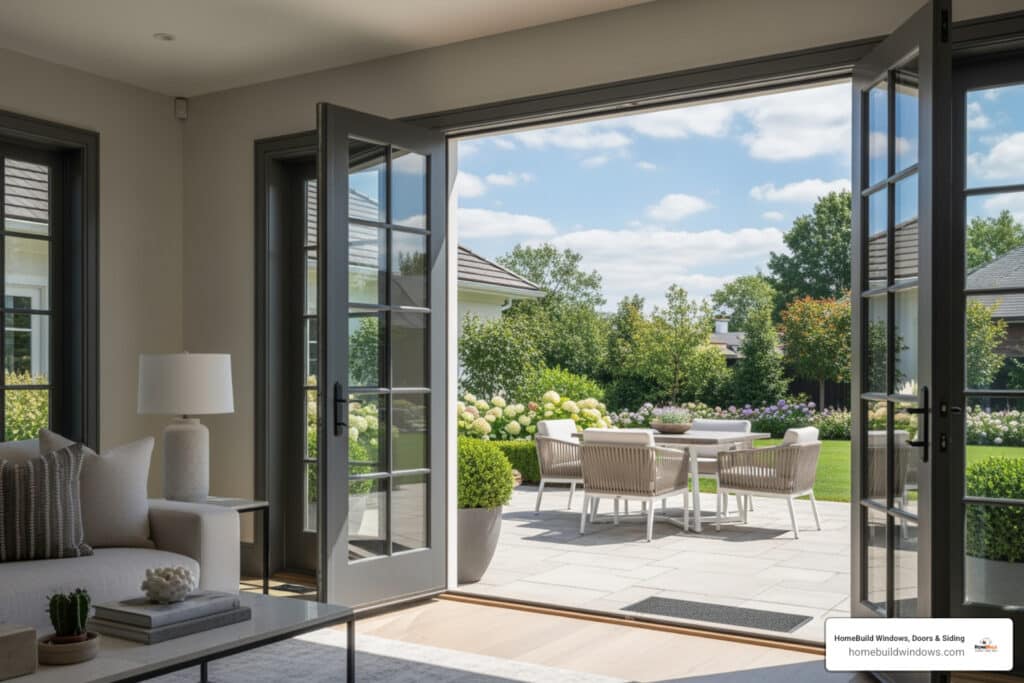
French doors are a pair of hinged doors with glass panes that extend nearly their full length, flooding interiors with light and creating an open, airy feel.
It’s important to distinguish between interior and exterior French doors. Interior doors separate rooms while maintaining light flow. Exterior French doors, our focus here, are built to withstand Chicago’s weather with weather-resistant materials and robust sealing.
You’ll also choose between in-swing (opening in) and out-swing (opening out) configurations. Out-swing doors save interior space and can offer better protection against wind-driven rain. Most units have an active/inactive configuration, where one door is for daily use and the other is secured but can be opened to create a wide passage. Learn more about door options in our Entry Doors Overview.
Choosing Your Materials and Style
The material you choose affects appearance, durability, maintenance, and energy efficiency.
| Material | Key Characteristics |
|---|---|
| Wood | Classic, timeless look. Requires regular painting or staining to prevent warping or rot in Chicago’s climate. |
| Fiberglass | Extremely durable and low maintenance. Resists warping and rotting. Can mimic wood grain. Excellent energy efficiency. |
| Vinyl | Most affordable option with good energy efficiency. Virtually no maintenance but has limited color options. |
| Steel | Provides maximum security and strength. Highly durable and energy-efficient but can dent and requires painting. Learn more in our guide on Steel Replacement Door Pros and Cons. |
Fiberglass doors are popular for offering the beauty of wood without the maintenance, standing up well to Chicago’s harsh weather. Vinyl doors are a great value for budget-conscious projects. Steel doors are ideal for prioritizing security, while wood doors offer traditional charm for those who don’t mind the upkeep.
Essential Tools and Materials for Patio French Door Installation
Gather everything before you start to avoid interruptions.
Tools: 4-foot and 6-foot level, drill/driver, reciprocating saw, circular saw, pry bar, hammer, tape measure, caulking gun, safety glasses, and gloves.
Materials: Pre-hung French door unit, wood shims, a sill pan, self-adhering flashing tape, exterior-grade sealant, low-expansion spray foam, screws, and a drip cap.
Using a pre-hung door unit, where doors are already mounted in the frame, dramatically simplifies installation and ensures proper alignment.
Before You Begin: Planning and Preparation
A successful patio french door installation starts before you pick up a tool. Protect yourself with safety glasses and gloves, and recruit a helper for lifting and setting the unit. For a broader overview, see our Guide to Exterior Door Installation.
Understanding French Doors
French doors are paired, hinged doors with large glass areas that brighten interiors and connect indoor and outdoor spaces. Exterior French doors are built for Chicago weather with durable materials, insulated glass, and robust seals. Choose in-swing (opens in) or out-swing (opens out) based on space and weather exposure. Most sets have an active daily-use door and an inactive panel secured by flush bolts that open when you need a wider passage. Explore configurations in our Entry Doors Overview.
Choosing Your Materials and Style
- Wood: classic and customizable but needs regular finishing.
- Fiberglass: durable, low maintenance, can mimic wood, and handles temperature swings well.
- Vinyl: budget-friendly and efficient with minimal upkeep.
- Steel: strong and secure; requires painting to prevent rust. See Steel Replacement Door Pros and Cons.
Essential Tools and Materials for Patio French Door Installation
Have these ready to avoid delays: 4-foot and 6-foot levels, drill/driver, reciprocating saw, circular saw, pry bar, hammer, tape measure, caulking gun, plus safety glasses and gloves. Materials include a pre-hung French door unit, wood shims, sill pan, self-adhering flashing tape, exterior-grade sealant, low-expansion spray foam, screws, and a drip cap. Pre-hung units simplify alignment and operation; for workflow tips, see Installing a Prehung Exterior Door.
Introduction
French patio doors flood living spaces with natural light, improve ventilation, and create a seamless indoor-outdoor connection that lifts curb appeal and home value. This guide shows DIYers how to plan, choose materials, and install a pre-hung unit step by step for a smooth, weather-tight result in typical Chicago-area homes.
Before You Begin: Planning and Preparation
Success with patio french door installation starts with smart prep: plan a two-day window, line up a helper, and put on safety glasses and gloves. For fundamentals that apply across exterior door projects, see our Guide to Exterior Door Installation.
Understanding French Doors
Exterior French doors are engineered for weather resistance and energy efficiency, unlike lighter interior versions. Decide on in-swing (saves patio clearance) vs. out-swing (saves interior space and helps shed wind-driven rain), and whether you want one active panel for daily use with an inactive panel you can release for a wider opening. Learn more in our Entry Doors Overview.
Choosing Your Materials and Style
- Wood: timeless look; needs periodic finishing.
- Fiberglass: durable, low maintenance, excellent for Chicago’s climate.
- Vinyl: affordable, efficient, low upkeep.
- Steel: strong and secure; finish to prevent rust. Details: Steel Replacement Door Pros and Cons.
Essential Tools and Materials for Patio French Door Installation
Gather everything before you start.
Tools: 4-foot and 6-foot level, drill/driver, reciprocating saw, circular saw, pry bar, hammer, tape measure, caulking gun, safety glasses, and gloves.
Materials: Pre-hung French door unit, wood shims, a sill pan, self-adhering flashing tape, exterior-grade sealant, low-expansion spray foam, screws, and a drip cap.
A quality pre-hung unit dramatically simplifies installation and helps ensure long-term smooth operation and proper alignment.
Step-by-Step Patio French Door Installation Guide
We recommend setting aside two full days for a DIY patio french door installation. Day one is for removal and installation; day two is for adjustments and finishing.
A pre-hung door unit is highly recommended as it simplifies the process and ensures proper alignment. Our guide on Installing a Prehung Exterior Door provides additional context.
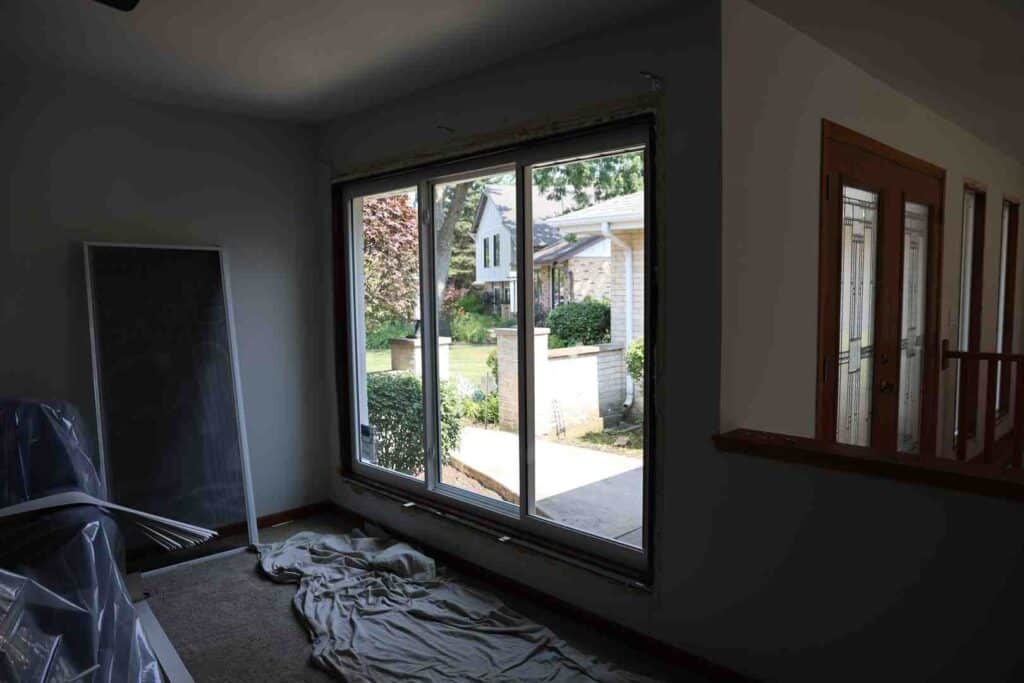
Removing the Old Door or Window
First, put on safety glasses and gloves, and protect the area with drop cloths.
- Remove Trim: Carefully pry off the interior and exterior trim. Work slowly to avoid damaging the surrounding walls.
- Cut Fasteners: Use a reciprocating saw to cut the nails or screws holding the old frame in place.
- Remove Old Unit: With the fasteners cut, the old frame should pull out. If it’s stuck, double-check for a missed fastener.
For more details, see our article on Door and Window Replacement.
Preparing the Rough Opening
A properly prepared opening is critical for a successful installation.
- Check for Plumb, Level, and Square: Use a level to ensure the sides are plumb (vertical) and the top and bottom are level (horizontal). Measure the diagonals; they should be equal, confirming the opening is square.
- Verify Dimensions: The rough opening should be 1/2 to 3/4 inch wider and taller than your door unit to allow for shimming and adjustment. Standard French doors are 5 to 6 feet wide.
- Inspect the Sill: Ensure the sill area is solid, level, and free of rot.
Minor imperfections can be corrected with shims, but significant framing issues should be fixed now.
Installing the Sill Pan and Flashing
A watertight seal is non-negotiable in Chicago’s climate.
- Install Sill Pan: Place a specialized sill pan across the opening. It should have a positive slope to drain water outward.
- Apply Flashing Tape: Apply self-adhering flashing tape up the sides of the opening first, then across the sill pan, overlapping the pieces like shingles. This tape should integrate with your house wrap to create a continuous moisture barrier. For visual instructions, view this helpful PDF guide.
- Seal Corners: Pay extra attention to sealing the corners, as they are common leak points.
Setting and Securing the French Door Unit
This is a two-person job.
- Apply Sealant: Run a bead of exterior-grade sealant along the subfloor where the door sill will sit.
- Set the Door: With a helper, tilt the door unit into the opening, bottom first.
- Shim the Frame: Insert wood shims between the door jamb and the framing, starting at the bottom corners and working up the sides every 8-12 inches.
- Check for Plumb and Level: Constantly use your level to ensure the unit is perfectly plumb and level as you add shims.
- Secure the Frame: Drive screws through the jamb and shims into the framing. Do not overtighten.
- Check the Reveal: The gap (reveal) between the doors and the frame should be consistent (about 1/8 inch) all around. Adjust shims as needed. Test that the doors swing freely and latch correctly.
The Finishing Touches: Sealing, Adjusting, and Finishing
These final steps ensure your door performs flawlessly for years and protects your investment. For more on the full process, see our guide on Changing Exterior Door.
Adjusting and Securing the Doors for a Perfect Seal
Before sealing, test the doors’ operation. They should swing smoothly without binding.
- Check that both doors latch and lock properly.
- Fine-tune the fit by adjusting the hinge screws. Make small, quarter-turn adjustments and re-test.
- Ensure the weatherstripping makes firm, even contact with the doors when closed to prevent drafts. The gap (reveal) between the doors should be consistent.
Insulating and Weatherproofing
Create a weathertight seal to keep Chicago’s weather out.
- Insulate Gaps: Fill the gap between the door jamb and wall framing with low-expansion spray foam for doors and windows. Using regular expanding foam can bow the jambs and ruin the door’s operation. Let it cure, then trim any excess.
- Seal the Exterior: Apply a continuous bead of exterior-grade sealant where the door frame meets the siding.
- Install Drip Cap: Place a drip cap (a metal or vinyl strip) over the top exterior trim to direct water away from the door.
Painting or Staining Your New Doors
If your doors are unfinished, now is the time to paint or stain them.
- Use exterior-grade products designed for doors to withstand UV rays and moisture.
- Crucially, finish all six sides of each door (front, back, top, bottom, and both edges) to prevent warping from moisture absorption.
- Follow the product’s instructions for preparation and application.
Once the finish is cured, install the interior trim to complete the project.
Common Challenges and Security Improvements
Even with good planning, patio french door installation can have challenges. Here’s how to solve common issues and improve security.
Overcoming Common Installation Problems
Few homes have perfectly square openings, especially older ones that have settled.
- Out-of-Plumb Walls: If walls aren’t vertical, your door can bind. Use shims to make the door unit itself plumb and square, even if the wall isn’t perfect. Check constantly with a long level.
- Uneven Sills: A sloped sill can cause water to pool. Correct this before setting the door, using tapered shims or by repairing the sill if it’s deteriorated.
The key is ensuring the door operates in a single, flat plane. If the doors twist or bind, recheck your shimming. For issues like damaged frames, our guide on Broken Glass Door Replacement can help.
Tips for Enhancing French Door Security
Modern French doors can be very secure with the right features.
- Multi-Point Locking Systems: This is the gold standard. These systems lock the door at three or more points along the frame, making it extremely difficult to force open.
- Reinforced Strike Plates: Upgrade to heavy-duty strike plates secured with 3-inch screws that go into the wall studs, not just the jamb. This dramatically increases kick-in resistance.
- Security Glass: Consider laminated or tempered glass. Laminated glass has a plastic interlayer that holds it together when shattered, offering significant protection against break-ins.
- Auxiliary Bolts: Use flush bolts at the top and bottom of the inactive door panel. A sliding bolt at foot level adds another layer of security.
For more on glass options, see our guide on Changing Glass on Front Door.
Frequently Asked Questions about French Door Installation
Here are answers to common questions about patio french door installation.
How long does a patio french door installation take?
For a DIY project, plan for a full weekend (two days). Day one is for removal and setting the door; day two is for adjustments and finishing. A professional crew can often complete the job in a single day.
Do both doors open on a French patio door?
Yes, both doors can open to create a wide, unobstructed entryway. Most have an active/inactive configuration: one door for daily use and an inactive door secured by flush bolts that can be opened when needed.
Are French doors energy efficient?
Absolutely. Modern French doors are highly energy-efficient. Look for units with double or triple-pane glass, low-E coatings to reflect heat, and advanced weatherstripping for a tight seal against drafts. A quality, properly installed unit can be as efficient as a solid door.
Transform Your Home with a Beautiful New Entrance
A successful patio french door installation does more than replace an entryway—it transforms your home’s look and feel. Natural light floods your living areas, making them feel larger and more connected to the outdoors. This feature also adds significant resale value.
While this is a rewarding DIY project, achieving a perfect, weather-tight fit requires precision. Small mistakes in making the opening plumb and level, integrating the sill pan, or shimming the frame can lead to drafts, water intrusion, or operational issues.
If you’re uncertain about any step or want the peace of mind that comes with professional installation, HomeBuild Windows, Doors & Siding is here to help. With two decades of experience installing thousands of French doors across the Chicago area, we guarantee your project meets the highest standards.
Whether you DIY or work with our team, your new French doors are a beautiful investment in your home’s comfort and style. Find expert door installers near you to get started today.