Why Learning How to Install Window Casement is a Game-Changer for Your Home
How to install window casement properly can transform your home’s energy efficiency, ventilation, and curb appeal. Here’s the quick overview:
- Measure the opening – Take width, height, and depth measurements at three points each; use the smallest measurements
- Remove the old window – Pry off trim, remove sash, cut out the old frame, and clean the opening
- Weatherproof the opening – Apply self-adhering flashing tape starting at the sill, overlapping at corners
- Install the new window – Apply sealant, set window in opening, shim it level and plumb, secure through nailing flange
- Seal and insulate – Apply exterior flashing tape, fill gaps with low-expansion foam, caulk the perimeter
- Finish interior – Install trim, fill nail holes, caulk gaps, and paint or stain
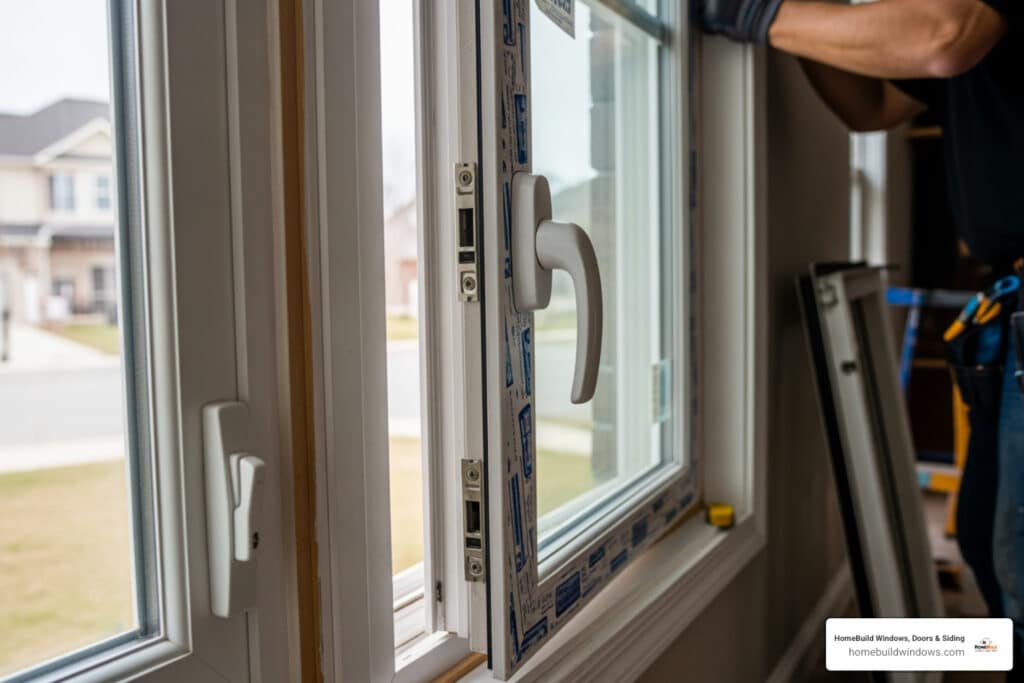
Casement windows are hinged on one side and swing outward like a door, operated by a crank handle. Unlike double-hung or sliding windows, they offer unobstructed views when open and create an exceptionally tight seal when closed—making them one of the most energy-efficient operable window types available.
When properly installed, casement windows can reduce air leakage by 30-40% compared to traditional windows. They’re ideal for capturing breezes, as even a small opening acts like a sail to direct fresh air inside. The compression seal formed when you lock the window prevents drafts far more effectively than windows that slide along a track.
The installation process requires careful attention to waterproofing, leveling, and sealing—but it’s manageable for homeowners with basic carpentry skills and the right tools. The most critical steps involve creating a weatherproof barrier around the rough opening and ensuring the window sits perfectly level and plumb before securing it.
I’m Steve Mlynek, founder and CEO of HomeBuild Windows, and over the past 20 years I’ve overseen thousands of window installations throughout Chicagoland. My experience with how to install window casement has taught me that proper preparation and attention to detail during installation make the difference between a window that performs beautifully for decades and one that causes problems within a few years.

Before You Begin: Preparation and Planning
Before we dive into the nitty-gritty of how to install window casement, proper preparation is paramount. Think of it as setting the stage for a successful performance – you wouldn’t want to start a play without your props and actors in place, would you? This initial phase is all about ensuring you have the right window, accurate measurements, a safe workspace, and all the necessary tools and materials at your fingertips. Safety should always be your top priority. We always recommend reviewing our guide on How to Prepare for a Window Installation for a comprehensive checklist.

Choosing Your Casement Window
Casement windows are popular in areas like Chicago for their aesthetic appeal, energy efficiency, and versatility. When selecting yours, consider the frame materials, energy efficiency ratings, and overall design.
Our Custom Window Designs can match your home’s aesthetic and functional needs. Here’s a rundown of common frame materials:
- Vinyl: Popular in climates like Chicagoland, vinyl windows are durable, low-maintenance, and offer excellent insulation. They withstand severe weather and are often the most cost-effective.
- Wood: Offers a classic, warm aesthetic and good insulation. They can be painted or stained but require regular maintenance (repainting/refinishing) to protect against moisture and UV damage.
- Fiberglass: A popular choice offering the strength of aluminum with a wood look and less maintenance. They are stable, resist warping, and have excellent thermal performance.
- Clad/Combination: Features a wood interior for aesthetics with an aluminum or vinyl exterior for protection and low maintenance.
Understanding energy efficiency ratings like U-Factor and SHGC is also crucial.
- U-Factor: Measures how well a window prevents heat from escaping. A lower U-Factor means better insulation, which is vital for Chicago winters.
- Solar Heat Gain Coefficient (SHGC): Measures how much solar heat a window lets in. A lower SHGC keeps your home cooler in summer, reducing AC costs. You can learn more about this at the [Solar Heat Gain Coefficient](https://www.energy.gov/energysaver/energy-performance-ratings-windows-doors-and-skylights#:~:text=Solar%20heat%20gain%20coefficient%20(SHGC,the%20greater%20its%20shading%20ability.) page.
For maximum energy savings, look for ENERGY STAR certified casement windows. As of 2020, there’s a single ENERGY STAR standard in Canada, making it easier to identify truly energy-efficient products. Our casement windows, for instance, must have an ER (Energy Rating) of 34 or higher to meet this certification.
How to Measure for a Replacement Window
Accurate measurements are the bedrock of a successful window installation. “Measure twice, cut once” is an old adage for a reason! When replacing a casement window, we recommend taking measurements at multiple points to account for any inconsistencies in the rough opening.
- Measure the Width: From the exterior, measure the width of your window opening at three points: the top, middle, and bottom. Record the smallest of these three measurements.
- Measure the Height: Again, from the exterior, measure the height of the opening at three points: the left side, center, and right side. Record the smallest of these three measurements.
- Check for Square: To ensure your opening is square, measure diagonally from corner to corner in both directions. If the two diagonal measurements are equal, your opening is square. If not, the new window might need adjustments, or shims will be crucial during installation. A frame out of square by 1/4 inch or less can often still be replaced and shimmed effectively.
- Measure the Depth: Go inside and open the existing window. Measure the depth at the same three points for width and height. Note the smallest measurements to ensure a snug fit for your new window.
Finally, to ensure an adequate opening for your new window, add at least a half-inch to the smallest width and height measurements. This provides a quarter-inch opening on all sides for shims, insulation, and thermal expansion, allowing for a perfectly plumb and level installation. If a brickmould is to be used, measure on the outside as well, leaving a quarter-inch of space for the brickmould to fit.
Essential Tools and Materials
Having the right tools and materials is like having a well-stocked kitchen before cooking a gourmet meal. It makes the entire process smoother, safer, and more efficient. Here’s what you’ll need for how to install window casement:
- Safety Gear: Safety glasses and gloves are non-negotiable. Protect your eyes from debris and your hands from splinters or cuts.
- Measuring Tools: A reliable tape measure for precise measurements and a level (a long one is helpful) to ensure everything is perfectly plumb and level.
- Power Tools: A high-quality power drill or impact driver with appropriate bits for driving screws.
- Hand Tools: A pry bar and a hammer for removing the old window, a utility knife for scoring and cutting, and a putty knife for smoothing caulk. Don’t forget a Caulk gun for applying sealants.
- Shims: Waterproof shims (plastic or composite are ideal) are essential for leveling and plumbing the window within the rough opening.
- Flashing Tape: Self-adhering flashing tape (butyl or asphalt-based) to create a watertight seal around the rough opening.
- Insulation: Low-expansion spray foam insulation to fill gaps between the window frame and the rough opening, ensuring an airtight seal.
- Sealant: High-quality exterior-grade sealant (silicone or polyurethane) for the perimeter of the window.
- Fasteners: Appropriate screws (often provided with the new window) for securing the window frame to the wall studs.
- Trim and Finishing Materials: Interior and exterior trim, finishing nails, wood putty, paint or stain, and painter’s tape.
The Step-by-Step Guide on How to Install Window Casement
Now for the main event! This is where we put our planning into action and learn the core steps of how to install window casement. Patience and precision are your best friends here. For a visual guide and more detailed instructions, we always recommend consulting our comprehensive Window Installation Guide.

Step 1: Remove the Old Window and Prepare the Opening
Removing the old window is often the most physically demanding part of the job. Proceed with caution and care to avoid damaging the surrounding wall structure.
- Prepare the Interior: Start by carefully prying off the interior trim (casing) around the old window. Use a utility knife to score any paint or caulk lines first to prevent tearing drywall or plaster.
- Remove the Sash: If possible, remove the old casement window sash. This might involve detaching the crank mechanism or hinges. Removing the sash makes the remaining frame lighter and easier to handle.
- Cut Out the Old Frame: Once the sash is out, you’ll need to remove the old window frame. For a full-frame replacement, this means cutting the frame loose from the rough opening. Use a reciprocating saw or a handsaw to cut through the nails or screws securing the frame to the studs. Be careful not to cut into the rough opening studs.
- Clean the Opening: With the old window completely removed, it’s time for a thorough cleaning. Remove any old caulk, insulation, debris, or loose paint. This ensures a clean surface for your new weatherproofing and sealant.
- Inspect and Repair: This is a crucial step! Inspect the rough opening for any signs of wood rot, water damage, or structural issues. If you find any, repair them before installing the new window. Replace any rotted wood with new lumber of equivalent size. Ensure the sill and jambs are solid and level.
Step 2: Weatherproof the Rough Opening
Creating a watertight and airtight rough opening is critical for preventing future water infiltration and drafts. This step ensures your new casement window performs as intended, especially against the unpredictable weather we experience in Chicago and the surrounding areas.
- Clean and Dry: Ensure the rough opening is clean, dry, and free of any dust or debris.
- Apply Sill Flashing: Start by applying self-adhering flashing tape to the sill (bottom) of the rough opening. Extend the tape up the side jambs by at least 6 inches, creating a waterproof pan. This directs any moisture outward.
- Flash the Jambs: Next, apply flashing tape up the side jambs, overlapping the sill flashing. Extend this tape past the top of the rough opening by a few inches.
- Flash the Header: Finally, apply flashing tape across the header (top) of the rough opening, overlapping the side jamb flashing. This “shingle-style” layering ensures water sheds away from the opening. This continuous air barrier is vital for the long-term performance of your window.
Step 3: The Correct Procedure for How to Install Window Casement
This is where your new window finds its home. Precision here is key for smooth operation and a long lifespan.
- Dry-Fit the New Window: Carefully lift the new casement window into the prepared opening. Check for fit and clearance. You should have that quarter-inch gap we measured for earlier on all sides.
- Apply Sealant: Remove the window. Apply a continuous, generous bead of high-quality exterior-grade sealant along the back of the nailing flange (if your window has one) or around the perimeter of the window frame where it will meet the rough opening. This acts as your primary water barrier.
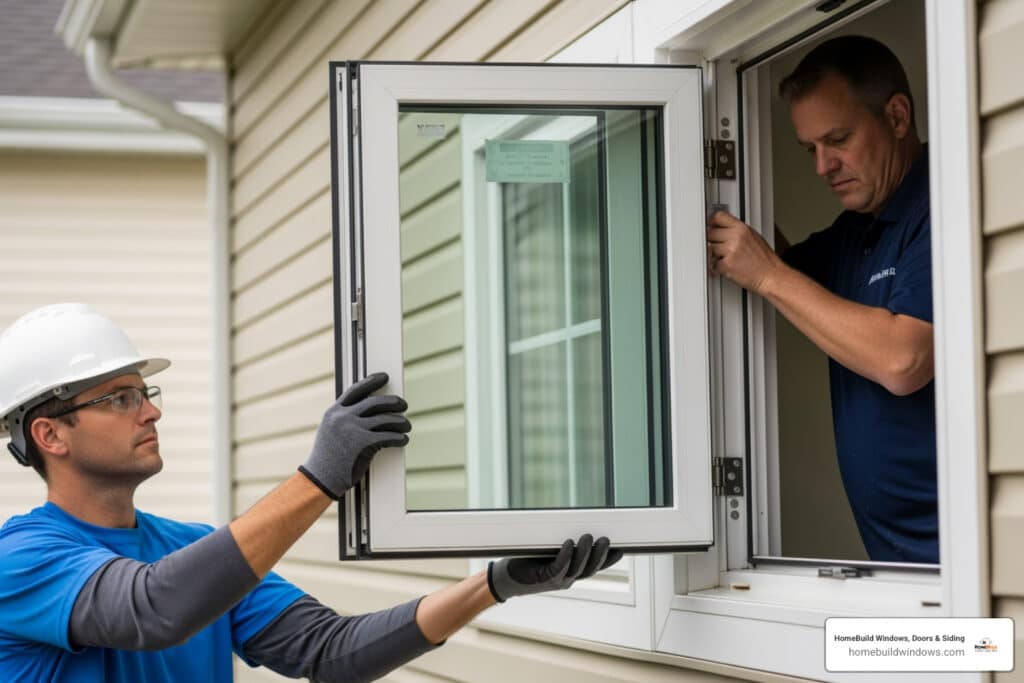
- Set the Window: With a helper, carefully set the window into the opening. Push it firmly against the exterior sheathing.
- Shim and Level: This is perhaps the most critical step. Using your waterproof shims, adjust the window until it is perfectly level, plumb (vertically straight), and square within the opening. Place shims at the bottom corners, then along the jambs where the frame meets the rough opening. Check frequently with your level and ensure the sash operates smoothly before securing. If the opening is out of square, shimming will help compensate.
- Secure the Window: Once the window is perfectly positioned and shimmed, secure it in place. If your window has a nailing flange, drive screws or nails through the pre-drilled holes in the flange and into the wall studs. If it’s a pocket replacement window without a flange, drive screws through the sides of the window frame into the rough opening studs. Follow the manufacturer’s recommendations for screw placement and type. Double-check level and plumb one last time after securing the first few fasteners.
Step 4: Insulate and Seal the Exterior
An airtight and watertight exterior is paramount for energy efficiency and protecting your home from the elements.
- Flash the Nailing Flange: If your window has a nailing flange, apply additional flashing tape over the top of the nailing flange, overlapping the previously installed flashing. This creates a secondary layer of protection against moisture. Put more gasket or aluminum tape over the top nailing flange that helps to ensure that there won’t be any leakage from the top.
- Fill Gaps with Foam: From the interior, fill the gaps between the window frame and the rough opening with low-expansion spray foam insulation. Be careful not to over-expand the foam, as this can bow the window frame and hinder operation. This step is crucial for preventing drafts and improving your home’s energy performance. HomeBuild Windows specializes in Energy Efficient Windows Chicago and knows the importance of proper insulation.
- Caulk the Exterior: Apply a continuous bead of high-quality exterior-grade sealant around the entire perimeter of the window frame where it meets the exterior siding or trim. Smooth the caulk with a wet finger or putty knife for a professional finish. This final seal is your last line of defense against water and air infiltration.
Finishing Touches and Post-Installation Care
The hard work is mostly done, but these final steps complete the aesthetic and ensure your new casement window is ready for years of reliable service.
Step 5: Install Trim and Finish the Interior
The interior trim not only covers the rough edges but also adds to the aesthetic appeal of your newly installed window.
- Replace Interior Trim: Reinstall or replace the interior trim (casing) around the window. Miter the corners for a clean, professional look.
- Nail and Fill: Secure the casing with finishing nails. Use wood putty to fill all nail holes.
- Caulk Interior Gaps: Apply a bead of paintable caulk along any gaps where the trim meets the window frame or the wall. This creates a seamless finish and further seals against drafts.
- Paint or Stain: Once the putty and caulk are dry, paint or stain the new trim to match your interior decor.
Common Challenges When Learning How to Install Window Casement
Even with the best preparation, you might encounter a few bumps in the road when learning how to install window casement. Don’t fret; many common issues have straightforward solutions.
- Window Won’t Open Smoothly: If your casement window feels stiff or doesn’t glide open easily, it’s often a sign that the frame isn’t perfectly plumb or square. Double-check your shimming and adjustments. A touch of silicone lubricant on the crank mechanism or hinges can also help.
- Uneven Gaps Around the Sash: This usually indicates improper shimming. The window frame might be slightly bowed or out of square. You may need to remove some fasteners, readjust the shims, and re-secure.
- Correcting a Non-Square Installation: If your rough opening was significantly out of square, even careful shimming might not completely compensate. This can lead to operational issues or uneven reveals. In severe cases, the rough opening might need to be reframed, or a custom-sized window ordered.
- Addressing Drafts or Water Leaks: If you feel a draft or notice water infiltration, it’s a sign that your sealing and insulation steps weren’t completely effective. Check for cracks in the exterior caulk, gaps in the foam insulation, or issues with the flashing. Reapply caulk or foam as needed.
- Troubleshooting the Crank Mechanism: Casement windows rely on their crank. If it’s stiff or broken, first try lubricating it. If the teeth on the crank handle are worn, it might need replacement. If the window still won’t open, the operator arm itself might be faulty and require professional attention.
Best Practices for Casement Window Maintenance
Once your new casement windows are installed, a little routine maintenance goes a long way in ensuring their longevity and performance, especially given Chicago’s varied climate.
- Regular Cleaning: Clean the frame monthly and glass twice a year with mild soap and water. Avoid abrasive cleaners that can cause scratches.
- Cleaning Tracks and Glass: Crank windows open to easily clean both sides of the glass. Use a small brush or vacuum for tracks and channels.
- Lubricate Moving Parts: Annually apply a silicone-based lubricant or light machine oil to the crank and hinges to ensure smooth operation.
- Annual Weatherstripping Inspection: Check seals and weatherstripping annually for damage or deterioration. Replace worn parts to prevent drafts and maintain energy efficiency.
- Check Exterior Sealant: Periodically inspect the exterior caulk for cracks or gaps. Reapply as needed to maintain a watertight seal.
DIY vs. Hiring a Professional
Deciding whether to tackle a casement window installation yourself or call in the pros is a common dilemma. While the satisfaction of a DIY project is undeniable, it’s crucial to weigh the complexities and potential risks against the benefits of professional expertise.
When to DIY
DIY installation can be a rewarding experience, especially for homeowners with some carpentry experience and a good understanding of how to install window casement.
- Simple Replacement: If you’re replacing a small, standard-sized casement window on a ground floor, and the rough opening is in good condition, a DIY approach might be feasible.
- Previous Experience: If you’ve successfully installed windows or similar home improvement projects before, you might have the confidence and skills needed.
- Proper Tools Available: If you already own or can easily rent all the essential tools and materials, the upfront cost might be lower.
- Budget Constraints: DIY can save you money on labor costs, which can be a significant portion of a window replacement project.
- Small, Ground-Floor Windows: These are generally less risky and easier to manage than larger windows or those on upper floors.
When to Hire a Professional
For many homeowners, especially in busy areas like Chicago, Arlington Heights, or Naperville, hiring a professional for Window Replacement and Installation is often the best choice.
- Full-Frame Replacement: If your project involves a full-frame replacement (removing the entire old window frame and installing a new one), it’s more complex and often best left to Certified Window Installers.
- Structural Issues: If you find wood rot, water damage, or any structural problems with your rough opening, a professional can assess and repair these issues correctly.
- Lack of Experience: If you’re new to window installation, the learning curve can be steep, and mistakes can be costly. Improper installation can lead to drafts, leaks, and operational problems.
- Ensuring Code Compliance: Local building codes (which can vary even within Chicagoland) must be met. Professionals are knowledgeable about these regulations.
- Peace of Mind: Hiring a professional provides assurance that the job will be done correctly, efficiently, and with proper sealing and insulation. This can save you money in the long run by preventing issues caused by improper installation. Professionals also often offer warranties on their work.
- Large or Difficult Windows: Large windows, those on upper floors, or those in challenging locations require specialized equipment and expertise.
- Warranty Protection: Many window manufacturers’ warranties are voided if the window is not installed by a certified professional.
At HomeBuild Windows, we pride ourselves on providing top-quality products and expert Window Installation Services throughout Chicagoland. Our team ensures that every window is installed to the highest standards, giving you peace of mind.
Cost Considerations
Understanding the financial aspect is key to any home improvement project. For casement window replacement and installation, costs can vary significantly.
- DIY Material Costs: You’ll be responsible for the cost of the new window itself, plus all the tools and materials listed earlier (sealant, flashing, shims, foam, trim, etc.). If you don’t own the necessary tools, you’ll need to factor in rental or purchase costs.
- Professional Labor Costs: When you hire a professional, you’re paying for their expertise, experience, and the efficiency of their team. Casement windows generally cost between $600 and $1,400 on average per window, with installation included. The average cost for replacement per window can range from $338 to $897.
- Long-Term Value: While DIY might seem cheaper upfront, a professionally installed window offers long-term value through superior energy efficiency, fewer maintenance issues, and the peace of mind of a warranty. Improper DIY installation can lead to costly repairs down the line due to air and water leaks. For a detailed breakdown, check out our Home Window Replacement Cost Guide.
Frequently Asked Questions about Casement Window Installation
How do you install the glass in a casement window?
Modern casement windows come as pre-glazed units, meaning the glass is already installed in the sash and frame. The installation process involves fitting this entire unit into the wall opening, not installing the glass separately. This ensures a factory-sealed unit for optimal performance and energy efficiency.
What makes casement windows so energy-efficient?
Casement windows are highly energy-efficient because the sash presses firmly against the frame when closed and locked. This compression creates an exceptionally tight, airtight seal that prevents air leakage far more effectively than sliding or double-hung windows. This tight seal minimizes drafts, helping to maintain consistent indoor temperatures and lower your energy bills year-round.
Can a casement window be installed to open from either the left or the right?
Yes, casement windows are available in left-hand and right-hand configurations. The choice depends on your preference, the room layout, and whether you want to direct airflow in a specific direction. This should be specified when ordering your New Windows Chicago. For example, you might choose a left-hinged window to open into a prevailing breeze.
Conclusion
Mastering how to install window casement is a significant undertaking, but one that can yield substantial rewards for your home. From understanding the nuances of different frame materials and energy ratings to executing precise measurements and meticulous sealing, each step contributes to the overall success of the project.
The key benefits of proper installation are clear: improved home comfort, improved energy efficiency, and increased curb appeal that boosts your home’s value. Whether you choose to start on this DIY journey yourself or opt for professional assistance, the goal remains the same: a beautifully installed, high-performing casement window.
For complex projects, or if you’re a homeowner in the Chicago area (including Arlington Heights, Crystal Lake, Glenview, Palatine, Schaumburg, and surrounding North-West Suburbs), the expert team at HomeBuild Windows is here to ensure a flawless installation. We combine top-quality products with unparalleled expertise and attention to detail. Ready to explore your options? Check out our Replacement Window Buying Guide to get started!