Why Knowing How to Replace Awning Window Sash Can Save You Hundreds
Learning how to replace awning window sash is a valuable skill that restores your window’s function without the cost of a full replacement. This DIY project takes 20-60 minutes and can save you $200-250 on professional installation.
Quick Steps to Replace an Awning Window Sash:
- Open the window and disconnect the operator arm from the sash
- Release retaining clips at the split-arm connections
- Detach hinges by prying arms loose from pivot pins
- Lift out the old sash carefully
- Position the new sash and reconnect hinges to pivot pins
- Reattach operator arm and secure all retaining clips
- Test operation by cranking the window open and closed
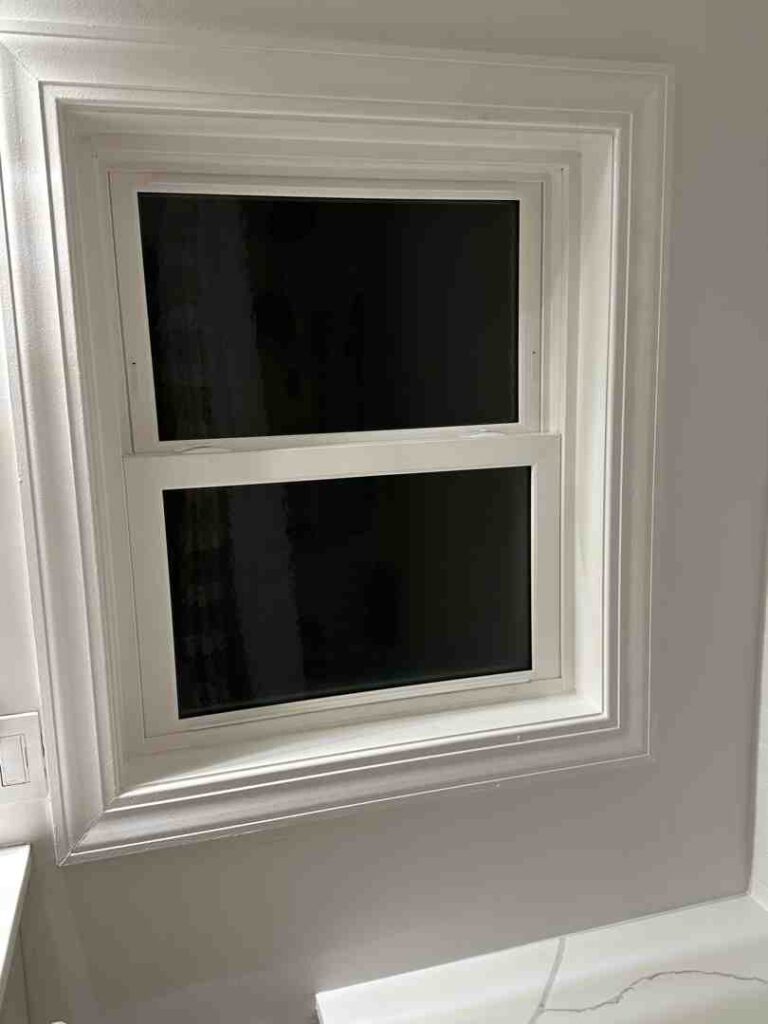
Awning windows provide ventilation even during light rain, but over time the sash (the movable part holding the glass) can develop rot, seal failure, or broken glass. Instead of replacing the entire unit, sash replacement is a cost-effective solution that maintains your home’s energy efficiency.
Common signs you need sash replacement include:
- Condensation between glass panes
- Cracked or rotten wood frames
- Difficulty opening or closing the window
- Visible damage to the glass or frame
I’m Steve Mlynek, CEO and founder of HomeBuild. With over 20 years of window installation experience in Chicago, I’ve helped countless homeowners learn this affordable alternative to full window replacement. My team has completed thousands of window projects, and I’m here to guide you through this manageable DIY task.

Before You Begin: Signs You Need a Replacement and Tools You’ll Need
Before you learn how to replace awning window sash, let’s confirm this repair is what your window needs. This pre-check will save you time and money.
Sash replacement is much more budget-friendly than replacing an entire window, potentially saving you hundreds while improving functionality and energy efficiency. Also, check your window’s warranty first; you might save an additional $200-250 if the manufacturer covers the replacement.
Signs It’s Time for a New Sash
Your awning window eventually shows its age. Here are the telltale signs that it’s time for a sash replacement:
Rotten wood: If the sash frame feels soft or crumbly, especially at the bottom corners, you have rot. This compromises your window’s insulation.
Cracked frames: Cracks from impacts, house settling, or weather let in air and water, increasing your heating and cooling bills.
Broken glass: Beyond obvious safety hazards, even small cracks can grow and compromise the window’s integrity.
Condensation between the glass panes: Fog or water droplets trapped inside a double-pane window mean the insulated glass unit’s seal has failed, costing you money in energy bills.
Seal failure: If you feel drafts around a closed and locked window, the seals have failed.
Difficult to operate: If cranking the window is difficult or it won’t stay open, the sash itself may be warped or damaged beyond simple hardware adjustments.
Tackling these issues now prevents bigger headaches later. For more insights on how replacement windows can boost your home’s performance, check out our guide on Energy Efficient Replacement Windows: Everything You Need to Know.
Tools and Materials Checklist
Getting organized before you start makes the process smoother.
Safety first – grab your safety glasses and work gloves.
You’ll need a screwdriver set (Phillips and flathead), a putty knife or 5-in-1 tool for prying clips, and a pry bar for separating parts.
A measuring tape ensures your new awning window sash fits correctly. Make sure the new sash matches your window’s brand and model.
Silicone caulk or sealant creates a weather-tight seal. Choose one designed for windows and compatible with your frame material.
Don’t forget cleaning supplies (rags, mild cleaner) and a utility knife for scraping debris. Finally, silicone-based lubricant keeps new parts moving smoothly; avoid petroleum-based products that attract dirt.
With everything gathered, this project will come together quickly.
How to Replace an Awning Window Sash: A Step-by-Step Guide
Now, let’s get to the guide on how to replace awning window sash. You’ll remove the old sash, prepare the frame, and install the new one. The process is straightforward if you work slowly and track how everything comes apart.
Step 1: Removing the Old Awning Window Sash
Remove the screen: If present, turn the small clips to release the interior screen. Pull it toward you and set it aside safely.
Open the window: Use the crank handle to open the window completely for full access to the hardware.
Disconnect the operator arm: This metal arm connects the frame to the sash. At the bottom of the sash, use a putty knife to slide back the retaining clips that hold the split arms. Some windows may have screws instead.
Release the hinges: On both sides, pry the hinge arms loose from the pivot pins, often by sliding back more retaining clips. Once these are released, the sash will be free. Be ready to support its weight.
Lift out the old sash: With all connections free, carefully lift the old sash out of the frame. Handle with extra care if the glass is broken.

For additional visual guidance on sash removal techniques, you might find this helpful resource on Window Sash Replacement useful.
Step 2: Preparing the Window Frame
With the old sash removed, prepare the frame to ensure a perfect, weather-tight fit for the new one.
Clean the frame: Use a brush or vacuum to remove dust and debris. Wipe down all surfaces with a damp cloth and mild cleaner so the new sealant will adhere properly.
Remove old caulk and weatherstripping: Use a utility knife and putty knife to scrape away any hardened caulk, old paint, or deteriorating weatherstripping for a smooth, clean surface.
Inspect for damage: Look for rot, cracks, or soft spots in the wood. Minor issues can be repaired with wood putty or epoxy. For significant damage, consider consulting a professional.
Apply new weatherstripping: If the old weatherstripping was damaged or part of the old sash, install fresh weatherstripping on the frame to prevent drafts.
Proper frame preparation is key to your new sash’s performance. For more detailed preparation tips, check out our guide on How to Prepare for a Window Installation.
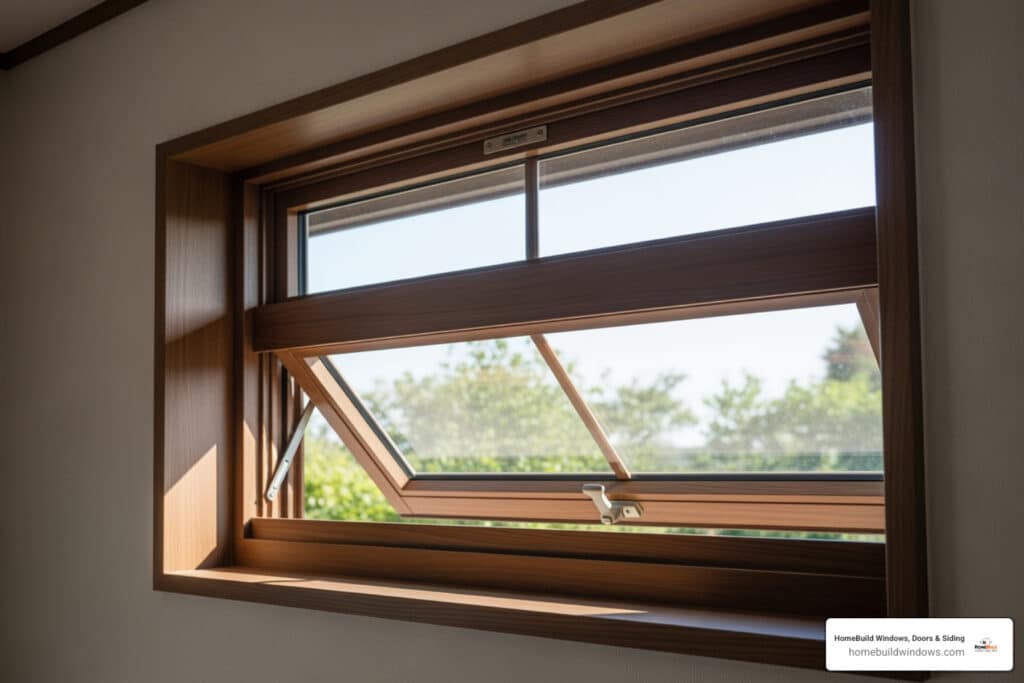
Step 3: How to install the new awning window sash
Now you’ll install the new sash by reversing the removal process.
Position your new sash: Carefully place the new sash in the window frame opening, ensuring it’s oriented correctly. Get a helper for larger sashes.
Align and secure the hinges: Reconnect the side operator arms to the pivot pins on the frame. Slide the retaining clips back into place to lock the connections. Test that the sash pivots smoothly.
Reattach the operator arm: Align the split-arm operator ends with the plastic shoes that slide into the track on the new sash’s bottom edge. Snap the shoes into place and secure the retaining clips.
Double-check all your work: Ensure every screw, clip, and connection is tight. Gently test the window’s movement before doing a full test.

Congratulations! You’ve successfully completed the main installation process. Next, we’ll test everything to make sure your new sash works perfectly.
Finalizing the Job: Testing and Finishing Touches
With the new sash in place, it’s time for testing and finishing touches to ensure it works perfectly and looks great. A proper test now can prevent headaches later.
Testing the New Sash
Start by cranking the window fully open and then fully closed several times. It should feel smooth. If you hear grinding or feel resistance, apply a small amount of silicone-based lubricant to the moving parts of the operator and hinges.
Next, check that your window locks properly. Close the window and engage the lock. It should feel secure. If it’s difficult to lock, the sash may need a slight adjustment.
Now, inspect for gaps. With the window closed and locked, look around the perimeter where the sash meets the frame. Run your hand along the edges to feel for drafts. Small gaps can be fixed with additional weatherstripping or minor sash adjustments.
Applying Finishing Touches
These final steps give your repair a professional finish.
Apply a continuous bead of high-quality, exterior-grade silicone caulk around the sash perimeter where it meets the frame, especially on the exterior. This weather-tight seal is your primary defense against water and drafts.
Give everything a good cleaning once the mechanical work is done. Use a mild glass cleaner on the new glass and wipe down the entire frame to remove fingerprints, dust, or excess caulk.
Finally, if you removed a screen at the beginning, now’s the time to put it back. Make sure it fits snugly and all the clips are secure.
With these finishing touches complete, step back and admire your handiwork. You’ve successfully learned how to replace awning window sash, saved money, and improved your home’s comfort and energy efficiency.
DIY vs. Professional Installation: Making the Right Choice
Now that you know how to replace awning window sash, you must decide: DIY or hire an expert? There’s no single right answer. At HomeBuild, we empower homeowners to handle their own repairs, but we also know that calling a professional is sometimes the smartest move.
| Feature | DIY Sash Replacement | Professional Sash Replacement |
|---|---|---|
| Cost | Lower material cost; no labor cost (save $200-$250) | Higher initial cost (materials + labor) |
| Time | 20-60 minutes (for experienced DIYer) to several hours (for novice) | Typically faster (20-60 minutes), done efficiently by experts |
| Skill Level | Requires basic carpentry/handyman skills, attention to detail | No skill required from homeowner, expertise handled by pros |
| Warranty | May void some manufacturer warranties if not done correctly | Often preserves manufacturer warranties; professional installation warranty |
| Tools | Requires purchasing or owning necessary tools | Professional brings all specialized tools |
| Risk | Higher risk of error, injury, or further damage | Lower risk of error or damage, insured work |
| Outcome | Can be successful with care; potential for minor issues | Guaranteed proper fit, optimal performance, and long-lasting results |
DIY Challenges
While replacing an awning window sash is doable, it’s not always simple.
Time: The job can take 20-60 minutes, but unexpected issues like a stuck sash or wrong parts can turn a quick project into a multi-hour task.
Risk: Working with glass and metal requires care. A slip could damage the frame, the new sash, or cause injury, especially when working on an upper floor.
Tools: Professionals often have specialized equipment that makes the job faster and more precise, ensuring a perfect seal and smooth operation.
Warranty: Some manufacturers require professional installation to keep warranties valid. Always check your warranty terms first—you might be eligible for a free replacement part, saving you hundreds.
Assistance: Larger or heavier sashes often require two people.
Professional Benefits
Here’s why calling pros like our team at HomeBuild might be your best bet, especially in the Chicago area.
Experience: Our craftsmen have seen every type of awning window across Chicago and its suburbs. We can diagnose and fix issues in minutes that might take a DIYer hours.
Guaranteed Work: We stand behind every job with a commitment to professionalism. If something isn’t right, we make it right.
Warranty Protection: Professional installation typically preserves your manufacturer’s warranty, and you get our installation warranty on top of that.
Safety: We handle all risks, use proper safety equipment, and carry insurance, so the job is done safely and correctly.
No Hassle: We bring all tools, source the right parts, and handle every detail from start to finish.
If you’re comfortable with DIY projects, go for it! But if the job feels overwhelming, don’t hesitate to call in the experts.
For more guidance on professional installation options, check out our comprehensive Window Installation Guide. Sometimes the smartest DIY decision is knowing when not to DIY!
Frequently Asked Questions about Awning Window Sash Replacement
After helping thousands of Chicago-area homeowners, I’ve noticed the same questions come up about how to replace awning window sash. Here are the answers to the most common concerns.
Is it cheaper to replace the sash or the whole window?
Sash replacement is significantly less expensive than swapping out the entire window unit, saving you hundreds of dollars if the main window frame is in good condition. If the frame, jambs, and sill are sound, replacing only the problematic sash is the most financially sensible and environmentally friendly option. It extends your window’s lifespan while keeping more money in your pocket.
How long does it take to replace an awning window sash?
For a homeowner with basic DIY experience, a sash replacement can take just 20-60 minutes once the correct part and tools are ready. The process involves disconnecting a few components, lifting out the old sash, and reversing the steps with the new one. If it’s your first time, allow extra time to ensure each step is done correctly.
Should I check my window’s warranty before buying a new sash?
Absolutely, yes! This is a critical tip that could save you money. Before buying anything, find the manufacturer’s sticker on your window frame or sash. It contains the model number and manufacturing date. A quick call to the manufacturer could reveal your sash is still under warranty. I’ve seen homeowners save $200-$250 by making this call and getting a free replacement part. Many warranties last 10-20 years or more. The worst they can say is no, but you might get your problem solved for free!
Conclusion
Congratulations! You now know how to replace awning window sash—a valuable skill that saves you money while keeping your home comfortable and energy-efficient. This project proves that with the right tools and our guide, you can tackle home repairs and gain confidence for future DIY adventures.
The benefits extend beyond savings. Your new sash improves energy efficiency, reduces drafts, and improves overall comfort. Your window is now performing exactly as it should, whether keeping out Chicago’s winter cold or letting in a spring breeze.
Of course, we know that not every homeowner is comfortable with this project. If you find unexpected damage or simply prefer an expert’s touch, that’s perfectly okay! Sometimes the smartest DIY decision is to call a professional.
If you’re in the Chicago area and want the peace of mind that comes with professional service, our team at HomeBuild is here to help. We bring quality craftsmanship to every project, from simple sash replacements to complete window upgrades.
Ready to explore more? Check out our guide to Awning Windows Replacement to see how upgrading your entire window system can transform your home.