Why How to Replace an Awning Window Operator Is a Smart DIY Project
How to replace an awning window operator is a straightforward afternoon project that can restore your window’s smooth operation without the expense of full window replacement. Here’s the quick process:
Quick Steps:
- Remove – Open window halfway, detach operator arms, unscrew old operator
- Measure – Match arm length, hand orientation, and mounting pattern
- Install – Align new operator, secure screws, reconnect arms
- Test – Lubricate moving parts, verify smooth operation
When your awning window becomes hard to crank, makes grinding noises, or won’t close securely, the operator mechanism is likely worn out. Replacing a faulty operator can often restore the awning window to working order without having to replace the entire window, saving you hundreds of dollars.
The most common signs include a handle that spins freely, stripped gears that make grinding sounds, or bent operator arms that prevent proper window closure. An awning window operator replacement is something that most homeowners can do in an afternoon with basic tools and the right replacement part.
As Steve Mlynek, CEO of HomeBuild Windows, Doors & Siding, I’ve guided Chicago homeowners through window repairs for over 20 years. How to replace an awning window operator is one of the most rewarding DIY fixes. This simple repair extends your window’s life, improves energy efficiency, and eliminates drafts.

Is It Time for a New Operator?
Is your awning window making grinding sounds when you crank it? Does the handle spin without opening the window? These aren’t minor annoyances; they’re signs your operator needs help.
The most obvious red flag is when your handle spins freely without moving the window. This usually means the gears inside the operator mechanism have stripped. You might also notice grinding noises when you turn the handle, another clear sign of worn internal gears.
Take a closer look at the operator arm. A bent or rusted arm is a dead giveaway that replacement time has arrived. Rust can freeze the moving parts, making your window impossible to operate.
Another frustration is when your window won’t close securely, leaving a gap that lets in air, rain, or pests. If you’re feeling increased drafts even when the window looks closed, your operator probably isn’t pulling the sash tight against the frame anymore.
These problems are common in homes throughout Chicago and its suburbs. A failing operator costs you money through higher energy bills and makes your home less comfortable. When you notice these warning signs, it’s time to consider how to replace an awning window operator. For more complex window issues, our team is ready to help with Window Repair in Chicago, IL by HomeBuild Windows, Doors & Siding.
Why Replace Just the Operator?
When your window acts up, you might think you need a whole new one, but replacing just the operator often makes more sense.
The biggest reason is cost-effectiveness. A new awning window can cost several hundred dollars plus installation. A replacement operator is a fraction of that cost, and the savings add up if you have multiple faulty windows.
Think of it like a car’s broken door handle; you wouldn’t replace the whole car. Extending the life of your current window makes sense when the frame, glass, and seals are in good shape. Why replace a perfectly good window for one worn mechanical part?
A properly working operator also helps with improving energy efficiency. When an operator can’t pull your window closed tightly, you’re losing money to air leaks and drafts. Chicago’s weather is unpredictable enough without your windows working against your HVAC system. Learn about Energy Efficient Window Replacement with HomeBuild if you’re interested in maximizing your home’s efficiency.
The best part? This is a manageable afternoon project for most homeowners. You don’t need to be a master carpenter or have specialized tools. With basic supplies and patience, you can tackle this repair yourself.
Gathering Your Tools and the Right Replacement Part
Before you start your how to replace an awning window operator project, take a few minutes to gather everything you need. Proper preparation saves time and frustration, ensuring the whole process flows smoothly.
Safety comes first. Always wear safety gear to protect yourself during any home improvement project.

Essential Tools and Materials
Most of these items are likely already in your toolbox. You’ll need:
- Phillips and flathead screwdrivers
- Power drill with appropriate bits
- Measuring tape (critical for getting the right part)
- Safety glasses and work gloves
- Silicone-based lubricant
- Putty knife
- New operator
- Towel or drop cloth
- Masking tape
How to Select the Right Replacement Operator
Choosing the right part can feel overwhelming, but a systematic approach makes it simple. Before removing the old operator, document the following:
- Take photos of the current operator from multiple angles. These will be invaluable when shopping for a replacement.
- Measure the arm length from the center of the operator body to the tip of the arm. An incorrect length will prevent the window from working properly.
- Determine hand orientation. Looking from inside, if the crank is on the left, you need a left-handed operator. If it’s on the right, you need a right-handed one.
- Match the mounting hole pattern. The new operator’s screw holes must align with the existing ones on the window frame to avoid drilling new holes.
- Note the arm setup. Is it a single-arm or dual-arm style? Your replacement must match.
- Identify the pivot type where the arm connects to the sash bracket. This connection point varies, and getting the wrong type means it won’t attach correctly.
When you’re ready to shop, bring your measurements, photos, and notes. Taking the time to get this step right ensures everything fits perfectly on the first try.
For a visual guide that walks you through identifying your specific operator type, check out this helpful resource: See a video on identifying your operator
How to Replace an Awning Window Operator: A Step-by-Step Guide
With your tools and new operator ready, it’s time for the main event. How to replace an awning window operator is a satisfying DIY project that restores your window’s functionality. Follow these steps for a smooth process.

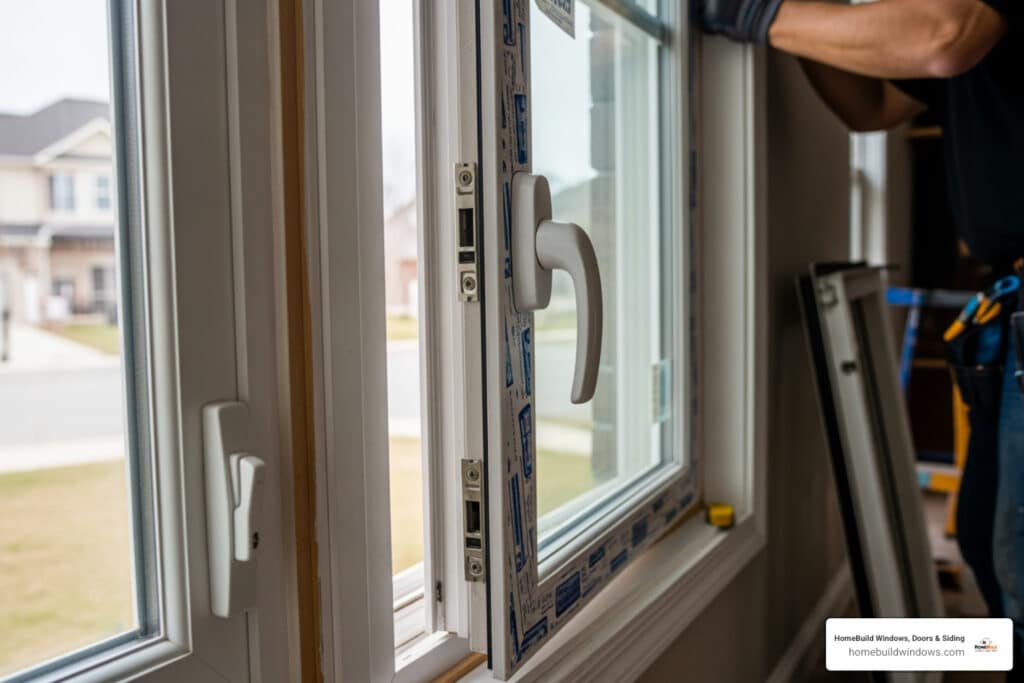
Step 1: Removing the Old Awning Window Operator
This is where the real work begins. Take your time, as patience is your best tool.
- Open the window sash partway (about three-quarters open) to access the operator components.
- Support the sash from below. Awning sashes can be heavy. Use a sturdy prop or have a helper support it to prevent it from swinging freely and stressing the hinges. A towel on the sill will protect the frame.
- Remove the window screen. Most are on the interior and can be unlatched and set aside.
- Remove the crank handle and cover. Pull the handle straight off (some have a set screw that needs loosening). Gently pry off the decorative cover plate.
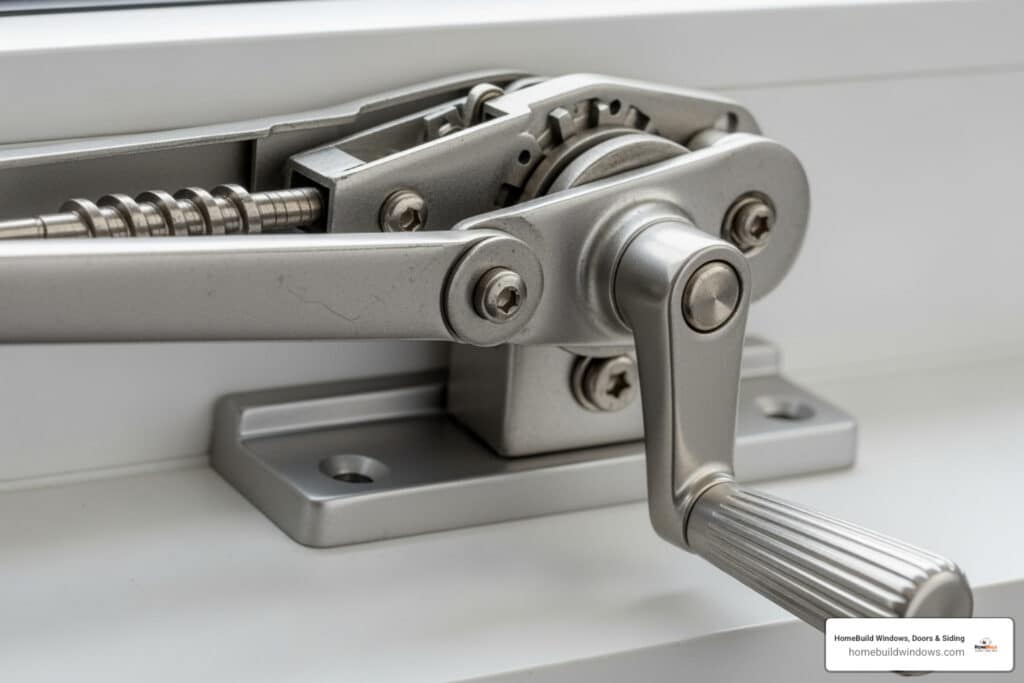
- Detach the operator arms from the sash bracket. This is the trickiest part, as connection methods vary. Many have clips to release the arm, while others require prying with a flathead screwdriver or unscrewing. Extending the arms first can make this easier.
- Unscrew the old operator from the window frame. Locate all screws securing the operator body. If they are rivets, you’ll need to drill them out carefully. Lift the old operator out and keep it for comparison.
Step 2: Installing the New Awning Window Operator
Now you’ll bring your window back to life by installing the new operator.
- Clean any debris from the sill to ensure a proper fit.
- Align the new operator with the mounting holes, positioning it exactly where the old one sat.
- Secure the new operator with screws, but don’t overtighten. Overtightening can strip vinyl or crack wood frames. Tighten until snug.
- Reconnect the operator arms to the sash bracket, reversing the removal process. Ensure the connection is solid.
- Test the mechanism’s movement with a few gentle turns of the crank to check for smooth operation.
Step 3: Final Touches and Adjustments
These final steps ensure your new operator performs flawlessly.
- Apply silicone lubricant to all moving parts: joints, pivots, tracks, and hinges. This crucial step ensures smooth, quiet operation and extends the hardware’s life.
- Reinstall the cover plate and crank handle.
- Test the window’s full range of motion. Open and close it completely several times, watching for any misalignment. It should open fully and close tightly.
- Ensure a tight seal when closed. Check for visible gaps, which hurt energy efficiency. Minor adjustments to the operator’s position can often solve this.
- Reinstall the window screen, clean up your work area, and dispose of the old operator.
Congratulations! You’ve successfully completed how to replace an awning window operator. Enjoy the smooth, quiet operation of your newly repaired window.
Troubleshooting and Pro Tips
Even a smooth how to replace an awning window operator project can have hiccups. Don’t be discouraged; most issues have simple solutions.
Solving Common Replacement Problems
- Operator arm won’t connect: This is often due to misalignment or a mismatched pivot type. Double-check compatibility and ensure the sash is positioned correctly. A slight adjustment of the sash can help.
- Stripped screw holes: For wood frames, fill the hole with wood filler or a toothpick and wood glue, then re-drill a pilot hole. For vinyl frames, try shifting the operator slightly or use a slightly larger screw, being careful not to overtighten.
- Window feels stiff or misaligned: This usually means the operator isn’t perfectly aligned or the hinges need lubrication. Ensure the operator is snug but not overtightened, which can warp the frame. Apply silicone lubricant to all moving parts.
- Sash doesn’t close tightly: Verify the operator arms are fully retracting. If they are, your weatherstripping may be worn and need replacement to create a tight seal.
- Binding or catching: This typically points to debris in the track or misalignment. Clean the track and operator area thoroughly. A warped sash may indicate a larger problem.
If you get stuck, taking photos or a short video can be helpful when seeking advice from a hardware supplier or a professional.
Tips for Different Window Frames
Knowing your window frame material is essential for a lasting repair.
- Vinyl windows: The golden rule is to avoid overtightening screws. Vinyl can strip or deform under pressure, affecting the window’s seal. Tighten screws just until they are snug. For more detailed guidance, check out our Guide for vinyl window operator replacement.
- Wood windows: Before installation, check thoroughly for rot or moisture damage around the mounting area. Repair any soft or discolored wood to provide a solid foundation for the new operator. Always drill pilot holes to prevent splitting.
- Metal frames (aluminum): These are sturdy but can corrode. Ensure no rust is impeding movement before installation. Clean any rust and consider applying a rust-inhibiting primer. Seized screws may require penetrating oil.
When to Call a Professional
While how to replace an awning window operator is a manageable DIY project, some situations require a professional. Certain jobs need expert hands.
Call for backup when you’ve hit a wall with your DIY attempt. If the window still won’t cooperate after your best efforts, a fresh set of experienced eyes can make all the difference.
Bigger problems are red flags. If you find rotted wood around the frame or notice the window sash itself is damaged (warped, cracked, or crooked), a simple operator swap won’t solve the underlying issue. These problems require professional assessment and repair.
Multiple faulty windows can signal a more systemic issue, like a house settling or all operators failing due to age. A professional can diagnose the root cause.
Safety is the top priority. If the window is on an upper story or is otherwise hard to reach safely, don’t risk injury. Professionals have the right equipment and experience for challenging locations.
Here in Chicago and surrounding areas like Naperville and Schaumburg, we often help homeowners who find their window needs more than just a new operator. Sometimes, a faulty operator is a sign that it’s time for a complete upgrade to more energy-efficient units.
At HomeBuild Windows, Doors & Siding, we provide honest assessments. We’ll tell you if a simple repair is enough or if replacement windows are a better long-term investment. When you need expert Window Installation Services from HomeBuild
Conclusion
Fixing something with your own hands is deeply satisfying. We hope this guide has shown that how to replace an awning window operator is a manageable afternoon project that can breathe new life into your windows, not an intimidating repair.
By completing this project, you’ve restored your window’s function, improved energy efficiency, and saved significant money compared to a full replacement. You’ve also gained the confidence that comes with a successful home repair.
A functional window is a simple project away! With the grinding noises and drafts gone, your window now operates smoothly. That’s the power of addressing problems at their source.
Of course, not every situation is right for a DIY approach. Sometimes issues run deeper than a worn operator, or you may simply prefer a professional to handle the work.
If the job seems too complex or you’re considering a full upgrade, the experts at HomeBuild Windows, Doors & Siding are ready to help. Serving the Chicago area for over two decades, we understand that every window situation is unique. We can guide you on a repair or help you explore complete window replacement options.
From Palatine to Naperville, we’ve helped countless homeowners make the right decisions for their needs and budgets. Sometimes a simple operator replacement is all you need; other times, a full upgrade is the smarter long-term investment.
Explore your Awning Windows Replacement options with HomeBuild