Why Awning Window Replacement Improves Your Home’s Comfort and Efficiency
Learning how to replace an awning window can transform your home’s ventilation, energy efficiency, and overall comfort. Here’s the essential process:
Key Steps to Replace an Awning Window:
- Remove the old window by detaching the crank operator and prying out the frame
- Prepare the rough opening by cleaning, inspecting for damage, and applying flashing
- Install the new window by shimming it plumb, level, and square in the opening
- Secure the unit with fasteners and low-expansion foam insulation
- Seal the exterior perimeter with weatherproof caulk and test operation
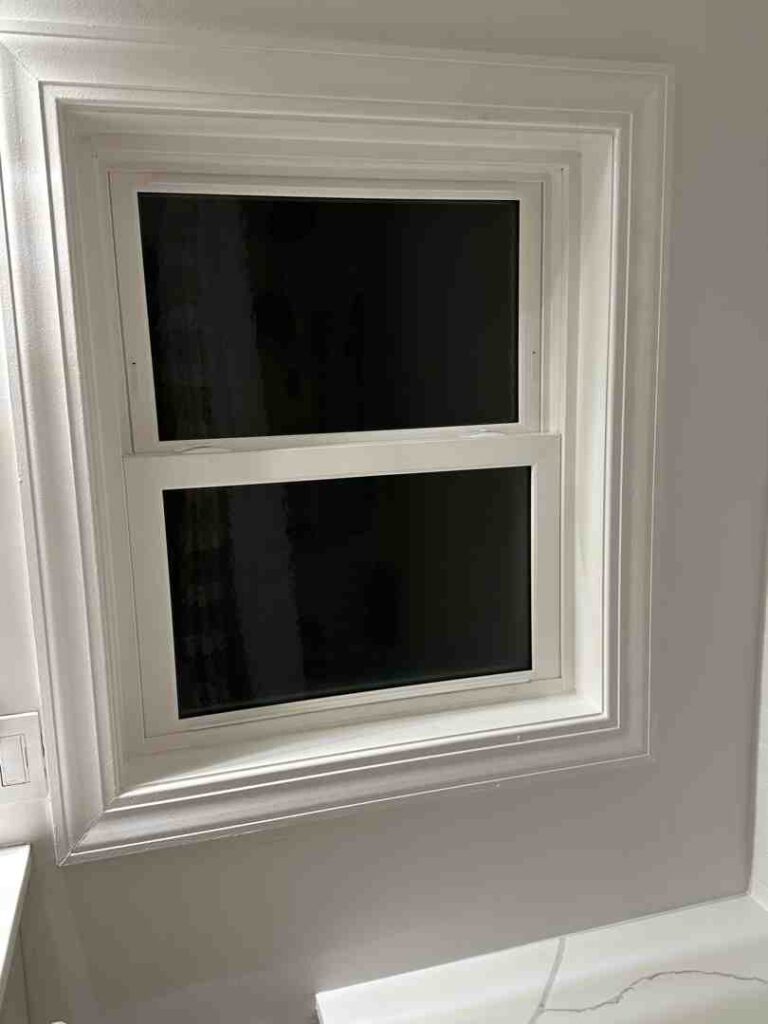
Awning windows are hinged at the top and open outward from the bottom, creating an “awning-like” cover. This unique design allows fresh air to flow even during light rain—perfect for Chicago’s unpredictable weather. They’re ideal for kitchens, bathrooms, and basements where ventilation is needed without taking up interior space.
Common problems that signal it’s time for replacement include worn weatherstripping causing drafts, broken crank mechanisms, rotted frames, and poor energy efficiency from single-pane glass. These issues lead to higher energy bills and reduced comfort.
I’m Steve Mlynek. With over 20 years in the window industry and nearly 15,000 installations with my team at HomeBuild, I’ve guided countless Chicago-area homeowners through this process. I’ll walk you through everything you need for a successful replacement.

Preparation: Before You Begin Your Window Replacement
Taking on how to replace an awning window requires careful preparation to avoid common pitfalls. Rushing into the project without the right tools or accurate measurements can lead to a messy and expensive outcome.

Project planning is the foundation for success. Before you begin, ensure you have all necessary tools and the correctly sized window. Safety comes first, so always use safety glasses and sturdy work gloves. A drop cloth is also essential to protect your floors and keep tools organized.
Measurement accuracy is non-negotiable. A window that’s too large or small for the opening can derail your entire project. Remember the carpenter’s rule: measure twice, order once.
While you’re planning, consider upgrading your home’s energy efficiency. Our Window Replacement Guide: Double Pane vs. Triple Pane Windows can help you choose glass options that will lower your energy bills for years.
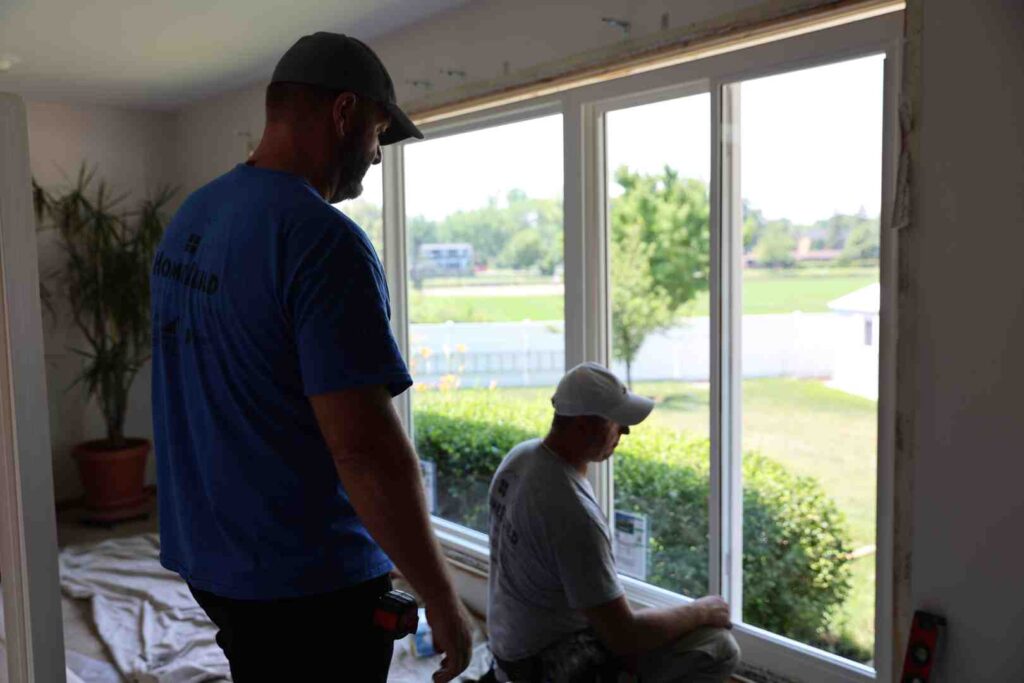
DIY vs. Professional Installation
Should you tackle this yourself or call in the pros? After 20 years in this business, here’s my take.
Project complexity varies. A simple retrofit installation may be manageable for a skilled DIYer. However, a full-frame replacement, especially one that reveals rotted sills or structural issues, gets complicated quickly.
The required tools can be a significant investment, including power drills, pry bars, levels, shims, and caulking guns. For many, the cost of tools can exceed the cost of professional installation.
Structural integrity checks are where experience is vital. A professional installer inspects for water damage, assesses load-bearing elements, and determines if the rough opening needs repairs—details that, if missed, can lead to costly problems.
Finally, consider the time commitment. A task that takes our certified team 1-2 hours can easily become a weekend-long project for a DIYer, especially if unexpected issues arise.
| Aspect | DIY Installation | Professional Installation |
|---|---|---|
| Cost | Lower upfront, higher risk of costly mistakes | Higher upfront, long-term value from proper installation |
| Time | Days to weeks, depending on experience | 1-2 hours per window typically |
| Skill Level | Advanced carpentry and sealing skills required | Expert installers with specialized training |
If you’re leaning toward professional installation, our Certified Window Installers have the experience and tools to handle any project surprises.
Essential Tools and Materials
Whether you’re going DIY or are just curious, here’s what you’ll need.
Your tool arsenal should include safety glasses and work gloves, a tape measure, a 4-foot level, a power drill with various bits, a pry bar, a putty knife, and a good caulking gun. You’ll also need plenty of wood shims.
For materials, you’ll need your pre-ordered awning window (sized about 1/4″ smaller than the rough opening), self-adhering flashing tape, low-expansion spray foam insulation (high-expansion foam can bow the frame), and exterior-grade sealant. Use backer rod to fill gaps wider than 1/4″ before applying sealant for a clean, professional finish.
Measuring for Your Replacement Awning Window
Getting your measurements right is critical when learning how to replace an awning window.
To measure the rough opening, measure the width from jamb to jamb at the top, middle, and bottom. Use the smallest measurement. Do the same for the height, measuring from head to sill at the left, center, and right, again using the smallest number.
Check for square by measuring diagonally from corner to corner in both directions. If the measurements are within 1/8″ of each other, the opening is square. If not, you’ll need to adjust the rough opening.
The 1/4″ gap around the perimeter is essential for shimming and insulation, allowing you to adjust for a perfectly plumb, level, and square installation.
For more guidance, check out our Replacement Window Buying Guide.
A Step-by-Step Guide on How to Replace an Awning Window
This guide details a full-frame replacement, where the old window and frame are removed down to the rough opening. This comprehensive method provides the best long-term results. A simpler alternative is a retrofit installation, which fits a new window into the existing frame.

Before starting, review our tips on How to Prepare for a Window Installation to save time and prevent headaches.
Step 1: Removing the Old Window
Work carefully and methodically during removal.
Start by removing the interior trim. Score the paint line with a putty knife, then gently use a pry bar to remove the trim pieces. Work slowly if you plan to reuse them.
Next, remove the operator handle and disconnect the sash. After removing the screen, open the window and locate the link arm connecting the operator to the sash. Remove the clip or screws holding it, then unscrew the entire crank operator mechanism from the frame.
Detaching the sash from the frame requires a helper. Unscrew the top hinges from both the sash and the frame, then carefully lift the sash out. The glass unit can be heavy.
For the old window frame removal, use a reciprocating saw to cut through old nails and screws. Work around the frame, being careful not to damage the surrounding wall. Some older windows may have exterior stops that need to be removed first.
Finally, clean the opening thoroughly. Remove all debris, old caulk, and loose paint to ensure a clean surface for the new window.
Step 2: Preparing the Rough Opening
Proper preparation of the rough opening is critical for a watertight, energy-efficient installation.
Inspect everything for rot or damage, paying close attention to the wood framing and bottom sill. If you find soft or discolored wood, you must replace those sections before proceeding. Installing a new window over damaged framing will lead to failure.
Repair the sill if needed to ensure it is level and structurally sound. You may need to install a new sill or add a sill angle to create the proper slope for water drainage.
Next is the flashing tape application. Start with the bottom sill, extending the tape up the side jambs about 6 inches. Then, apply flashing to the side jambs, overlapping the bottom piece. Finally, apply the top piece, overlapping the sides. This shingle-style application directs water away from the opening.
To create a weatherproof barrier, apply a continuous bead of sealant along the inside edge of the opening where the new window will sit. This creates a crucial seal against air and moisture.
For more details, see our Window Installation Guide.
Step 3: Setting and Shimming the New Window
Precision is key for a window that operates smoothly for decades.
Apply a bead of sealant on the sill before setting the window. Use a continuous 3/8-inch bead of exterior-grade sealant on top of the flashing tape to create a final water barrier.
With a helper, place the new window into the opening. Tilt it in from the bottom and guide it into place. If it doesn’t slide in easily, check for obstructions.
Shimming the window properly is critical. Start by shimming the bottom until the window is perfectly level, using a 4-foot level to check. Then, use shims on the sides and top to make the frame plumb and square. Place shims directly behind fastener locations for solid backing.
Check for even gaps around the entire perimeter. The space between the window frame and the rough opening should be consistent. Adjust shims as needed to correct any large variations.
Step 4: Securing and Insulating the Unit
With the window positioned, it’s time to secure it and seal it for maximum energy efficiency.
Fasten the window according to the manufacturer’s instructions. For windows with a nailing fin, secure it to the exterior sheathing. For retrofit styles, drive screws through pre-drilled holes in the jambs into the rough opening framing, ensuring shims are behind each screw. We typically use #8 x 3-inch pan head screws.
Use low-expansion spray foam to fill the gaps between the window frame and the rough opening. This is crucial, as high-expansion foam can put pressure on the jambs and bow the frame. Apply it in small beads.
Avoid overfilling the gaps. Too much foam can bow the jambs inward, causing the window to bind. It’s better to under-fill and add more if needed.
Proper hardware selection and installation plays a huge role in your window’s long-term performance. For additional insights on this topic, you can find helpful information on window hardware.
Finishing Touches and Final Checks
These final steps are what separate a good installation from a professional one. The details in these finishing touches will ensure your new awning window not only looks fantastic but performs flawlessly for years to come.

The difference between a window that lasts 10 years versus 30 often comes down to these final weatherproofing and testing steps.
Sealing the Exterior and Replacing Trim
Exterior sealing is your window’s essential defense against Chicago’s weather.
Applying exterior-grade caulk around the perimeter where the window frame meets your home’s siding or exterior trim. Use a high-quality, paintable caulk to create a continuous bead, as even tiny gaps can let in moisture.
Tooling the caulk properly makes a significant difference. After applying the caulk, use a smoothing tool or a gloved finger to create a clean, concave bead. This ensures better adhesion and a truly watertight seal, in addition to providing a more professional look.
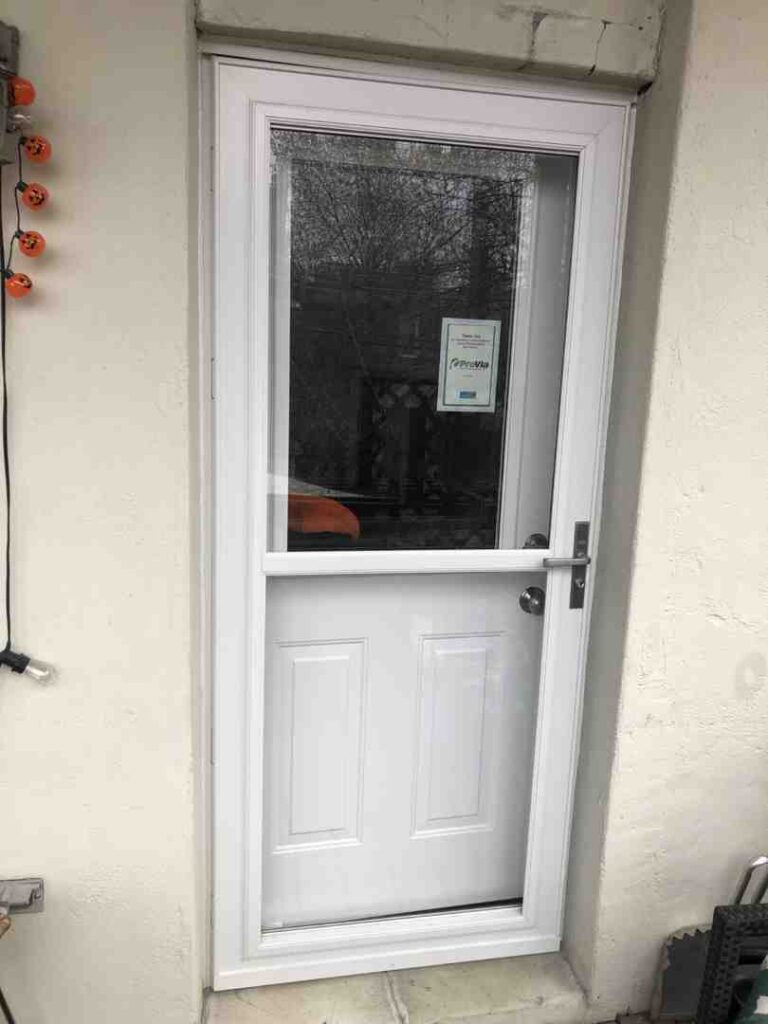
Re-installing trim brings the project together visually. You can often reuse the original interior and exterior trim if it was removed carefully. Alternatively, new trim can give your awning window replacement a fresh, updated look and improve your home’s curb appeal. Take your time with trim work to ensure a clean, professional fit.
Testing Your New Awning Window
Proper testing ensures you’ve completed the job correctly.
Start by operating the crank handle through its full range of motion. It should turn smoothly without grinding or sticking. If you feel any binding, stop and correct the shimming before proceeding.
Opening and closing the sash should be effortless. The window should open fully without the sash hitting the frame. When closing, the sash must seat properly against the weatherstripping on all sides.
Test the multi-point locks, which provide security and energy efficiency. Each lock should engage smoothly and pull the sash tightly against the frame. Adjust the strike plates if any lock feels loose.
Finally, check for drafts by running your hand around the perimeter of the closed window. You should feel no air movement. This confirms your weatherstripping is sealing correctly and your window is delivering the expected energy efficiency. Address any issues found during testing immediately to ensure decades of trouble-free operation.
Frequently Asked Questions about Awning Window Replacement
Here are answers to the most common questions we hear from homeowners considering how to replace an awning window.
What are the different installation methods for awning windows?
The best method depends on your home’s condition and your goals.
- Retrofit Installation: The new window unit is installed inside the existing window frame. This method is faster, less disruptive, and more affordable, but it results in a slightly smaller glass area.
- Full-Frame Replacement: The old window and the entire frame are removed down to the rough opening. This is recommended when the existing frame is rotted or damaged, or if you want to maximize your glass area. It allows us to inspect the structure and address hidden issues. We offer two full-frame approaches:
- Brick-to-brick installation for masonry homes, where we seal the new frame directly to the brick opening.
- Stud-to-stud installation, which takes us to the wall studs for the best possible fit and maximum insulation, especially in older homes.
How do you ensure the new window is energy efficient?
Energy efficiency is key to comfort and lower heating bills in Chicago.
- Choosing the Right Glass: We offer glass with Low-E coatings (like LoE-180, LoE-272, LoE-366, and LoE-i89), which are thin metallic layers that reflect heat, keeping it out in summer and in during winter.
- Double or Triple-Pane Glass: These units create an insulating barrier. Double-pane windows have two panes of glass with Argon gas sealed between them. Triple-pane windows add a third layer for maximum thermal performance and noise reduction.
- Proper Insulation and Sealing: This is critical. We use high-quality flashing tape, exterior-grade caulk, and low-expansion spray foam to eliminate air leaks. Our windows often feature triple seals with compression weatherstripping for a tight barrier when locked. Many of our products meet ENERGY STAR® qualifications for proven performance.
For a deeper dive, see our guide on Energy Efficient Replacement Windows: Everything You Need to Know.
What are common mistakes to avoid when you replace an awning window?
Avoiding these common mistakes is key to a successful project.
- Incorrect Measurements: This can stop a project in its tracks. Order your window about 1/4″ smaller in both width and height than the rough opening to allow room for shimming and sealing.
- Not Leveling the Window: An unlevel window will bind, its locks won’t engage properly, and uneven gaps will compromise the seal. Take your time when shimming.
- Inadequate Sealing and Flashing: Skipping flashing tape or using cheap caulk invites water leaks and costly damage. Every joint must be properly sealed.
- Over-tightening Fasteners: This can warp or even crack the window frame, leading to operational problems. Fasteners should be snug, not overly tight.
- Using High-Expansion Foam: Standard spray foam expands aggressively and can bow the window jambs, making it inoperable. Always use low-expansion foam designed for windows and doors.
Conclusion
Learning how to replace an awning window is an investment in your home’s comfort, efficiency, and curb appeal. A new, properly installed window eliminates drafts, lowers utility bills, and adds a touch of modern sophistication. The unique design of awning windows also allows for ventilation even during light rain—a valuable feature for Chicago’s unpredictable weather.
While this guide provides a comprehensive overview, a successful installation requires precision in measuring, flashing, and fitting. There are many opportunities for costly mistakes.
For homeowners in the Chicago area who want flawless results without the stress, HomeBuild Windows brings over 20 years of expertise right to your door. Our certified installers have completed nearly 15,000 window replacements across Chicago, Chicagoland, and the North-West Suburbs, including Arlington Heights, Barrington, Crystal Lake, Des Plaines, and Schaumburg.
We’ve built our reputation on delivering top-quality products, expert installation, competitive pricing, and exceptional customer service. When you choose our team, you’re choosing peace of mind and guaranteed results.
Ready to enjoy all the benefits of new awning windows without lifting a finger? Get a quote for your Awning Windows Replacement today and let our experienced professionals handle every detail with the precision and care your home deserves.