Why Professional Patio Door Installation Matters for Chicago Homeowners
Patio door installation is one of the most impactful upgrades you can make to your Chicago-area home — improving energy efficiency, curb appeal, and everyday comfort all at once.
Quick answer: What does patio door installation involve?
- Choose your door style — sliding, French, bifold, or telescoping
- Measure the rough opening — width, height, and diagonal squareness
- Prepare the opening — sill pan, flashing, and sealant
- Set and secure the door — plumb, level, and shimmed correctly
- Seal and insulate — low-expansion foam and weatherproofing
- Adjust hardware — rollers, locks, and keepers for smooth operation
A properly installed patio door can last 20 to 30 years. A poorly installed one can cause drafts, water damage, and rising energy bills — problems Chicago homeowners know all too well given the region’s harsh winters and seasonal weather swings.
This guide walks you through everything: door styles, measurements, step-by-step installation, and when to call a pro.
I’m Steve Mlynek, CEO and founder of HomeBuild Windows, Doors & Siding, with over 20 years of experience overseeing patio door installation projects across Chicago and the northwest suburbs. As an Elite Platinum Pella® Certified Contractor and Andersen Certified Contractor, I’ve seen what separates a long-lasting installation from one that fails prematurely — and I’ll share those insights throughout this guide.

Selecting the Right Style for Your Patio Door Installation
Choosing the right patio door style depends on your home’s layout, your aesthetic goals, and how you plan to use your outdoor space. In Chicago and the surrounding suburbs, our homes range from classic brick bungalows to modern builds, meaning there is no one-size-fits-all solution.

Let’s break down the four primary options we install:
- Sliding Patio Doors: These are the classic space-savers. Because the panels slide horizontally along a track, they don’t require any swing space. This makes them perfect for smaller rooms, tight patios, or layouts where furniture sits close to the glass. Modern sliding doors feature large glass panes that maximize natural light and offer a seamless transition between your indoor and outdoor living areas. If you are leaning toward this style, check out our guide on sliding patio door installation to see how we handle these sleek systems.
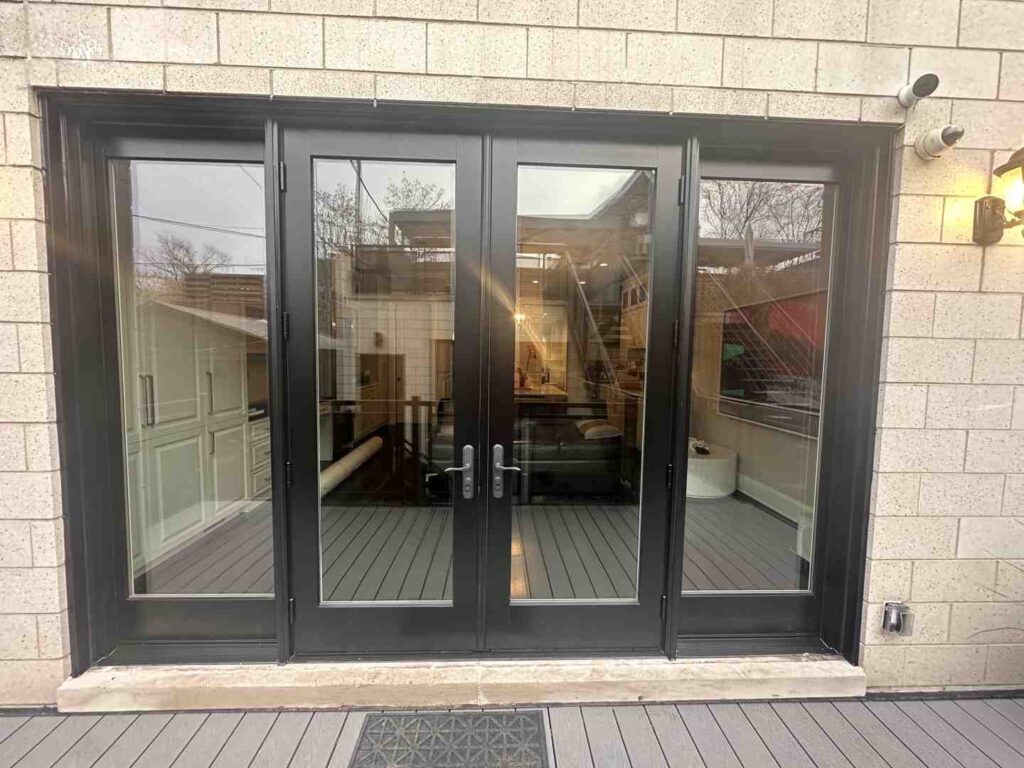
- Hinged French Patio Doors: If you want to make a classic architectural statement, French doors are unmatched. They typically swing open from the center, creating a wide, dramatic opening. You can choose whether they swing inward (inswing) or outward (outswing) depending on your interior floor space. They add exceptional elegance and a sense of luxury to dining rooms and master bedrooms. Learn more about this timeless choice in our deep-dive on patio French door installation.
- Bifold Patio Doors: Bifold systems consist of multiple panels that fold up accordion-style against one another. This style offers the ultimate way to eliminate the boundary between your home and your patio, providing the maximum amount of natural light and an incredibly wide opening for hosting summer gatherings.
- Telescoping (Multi-Slide) Patio Doors: Unlike standard sliding doors where one panel remains stationary, telescoping doors feature multiple interlocking panels that slide and stack neatly on top of one another or tuck away into a wall pocket. They are ideal for wide openings where you want expansive, unobstructed views of your backyard.
We work with industry-leading brands like Pella, Marvin, Therma-Tru, and Simpson to ensure your new door stands up to the extreme Midwest weather. Whether you are seeking inspiration for quality exterior door solutions in Barrington, IL or looking into general window & door installation in Chicago, selecting high-performance materials like fiberglass, vinyl, or clad-wood is essential.
Homeowners searching for Crystal Lake replacement doors and windows or exploring Des Plaines door replacement & installation services will find that modern doors engineered with multi-pane glass and argon gas fills keep the freezing winter winds out and the summer heat at bay.
Preparing, Measuring, and Installing Your Patio Door
A successful patio door installation begins long before the new door arrives at your home. It starts with precision measurements. If the rough opening is measured incorrectly, your new door simply won’t fit, or worse, it will sit unevenly and fail to lock or seal properly.

To get an accurate measurement of your rough opening, you must first remove the interior casing to access the structural studs.
- Measure the Width: Measure the distance between the studs at the top, middle, and bottom of the opening. Record the smallest of these three measurements.
- Measure the Height: Measure from the subfloor (not the finished flooring) to the header at the left, center, and right sides. Record the smallest measurement.
- Check for Squareness: Measure diagonally from the top-left corner to the bottom-right corner, and then from the top-right to the bottom-left. If these two diagonal measurements are within 1/8 inch of each other, your opening is square. If they differ by more, the opening is out of square, and you will need to use shims carefully to compensate.
- Verify the Sill: Use a long level to check if the subfloor sill is perfectly flat and level. Any sag or slope must be corrected before setting the new frame.
For a detailed look at manufacturer-specific guidelines regarding tolerances, you can refer to the JELD-WEN Vinyl Patio Door Installation Instructions, which highlight the importance of keeping your opening square within tight margins to preserve structural integrity.
Step-by-Step Guide to Prehung Patio Door Installation
Prehung patio doors are highly recommended for replacement projects because they come pre-assembled with the door slab, hinges, and frame integrated into a single, weathertight unit. This simplifies the process and ensures a tighter seal against the elements.
Here is our step-by-step method for installing a prehung patio door:
Step 1: Prepare the Rough Opening
Clean the subfloor sill of all dust, old adhesive, and debris. Inspect the wood for any signs of rot or water damage and replace structural framing if necessary.
Step 2: Install a Sloped Sill Pan
Never install a patio door without a sill pan. A sill pan is a rigid or flexible flashing system with an interior dam and an exterior sloped leg. It acts as a safety net, collecting any water that bypasses the exterior seals and draining it harmlessly to the outside. Apply three continuous 3/8-inch beads of high-quality silicone sealant to the subfloor before setting the sill pan in place.
Step 3: Apply Flashing Tape and Sealant
Apply self-adhering flashing tape to the sides (jambs) and top (header) of the rough opening, overlapping them properly to shed water. Run a continuous, generous bead of exterior-grade silicone sealant around the interior side of the door’s nailing fin (or around the brickmould if your door uses a wood trim frame). For detailed diagrams on flashing integration, see the Ply Gem 70 Series Patio Door Installation Guide.
Step 4: Tilt the Door into the Opening
With the help of a partner, lift the door frame from the exterior and tilt the bottom into the sill pan first, then swing the top into place. Press the nailing fin firmly against the exterior sheathing to create a seal with the caulk.
Step 5: Shim, Level, and Plumb the Frame
Insert high-impact composite shims between the door frame and the wall studs. Place shims approximately every 12 inches along the side jambs, ensuring there is a shim at every hinge and lock-strike location. Use your level to ensure the side jambs are perfectly plumb (vertical) and the header and sill are perfectly level.
Pro Tip: Do not over-tighten your installation screws. This can bow the vinyl or wood frame, throwing the door out of alignment.
Step 6: Secure the Frame
Drive heavy-duty installation screws through the pre-punched holes in the nailing fin or directly through the side jambs (at the shim locations) into the structural studs. Ensure the screws penetrate at least 1-1/4 inches into the solid wood framing.
Step 7: Insulate the Gaps
Fill the small gap between the door frame and the rough opening studs with a low-expansion polyurethane foam sealant designed specifically for windows and doors. Avoid standard high-expansion foam, as it can exert enough pressure to bow the frame, preventing your door from sliding or latching.
Post-Installation Adjustments and Long-Term Maintenance
Once the frame is secure and insulated, it’s time to fine-tune the door’s moving parts for effortless operation.
- Adjusting the Rollers: If you installed a sliding door, locate the small adjustment screws at the bottom corners of the sliding panel. Turning these screws clockwise raises the panel; turning them counterclockwise lowers it. Adjust them until the door slides smoothly along the track and sits perfectly parallel to the side jamb when nearly closed.
- Aligning the Lock and Keeper: If the door doesn’t latch securely, loosen the screws on the metal keeper (the plate on the side jamb where the lock latch lands). Slide the keeper up or down slightly until the latch engages cleanly, then tighten the screws back down.
- Maintaining the Tracks: Over time, dirt, pet hair, and outdoor debris will accumulate in the bottom track of a sliding door. Vacuum the tracks regularly and wipe them down with a damp cloth. Avoid using heavy grease or oil lubricants, which attract dirt and cause rollers to fail prematurely; instead, use a dry silicone spray.
- Inspecting Weatherstripping: Check the rubber seals and brush weatherstripping once a year. If you notice any drafts or visible wear, replace the weatherstripping to maintain your home’s energy efficiency.
With proper care, high-quality doors from brands like Pella and Marvin can easily last 20 to 30 years, keeping your home comfortable through hot, humid summers and freezing winter blizzards.
Choosing Between DIY and Professional Services
While a highly skilled DIY enthusiast with the right tools and a helper can successfully tackle a basic patio door replacement, it is a project with a very high margin for error.
Why You Should Hire Professional Patio Door Installers
There are several critical reasons why working with experienced door installation professionals is the smartest choice for your home:
- Heavy Lifting and Safety: Patio doors are incredibly heavy. Double-pane and triple-pane glass units often weigh several hundred pounds. Safely maneuverability requires specialized suction cups, carrying straps, and a team of experienced installers to prevent injury or glass breakage.
- Structural Modifications: If you are expanding an opening to fit a larger door, or if you discover structural rot in your wall framing, you are no longer dealing with a simple swap. Modifying load-bearing headers requires professional carpentry skills to keep your roof from sagging.
- Perfect Air and Water Sealing: The biggest risk of DIY installation is water infiltration. If flashing tape is applied in the wrong order, or if the sill pan is improperly sealed, water will slowly leak into your subfloor. By the time you notice the damage inside, you could be facing extensive structural rot.
- Warranty Protection: Most premium door manufacturers require professional installation to keep their warranties fully intact. If a DIYer bows a frame or cracks a weld during installation, the manufacturer’s warranty will not cover the replacement parts.
- Time and Convenience: A professional crew can typically complete a full removal and installation in 3 to 6 hours, including clean-up. A DIY attempt can easily stretch over an entire weekend, leaving your home exposed to the elements and security risks overnight.
If you want the peace of mind that comes with flawless execution, look for reputable door contractors near me who are fully licensed, insured, and certified by the manufacturers they install.
For information regarding project scope and structural considerations, you can explore our insights on The Best Patio Door Replacement Northwest Suburbs Has to Offer.
Frequently Asked Questions About Patio Door Installation
What are the standard sizes for patio doors?
Standard patio door heights are typically 80 inches (6 feet, 8 inches) or 96 inches (8 feet).
For two-panel sliding or French doors, standard widths range from 60 inches (5 feet) to 72 inches (6 feet) and 96 inches (8 feet). Three-panel configurations usually come in widths of 108 inches (9 feet) and 144 inches (12 feet). Custom sizes can also be ordered to fit unique architectural openings.
How long does a typical patio door installation take?
On average, a professional patio door installation takes between 3 and 6 hours. This timeline includes carefully removing your old door, preparing and leveling the rough opening, installing the new prehung unit, sealing and insulating the frame, reinstalling the interior and exterior trim, and performing final hardware adjustments.
What are the signs that my patio door needs to be replaced?
You should consider replacing your patio door if you notice any of the following warning signs:
- Drafts: Feeling cold air blowing in around the edges of the door during the winter.
- Condensation: Fog or moisture trapped between the double panes of glass, which indicates that the insulated glass seal has failed.
- Sticking or Binding: Difficulties opening, sliding, or locking the door, often caused by a warped frame or worn-out rollers.
- Visible Damage: Rotting wood, cracked vinyl, or rusted metal along the frame or sill.
Conclusion
Upgrading your home with a new patio door is an investment that pays dividends in beauty, security, and lower utility bills. However, the performance of even the highest-quality door relies entirely on the precision of its installation.
At HomeBuild Windows, Doors & Siding, we bring over 20 years of exterior remodeling expertise to homeowners in Chicago and the surrounding northwest suburbs. Every single project we take on is owner-supervised, ensuring our high standards of craftsmanship and attention to detail are met on every job site.
As an Elite Platinum Pella® Certified Contractor and an Andersen Certified Contractor, our team has the specialized training to install your doors flawlessly. Our commitment to outstanding service has earned us the Angi Super Service Award, a spot as a Nextdoor Neighborhood Fave, and more than 200 positive Google reviews from your neighbors. We are fully licensed, insured, and ready to help you transform your home.
Ready to take the next step toward a warmer, more beautiful home? Contact us today for a free consultation on professional window and door replacement in Chicago.