Skip to content
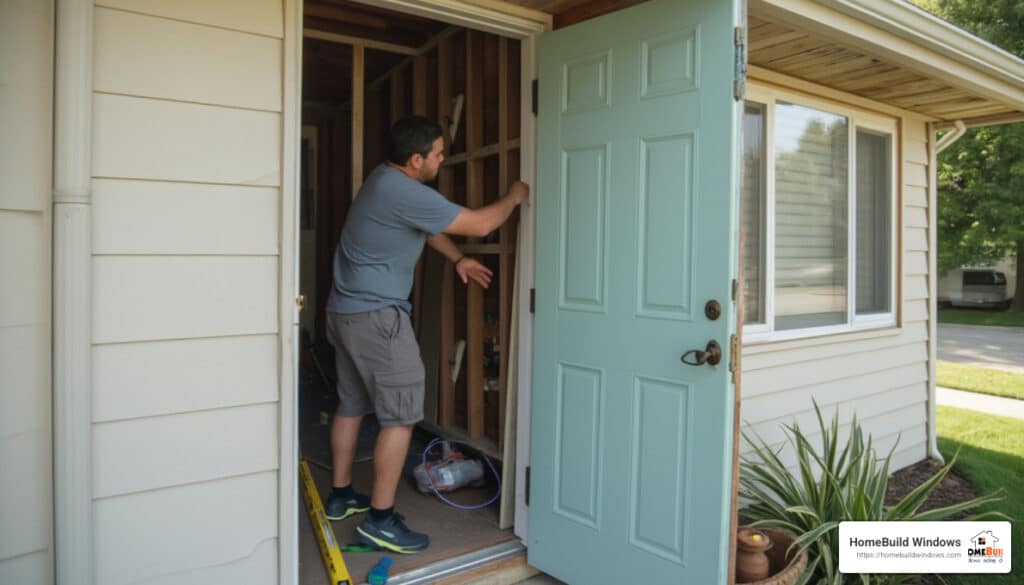
Installing a prehung exterior door is a task that can transform the entryway of your home, improving both its security and aesthetic appeal. For those eager to make an impression with minimal investment, opting for a prehung door setup simplifies the process, as these doors come ready-fitted with all necessary components, including the frame and hinges.
Key Steps for Installing a Prehung Exterior Door:
- Choose the right door: Confirm the options for swing direction and handedness.
- Gather tools: You’ll need items like a hammer, drill, and level.
- Prepare the opening: Measure accurately and ensure the space is ready.
- Fit and secure the door: Ensure it is plumb and affix shims for stability.
- Seal appropriately: Use caulking and flashing for weatherproofing.
Prehung doors are a popular choice because they can make a significant improvement without requiring extensive carpentry skills. Not only do they provide an easy yet sophisticated upgrade, but they also foster energy efficiency and improve your home’s curb appeal.
As the owner and president of HomeBuild Window, Siding & Door Replacement Company, I, Steve Mlynek, have overseen countless installing a prehung exterior door projects since 2005. My expertise in this field ensures a seamless process and top-notch results.

Preparing for Installation
Before diving into the installation process, it’s crucial to prepare thoroughly. A successful installation of a prehung exterior door starts with the right measurements, tools, and materials, along with a strong focus on safety.
Accurate Measurements
-
Height: Measure from the floor to the top of the door jamb.
-
Width: Take three measurements: top, middle, and bottom of the doorway. Use the smallest width for accuracy.
-
Door Jamb Width: Measure from the front to the back edge of the door frame.
Accurate measurements ensure that the new door fits perfectly, reducing the risk of drafts and enhancing energy efficiency.
Essential Tools & Materials
Having the right tools and materials at hand is key to a smooth installation. Here’s a checklist:
- Tools:
- Hammer
- Drill/Driver & Bits
- Level
- Screwdriver
- Circular Saw
- Chisel
-
Pliers
-
Materials:
- Prehung Door
- Door Hinges
- Locks
- Door Knob
- Wood Screws
- Spackle
- Putty Knife
- Paint or Stain
- Caulk and Sealant
These tools and materials will help you tackle each step of the installation process effectively.
Safety First
Installing a prehung exterior door can be physically demanding. Here are some safety tips to keep in mind:
-
Use Protective Gear: Wear gloves and eye protection to prevent injuries.
-
Ask for Help: Doors can be heavy. Having an extra set of hands can make the job safer and easier.
-
Protect Your Floors: Use a drop cloth or cardboard to avoid scratches and damage.
-
Careful with Tools: Ensure all power tools are in good working condition and used correctly.
By taking these precautions, you’ll ensure a safer and more efficient installation process.
With the preparations complete, you’re ready to move on to the next stage: installing the door itself. This involves preparing the rough opening, installing the sill pan and flashing, and finally securing the door in place.
Installing a Prehung Exterior Door
Preparing the Rough Opening
The first step in installing a prehung exterior door is to ensure that the rough opening is ready. This means it must be level, plumb, and square. If the opening is off, the door won’t fit properly and could lead to issues like drafts or water leaks.
- Check for Level, Plumb, and Square:
- Use a level to ensure the subfloor is flat. A level surface is crucial for the door to operate smoothly.
- Ensure the sides of the opening are plumb (vertically straight) using a plumb bob or a level.
-
Measure diagonally from corner to corner to check for squareness. The measurements should match.
-
Water-Resistive Barrier (WRB):
- Cut the WRB flush at the bottom and leave an inch exposed at the sides and top.
- Tape any cuts to prevent water intrusion.
By preparing the rough opening correctly, you set the stage for a successful installation.
Installing the Sill Pan and Flashing
A sill pan is essential for protecting your door from water damage. It acts as a barrier, directing water away from the door.
- Install the Sill Pan:
- Begin by placing the sill pan tight against the subfloor and wall sheathing.
-
Use flashing tape and a roller to adhere it to the WRB. This seals out moisture effectively.
-
Apply Sealant:
- Use a high-quality sealant to create three continuous beads on the subfloor, bottom plates, and face of the sheathing.
-
This ensures that the sill pan is watertight.
-
Finish with Flashing Tape:
- Seal the pan flashing with flashing tape, ensuring it extends just past the sill flashing.
- Install head flashing that overlaps the side-jamb flashing for added protection.
A well-installed sill pan and flashing system will help prevent water from compromising your door’s integrity.
Securing the Door in Place
With the rough opening prepared and the sill pan in place, it’s time to secure the door.
- Set the Door:
-
Carefully place the prehung door into the opening. Center it and check that the side jambs are plumb in both directions.
-
Use Shims:
- Insert shims at the hinge locations to keep the door frame from twisting. This helps maintain plumb alignment.
-
Ensure the door is level and not tilting in any direction.
-
Fasten with Screws:
- Predrill holes for jamb screws and drive them into the framing. Use #8 2-1/2-in. screws for a secure fit.
-
Reinforce the hinges with longer screws to ensure stability.
-
Weatherstripping:
- Check the compression of the weatherstripping along the door. It should be even to prevent drafts.
Securing the door correctly ensures it operates smoothly and maintains a tight seal against the elements.

With the door securely in place, you’re ready to fine-tune its functionality and ensure it meets all your needs.
Ensuring Proper Functionality
Once your prehung exterior door is in place, it’s crucial to ensure it functions perfectly. This involves adjusting the sill and weatherstripping, and insulating and sealing the door properly.
Adjusting the Sill and Weatherstripping
1. Sill Adjustment:
An adjustable sill can make a big difference in your door’s performance. Adjust the sill so that the door-sweep gasket presses down firmly on a dollar bill. You should feel some resistance when you pull the bill out, but not so much that it tears. This ensures a good seal to keep air and water out.
2. Weatherstripping:
After adjusting the sill, check the weatherstripping. Ensure it fits snugly at the top and bottom of the door. If it’s too long, trim it to fit flush with the sill. Properly installed weatherstripping prevents drafts and water intrusion, making your home more energy-efficient.
3. Corner Pads:
Don’t forget the corner pads. These small additions help prevent water from being drawn up into the house during storms. They work best when installed according to the manufacturer’s instructions.
Insulating and Sealing
1. Insulation:
Use low-expanding spray foam to fill the gap between the door jambs and the framing. This not only seals out drafts but also adds an extra layer of insulation to keep your home comfortable.
2. Caulking:
Caulking is essential for sealing gaps where air and water could sneak in. Apply caulk around the door frame, focusing on the joints between the door jamb and the wall. Make sure to tool the caulk into the edge of the brick molding for a clean finish.
3. Head Flashing:
Install rigid head flashing above the door. This directs water away from the door and prevents leaks. Seal the flashing to the sheathing with flashing tape. This step is especially important for doors located under large, unsheltered walls, where water exposure is high.
By carefully adjusting, insulating, and sealing your prehung exterior door, you ensure it functions flawlessly. This attention to detail not only improves performance but also prolongs the life of your door.
Frequently Asked Questions about Installing a Prehung Exterior Door
How to install an exterior door step by step?
Installing a prehung exterior door might seem daunting at first, but with the right steps, it can be a manageable DIY project.
-
Prepare the Rough Opening: Ensure the opening is level, plumb, and square. If needed, make adjustments using a reciprocating saw.
-
Install the Sill Pan and Flashing: Use a sill pan to protect against moisture. Apply flashing tape to secure the sill pan and prevent water intrusion.
-
Position the Door: Center the prehung door in the opening. Check for level and plumb, making adjustments with shims as necessary.
-
Secure the Door: Use screws for better control and strength. Drive screws through the jamb into the framing, starting at the top and working your way down.
-
Check Operation: Open and close the door to ensure smooth operation. Adjust the hinges if necessary.
-
Seal and Insulate: Apply low-expanding spray foam between the jamb and framing. Caulk around the outside for a weather-tight seal.
Can I install a prehung door myself?
Yes, you can install a prehung door yourself, especially if you’re an experienced DIYer. However, it’s important to have the right tools and guidance.
Tools Needed:
- Drill/Driver & Bits
- Hammer
- Level
- Screwdriver
- Shims
- Caulk Gun
Having a helper can make the process easier, especially when lifting and positioning the door.
Should I screw or nail a prehung door?
When installing a prehung door, using screws is preferable over nails. Screws offer better control and are easier to adjust if needed. They also provide a stronger hold, ensuring the door stays secure and level over time.
-
Control: Screws allow for precise adjustments, which is crucial for maintaining a level door.
-
Strength: Screws are less likely to loosen over time compared to nails, reducing the risk of the door shifting.
By following these steps and using the right tools, installing a prehung exterior door can be a rewarding DIY project. Whether you’re tackling it yourself or calling in a professional, understanding the process will help ensure a successful installation.
Conclusion
HomeBuild Windows is your trusted partner for all your exterior door installation needs. As an Elite Platinum Pella Certified Contractor, we pride ourselves on delivering top-notch service and products that stand the test of time.
Our doors are not just about aesthetics; they are designed with energy efficiency in mind. This means lower energy bills and a more comfortable home environment. We use only high-quality materials that ensure durability, so your door withstands the elements and daily use without losing its charm or functionality.
When you choose us, you also benefit from the Pella Limited Lifetime Warranty, providing you peace of mind knowing that your investment is protected. Our team of experts ensures that every installation is perfect, enhancing your home’s curb appeal and security.
Ready to transform your home’s entryway? Contact HomeBuild Windows today for expert advice and installation services. Let us help you open up to new possibilities with a prehung exterior door that meets your needs and style.